Monday, October 28, 2013

Homemade Tikka Paste and Chicken Tika recipe


I am very fond of curry.  Though, I must admit, not too spicy.  But that's the great thing about homemade curry, you can make it as are-you-certain-this-is-curry-mild or as call-the-fire-department-hot as you like.  If you don't like chicken in your tika, try lamb, or shrimp.  If you don't like coconut then omit, or try a Tablespoon of Kechk powder instead.  There are so many choices, and it's hard to do wrong when it comes to curry.

Increasingly these days, there is a problems with curry.  A Lot of curry pastes sold in stores, contain soy, or nuts, or other potential allergens.  Vegans have a similar problem, as often these jar pastes will contain animal products like butter.  Thank goodness it's easy to make your own curry paste, especially if you have a food processor at home, but you can also do it by hand, just give yourself more time.

When I'm making my own curry paste, I like to put it together the day before I cook a curry, that way, the flavours blend together better and, in my opinion, make a nicer curry.  But other people like to make it up fresh each time, so it's really a matter of personal taste.  


Tikka Paste

1 super hot chile
4 cloves of garlic
half an inch of fresh ginger
1 tsp cayenne pepper
1 Tbs smoked paprika
2 tsp garam masala
1/2 tsp salt
2 Tbs oil
one small tin tomato paste
1 tsp ajwain (whole)
1 tsp fennel (whole)


  • In a dry fry pan, toast the ajwain and fennel on medium high until they start to change colour and smell fantastic.  Remove from heat, allow to cool a bit then grind to a fine powder.
  • Combine all the ingredients in a food processor or blender and blitz until well blended.  Add more oil if needed.  
  • Keep in an sealed container in the fridge for a couple of weeks.


Chicken Tikka

2 to 4 skinless, boneless chicken breasts
1 large sweet onion
1 chile fresh or dry (optional)
1/2 inch fresh ginger
olive oil
1/2 cup tikka paste
1 can diced tomatoes
water


  • Slice the chicken into 3/4 inch strips (or cubes if you like), put to one side
  • Finely slice the onion, chili (optional) and ginger.  In a heavy bottom pot (my favourite is the cast iron, stove friendly dutch oven) heat a few glugs of oil and fry on medium heat, the onions, chili and ginger until onions start to turn golden.  
  • Add the curry paste, give it a stir, then add the chicken.  Cook, stirring frequently, until the chicken is seared on the outside.
  • Add the tomatoes and then fill the tin about 3/4 full with water, and add that.  mix well and bring to a boil.
Two choices here
  1. simmer on the stove with the lid on, for about 20 minutes, string often to make certain nothing burns on the bottom.  OR...
  2. Put the lid on the pot and put it in the oven, at 325 F for at least half an hour, and up to 2 hours.
  • Serve with rice and optional a dab of yogurt on top.


This recipe is (heavily) modified from Jamie Oliver's book Food Revolution.  He has a nice selection of easy to make curry pastes, from super-spicy Vindaloo, to a nice everyday Korma paste.  Each of these pastes lasts one to two weeks in the fridge, and in my mind are just as good as any commercial curry paste. If you end up getting that book, I highly recommend the Vegetable Bhajis as a side dish to the chicken tikka, served with a simple salad and a bed of rice.  His Aloo Gobhi recipe is a fantastic vegetarian (omit the butter for a vegan friendly) curry.

Another source of curry recipes is 1000 Indian Recipes by Batra.  There are some fantastic recipes in this book, but I find it a bit difficult to use.  Most recipes include well over a dozen, in some cases up to 3 dozen, ingredients, and often refer you back to other recipes, that require yet other recipes... and so forth.  But for someone truly enamoured with Indian cooking, it's a fantastic reference.  The flat breads are especially yummy and even nicer when adapted to use sourdough yeast.

Affordable?  Yep.  If you have the tikka as a main, then you only need about 1 chicken breast per person, however, if you keep it as a side dish with rice and a vegi dish, then you can feed 2 or 3 people per chicken breast.

This is exceptionally yummy in bento.  Reheat leftover Tikka and pack with fresh rice.  Allow everything to cool before closing the lid.  The spices in the tikka help keep the meat fresh longer at room temp, but of course, always use your common sense if keeping meat at room temp for more than a few hours.


Saturday, October 19, 2013

Wild Cranberry Mead Recipe

This blood red mead is perfect for the holidays... be it a spooky Halloween trick or treat, or a festive December red, this is by far one of my most favourite wild brews.  


I used wild yeast already in the honey and fresh fruit to get the fermentation going.  Unpasteurized (aka, the stuff the bees make before commercially processed) honey is just teaming with wild yeast, but it doesn't ferment because the moisture content in honey is too low, but once you add water... things get a little more lively.  There is also wild yeast living on the skins of the cranberries, that way if the honey yeast doesn't get going for some reason, the cranberry yeast can take over.  

Wild yeast is unpredictable compared to laboratory prepared strains that you can buy at your local brew shop.  But that's one of the things I like about it.  I celebrate the fact that every batch is different.  So long as the cranberry juice only contains cranberry juice and the honey isn't pasteurized, it's almost impossible to avoid fermentation.  Just be certain to stir it often otherwise it might get mouldy, especially at the start.


Wild Cranberry Mead


2 cups raw honey
1 cup pure cranberry juice (pasteurized is fine, but additives may inhibit fermentation.)
1/2 lb fresh or 1/4 lb dry cranberries
8 cups water (boiled and cooled to room temp)

  • Get a wide mouth bucket or crock (that will hold liquid), at least 2 gallons volume.  Clean it well.  Also get a large wooden (or plastic) spoon and clean that too.  Wash your measuring containers.  And...wash your hands, and... anything else you can think of.
  • Combine the honey with 2 cups lukewarm water, mix until honey is dissolved.  Add the honey water with all the other ingredients into the bucket, stir vigorously.
  • Cover the crock or bucket with a cotton or linen towel to keep the bugs away, but let the air in.
  • Stir vigorously at least twice a day.  More often is fine.  
  • It should start to change after about 4 days.  The smell will be a bit yeasty or tangy, it might start getting a slight fizzing sound when you stir it.  Eventually, there should be some froth on the top, a little or a lot depending on the kind of yeast you captured.  In about a week to 10 days, the fermentation will start to slow down.  
  • Strain out the berries (save the berries to eat on yoghurt later) and give the mead a taste. 
  • Now it's time to choose
    • You can bottle it now if you have some high pressure bottles (like beer bottles, or beer bottles with the flip top) for a less alcoholic, sweeter and fizzy drink.  It's a cross between a mead and a homemade alcoholic soda.  Very nice, but the alcohol does sneak up on you so make certain you have a designated driver appointed before you start on the mead.
      • Pour the liquid into the bottles.  Make certain they are bottles that can handle the pressure otherwise...a big boom and a bigger mess.
      • Place the cap on the bottles and leave in a room temperature (or slightly cooler) place for a few days.  Check after day 2 to see if they are getting fizzy yet.  It may take as long as a week, or you may get a huge soda fountain by day three.  When they are fizzy enough, move the bottles to the fridge until you are ready to drink.  Personally I like them best at room temp, but putting them in the fridge slows the fermentation.
    • If you would like a dry mead then rack the mead.  Pour the liquid into a half gallon jug with a small opening and an air lock.  Leave it for a few weeks or a few months before bottling.  The longer you leave it the (in my opinion) better it will taste.  Once it's finished fermenting (no more gas is escaping) then you can rack it again into a different jug to restart the fermentation, or bottle it.  If you feel the need to taste some at any step, just replace the same volume with honey water of a ratio of 1 part honey to 4 parts water.
If I remember right, this made a bit more than half a gallon, but some of it evaporated during the first stage of fermentation and the rest got drunk at some point.

In time, I hope to scale up the recipe for a 5 gallon batch, but since there is so little time left 'till the end of October, I thought I would share the smaller recipe now.  Brew it this week, and it will be ready for drinking by Halloween (or Guy Fawkes) night.  Or better yet, brew it now and rack it for bottling in late december just in time for Holiday giving.

Affordable cooking: $2 for the cranberry juice, another $1 for the cranberries, and about $2 for the honey. That's $5 for the equivalent of 3+ wine bottles worth of mead.  If I were to buy that much mead here (when I can find it) it would cost at least $75 plus tax... so yes, I think it's affordable.

Vegan Friendly?  No way!  Honey is from bees, bees have faces...Get a good old fashioned glass of wine for your vegan friend and save the mead for another time.

Possible allergies: Some people have sensitivity to yeast and honey. But not many other allergies here, non of the regular chemicals used in commercial alcohol.  

Friday, October 18, 2013

Pasta Day - raman miso soup with squash and stuff


I'm in the mood for something light and colourful in the way of pasta today.  So I raided the fridge and garden to see what I could find.


I cooked the ramen noodles in some dashi, put them at the bottom of the bowl, and piled up some toppings.

Here we have left over smoked salmon, umeboshi, green onions,  fancy flower shaped cake things that look nice in soup but really have no flavour, and some wakame seaweed.

While the ramon was cooking, I simmered some squash in dashi in a separate pot, took it off the heat when the squash was done and added some chickpea miso paste.  I poured the soup on top of the noodles and...


mmmm... yummy!

Happy Pasta Day everyone.

Friday, October 11, 2013

Troubleshooting Kombucha brewing and some unusual ideas for all those extra SCOBYs about to enter my life

I am completely in love with Kombucha, possibly to the point of mild obsession.  It's just so darn tasty!


I've made a few batches from the Kombucha mother I got from Wells of Health (who have been totally awesome about replacing the viili culture.  I'll definitely be buying more from them in the future), and the first thing I learned is that it doesn't always go right.  But that's okay, because every time you finish brewing one batch of Kombucha, you have what you need to make two more.  I can most definitely see the advantage of having more than one batch on the go at any time, even if it's just a small back up tucked away in some obscure spot of the house, that you change up every couple of months.

Here's an example of why a back up tea is a good idea:

These two 6 cup kombucha brews were started at the same time.


This first one used the original SCOBY, which is a bit over a quarter inch thick.  Only 11 days old, and it is growing a nice layer on top of the tea.  It smells great, but a bit sweet still, so I'll wait a while before harvesting it.


Started the same day, but using a smaller kombucha mother (another term for kombucha SCOBY), it doesn't seem to be doing anything.  The smell is still like sweet tea.  About three days ago, I added a tiny bit of SCOBY (that spontaneously formed in a bottle of Kombucha I was drinking at the time) and some more starter tea... only now it seems to be growing something, but what it is growing...I'm not too sure.

I declare this second batch a kitchen failure, thank goodness the first batch is so healthy.

Both of these made a total of 6 cups, I used 3 tsp of loose black tea, brewed till cold, just under 1/2 cup sugar, and 3/4 cup of starter.

Both made the same, yet they are so different!  So I did some reading.  This is my favourite site for troubleshooting kombucha, I suspect what happened is that I didn't let the second batch cool enough before adding the kombucha mother and starter tea.  Or maybe, the mother I used wasn't thick enough, or maybe, the brew I added as a starter wasn't acidic enough.  Could have been any number of things, but thankfully I have a back up on the go.


I'm having a great time brewing (and drinking) Kombucha, and it won't be long before I have more SCOBY than I know what to do with.  That's why I wanted to share with you this video:


It's about using kombucha mothers to create clothing and sculpture and other exciting possibilities.  When dried, it has a texture a bit like leather.  Only problem is, it's not rain proof...in fact it starts to decompose with body moisture.  But I like the idea of using this, and I have an idea brewing in the back of my mind that I want to try.


Like I said before, brewing your own kombucha is an affordable way to get some probiotics and other healthy things in your gut.  It's also vegan friendly.  Clothing made from it would also be vegan friendly, but I wonder if you would start smelling like tea or vinegar if you wore it too long... or if instead, kombucha clothing has beneficial side effects for your skin.

Thursday, October 10, 2013

Review: Organic Lives Chickpea Miso paste (soy free)

Organic Lives, a company out of Vancouver (although the miso is a product of the USA) makes a rather yummy sweet miso paste from chickpeas.  I'm always thrilled to find a soy-free alternative to my favourite Japanese foods, so I picked up a bottle from my local health food shop.


Although I am a die hard fan of South River Miso chickpea miso, it's not always easy to get here.  The shipping direct from the company is prohibitive, and I only know of one health food shop that gets it in (twice a year), so I have to be quick to snatch up my bottles.  The great thing about South River, is that the miso paste seems to last forever in the fridge and only tastes better the longer I leave it.  I found a jar of chickpea miso while cleaning the fridge the other day, it had been in there at least a year and tasted fantastic.

But like I said, the supply is inconsistent.  Organic Lives is filling a well needed gap in the market.

What I like best about the Organic Lives chickpea miso (aside from it being soy free) is the flavour.  It's a nice balance of sweet and salty.  It is a smooth paste and easy to blend into your broth (much easier to work with than the South River chickpea miso which is quite chunky).

You can see the texture difference between the two

I also really like that they used sprouted chickpeas.  As far as I can tell, this is unique to this company.  This is fascinating and I would love to learn more about this process and what effects it has on the nutritional value of the finished paste.   I understood that the fermentation process makes more nutrients available from the  beans, but if sprouting adds another degree of nutrition... well, it's very interesting to me.

Because this is a sweet miso, in other words it's aged in weeks instead of years, the rice in it is still a bit crunchy.

Which brings me to my next point... The bottle brags about being aged for 60 days!  Whereas South River chickpea miso is a 1 year miso.  Most customers are use to labels bragging about how many years old the miso paste is, not days.   What they do not realize is that there are different - yet traditional - methods for making miso.  Some miso methods are ready in as little as two weeks, others need at least four years.  They each have different flavours and unique benefits. Without educating the customers about this, bragging about only ageing the paste for 60 days is not necessary the best idea.


The one thing I really do not like about the Organic Lives chickpea miso paste is the way it's been put in the jar.  For starters, I think the jar is too large for the volume of paste, leaving lots of airspace at the top and a feeling when you open it that you are being short changed on your dollar.

Second, it isn't packed down firmly into the jar, leaving air pockets where mould can grow - sure it's not bad mould, miso after all is made from carefully cultured mouldy grain and beans.  Although it is safe to eat, the mould growing in air pocked can cause a musty flavour to the paste around the offending air bubble.

Can you see the white tinge of mould starting to develop
near the bottom of the jar?
This is probably Koji mould, and harmless, but preventable.

To me, this displays a level of amateur behaviour that I do not like to see in a company that prepares my food.  If I didn't already know about the mechanics of making miso paste, I would be freaked out to find mould in a jar fresh from the store.  And yes, being alive, miso will continue to ferment and produce gas after it is bottled, but there are steps to make to prevent these air pockets from forming and make it more customer friendly They have either skipped them or not bothered to do their research.

This makes me nervous.


However, I do like the flavour of Organic Lives miso paste, and there is nothing harmful to my health in their packaging mistake. It's not necessarily my first choice, but it makes a fair enough substitute for when I cannot find any better soy-free miso.


Cuppa miso soup, green onions, miso to taste,
 and water that boiled about five minutes ago.


Sunday, October 6, 2013

What is Whole Wheat FSM?

Is it a food? hmmm.... yes and no.

It's a reference to the Flying Spaghetti Monster. The idea is that if there is a deity based on food, or a food based on a deity, then eating becomes an act of devotion that nourishes both the body and soul.


Whole Wheat Pastafarianism (word for people who follow the teachings of the FSM) pokes fun at the (supposed) atheist origins of the religion by taking Pastafarianism to it's natural conclusion. Since the divine is food then it becomes a duty to eat the best quality (and tasting) and most nourishing food possible (given the individuals' budget and other social-economic constraints). Extend this further and cooking healthy food using methods that extract maximum taste and nourishment becomes an act of devotion. For example if one wanted mac and cheese for dinner, one could choose box-pasta, or one could buy some really nice cheese and toss together a casserole in the slow cooker (healthier yummier, and takes roughly the same time and expense per serving). Likewise, if one wanted sauerkraut, flowing the FSM way would lead one to choose home made live 'kraut over the more expensive, pasteurized tin cabbage mush.


Then, well, once you start thinking about it, food is only as good as it is grown. The egg is only as good as the chicken is fed, the wheat only as nutritious as the soil where it's roots rest. Taking the effort to choose food that has been grown in nourishing ways, becomes even more important.


On top of that, agricultural practices that deplete the land and reduce fertility for future generations is avoided where possible.  This is really important and close to my heart.  This is where eating becomes a political act as well as a spiritual one.  This tenant could be (and should be) expanded to include modifying our consumerist activities to helping those who do not have enough to eat in the world.  Diet for a Small Planet, 'though dated, is a book that addresses this issue and has some good ideas how we can vote with our fork - That the individual can improve the world through his or her choices isn't a new idea.


In it's most basic form, Whole Wheat Pastafarianism is supporting sustainable, holistic agricultural practices, and taking time each day to participate in food preparation - be it growing a garden, fermenting your own sauerkraut, cooking pasta... Taking a few moments to transform the daily act of food into mindful meditation.

How much of it is a religion, how much a philosophy, how much an excuse for common sense eating? I'm not sure... but it's fun, and I do like growing, fermenting and cooking healthy food. 


Many people who embrace the Whole Wheat path, find that food becomes more affordable, more meaningful and more nourishing to both body and spirit.  The chore of preparing meals becomes an opportunity for time alone with your thoughts... like a zen meditation.  For some, preparing meals becomes family time, parent and child cooking together, learning together, trying new things that either alone wouldn't venture to attempt.  

The Whole Wheat path isn't just for Pastafarians.  It's for people of all walks of life, of all backgrounds.  It's an opportunity to expand one's way of thinking about the most central part of existence - food.


One more thing.  In the book The Revolution will not be Microwaved, Katz says,


...my passion for food is not at all abstract.  Food is the stuff of our most basic material reality.  Food nurtures us, comforts us, and structures our lives.  Our daily habits and routines revolve around it.  It is fully sensual, composed of smells, flavours, textures, and aftertastes.  Eating is a full-body experience, involving the nose, the mouth, the hands, the teeth, the tongue, the throat, the vast array of internal sensations relating to digestion, and the renewing pleasure of defecation.
If the food we consume is all of this, how can eating not be an act of devotion?  No matter which deity or divine influence permeates your life, what you eat honours, or dishonours that divinity.  


Then there is the whole eating pasta on Fridays and brewing aspects...but that's a whole different conversation. 

I did put my pirate hat on for that, but I admit, I couldn't find my eye patch - for those of you who know the Pastafarian dogma.


Saturday, October 5, 2013

Radish Leaf Rice Spice (Furikake) Recipe (no soy)

In Japan, they have this amazing thing.  It's a mixture of random things, dried and put in packets or jars, that you sprinkle on top of rice.  It's called Furikake and it is exceptionally delicious.  It transforms a regular bowl of rice into something extra-ordinary.


You will find these highly addictive rice spices in just about every grocery and convenience store in Japan, and it comes in a huge assortment of flavours from seaweed, to shrimp, to desiccated egg, to my personal favourite, salted salmon.

I don't know how old the idea of Furikake is, but in the book Black Rain, a book describing the events of a family surviving Hiroshima at the end of the Second World War, the woman cooked up something very like this using an assortment of ingredients.  If I remember correctly, radish leaves were one of them.

Most people in the West don't consider radish leaves a food, many go so far as to say they are toxic, which I suspect they may be if you eat too much of it - but that's true of just about anything, including water.  In small quantities these greens are delicious and nutritious.  But using otherwise discarded veggies like radish and carrot tops as a garnish is an affordable way to add flavour to a dish.

The problem is that most commercial made Furikake is full of ingredients like soy and MSG, and other things that aren't necessary good for a person.  Thankfully it's quite easy to make at home, and by doing so you can change the ingredients to accommodate different allergies or other dietary needs (like low salt or veganism).

My recipe changes each time I make it, depending on what is in the cupboard and how I'm feeling.  I seldom make a vegan version, but if you like, there is a great vegan radish leaf rice spice recipe here.  It comes from my favourite blog, Just Bento, and my rice spice is heavily inspired by her Furikake no. 1 recipe.

Radish Leaf Rice Spice (Furikake) Recipe

A large bunch of radish leaves (about 2 cups after blanching)
1/2 cup sesame seeds
1/2 cup bonito flakes
1/4 cup dried mini sardines or shrimp
1 super-hot chili (fresh or dry) or 1/2 tsp of dry chili flakes
2 Tbs Fish sauce (or to taste)


  • Chop the chili as fine as possible and put to one side.  If you like, you can finely chop the sardines/shrimp at this time. If you cannot get very-tiny sardines, you can get the dried larger version, and chop them fine.
  • Wash the radish leaves really well.  Bring a large pot of water to the boil and blanch the leaves for about 3 minutes.  Strain leaves, rinse under cold water, and squeeze the leaves to remove as much moisture as possible.  Chop leaves fine.
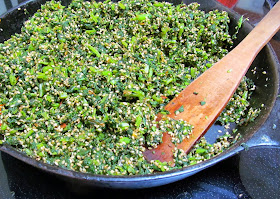
  • In a large skillet or wok, dry fry the leaves on medium heat until most of the moisture is removed.  Stirring almost constantly.
  • Add the sesame seeds, bonito flakes, dry sardines/shrimp, and chili, mix well.
  • Mix in the fish sauce and continue to fry and stir until things start to dry out.  
  • At this stage you can cool completely and wrap into individual size bundles to freeze... or you can do what I did and dry them in the dehydrator or oven. 


Just added the fish sauce
I'm making a lot more than two cups worth today

to dry on a dehydrator, I covered half of each try with tinfoil
Each try was 1/3 turn from the last,  to encourage airflow
If you are going to dry them and keep them at room temp, then make certain they are completely dry, cool completely and add one of those 'do not eat' packets you sometimes get in food - silicon or some such in them, that absorbs moisture - I found mine in packets of seaweed.  Keeps in the freezer for about 6 months, or at room temp for about 2 months.

I usually make this recipe if I have a crop of radishes that didn't bulb up for one reason or another.  Maybe the weather was too wet, maybe worms got in at them, whatever.  I harvest them just as the first plants are starting to bolt.


Thursday, October 3, 2013

Chard Wraps Recipe

Over the last 6 weeks or so, I've had some of the oddest food cravings.  It's not the kind of craving like the intense desire for eating that last piece of cake, or chocolate brownies.  It's more extreme than that.

No, I do not have a bun in the oven.

Often hard to pin down exactly what the food is my body wants, the craving can last for months or years until I eat what it demands.  Whereas a regular sweet tooth craving will go away in a few hours/days.  Usually these extreme cravings are for foods I don't even like.  For example, last spring it was for oysters.

Right now, my body is demanding several things:  Almonds top the list, followed closely by anchovies.  Also high on the list are milk products (but surprisingly not cheese), swiss chard, oats, fish sauce and chickpeas.  I'm sure there must be some diagnostic element to all these strange cravings.  Most of these foods are high in calcium and the kind of oils that I don't normally get in my diet.  None of them are particularly unhealthy, so I've added them into my diet, in moderation.

As much as I want to eat chard, I only know a few recipes and they are getting a bit repetitive.  So I asked my friend for ideas.  Here's what his family makes with chard.


Chard Wraps


1 cup rice, soaked but not cooked
chard leaves (quantity depends on size of leaves)
onion, tomato, herbs, meat... whatever you think goes well with this.  I used shallots, dried tomatoes and thyme.
potato
3 cups of broth of your choosing, I like chicken broth.


  • Wash and soak the rice for at least an hour (upto 24 hours).  Rinse and drain.
  • chop up the onion, tomato, whatever you want in the filler, very fine.  Combine with the rice, put to one side.
  • If you haven't already, trim off the stocks from the chard, reserve the stocks for soup or something else.  If the leaves are very large, chop them into two or four pieces.  Blanch for about 1 minute by boiling some water in a very large pot, submerge the leaves, remove from water and drain.
  • slice a potato and put it in the bottom of a large pan.
  • Wrap about 1 Tbs of rice mix in each leaf.


  • Place each wrapped chard leaf in the pan on top of the potatoes.  Make certain they are tightly packed together or it will all fall apart.

  • Place a plate on top of the wraps to hold them down and add broth.
  • Bring to boil and cook for about 20 to 30 minutes (depending on kind of rice, brown rice usually takes longer).  Serve hot or cold.


This is an affordable dish and healthy dish.  You can add different fillers to the rice to accommodate allergies.  If you use vegetable broth and no meat in the filling, this is Vegan Friendly. 

I deliberately left the instructions vague as to how much of what you put in the filling.  I think the joy of this meal is that you use what is on hand, and adapt it to different dietary needs.