Showing posts with label Farming. Show all posts

Wednesday, August 5, 2015

An excellent sweet 'mango' chutney - sans mangos

No photos today, just a quick recipe before I forget how to make this amazing condiment.

A couple of weeks ago, a branch from an apple tree broke because the apples on it were too heavy.  Unfortunately, the apples weren't ripe yet.  Then I remembered about this Victorian recipe I read for mango chutney, only it didn't have a single mango in it.  Instead, it had unripe apples.  Perfect!

Based loosely on recipe 392 of Mrs Beeton's Book of Household Management, I had to make a few changes.  I have a tender place in my heart for anyone who applies garlic by the quarter pound, I must admit that some of the other ingredient quantities were a bit unusual to the modern taste.  So changes were made to method and quantities but without Mrs B's little book, I wouldn't have thought to make such a scrummy chutney.

Here's a little note that Mrs Beeton gives regarding her version of the recipe:

This recipe was given by a native to an English Lady, who had long been a resident in India, and who, since her return to her native country, has become quite celebrated amongst her friends for the excellence of this Eastern relish.

Sweet "Mango" Chutney

All ingredients are approximate

3 large onions
drizzle olive oil
2 Tbs mustard seed
1 Tbs powdered ginger
4 dry chilies lightly crushed (seeds included)
a large handful of garlic
At least 6 unripe apples, peeled, cored and cut into chunks less than 1 inch cubed.
1 cup raisins
2 cups apple cider vinegar or equivalent
1 to 2 cups of sugar
boiling water
2 Tbs salt


  • Chop the onions into about 1/2 inch chunks, in a large heavy bottom pot, fry onions on medium-low with olive oil until transparent
  • add mustard seed, ginger, chili and garlic to the onions, stir well, cook about one min
  • add apples, raisons and vinegar to the onion mix, bring to boil and then turn off heat
  • Mix 1 cup of sugar with 1 cup of boiling water to make a syrup.  Mix until sugar is dissolved
  • Add syrup and salt to the apples.  Mix well and bring back to a boil.  Taste and add more sugar as necessary.  Boil on high for about 5 to 15 min or until enough liquid has evaporated.  Mixture will thicken as it cools.
  • Place into washed (and if you like, sterilized) jars, seal with lid as per normal.  Because of the spices, salt and sugar, I didn't heat process these jars.  Mrs B never did, she just tightly wrapped the mouth of the jars with sheep bladders.  But as sheep bladders are hard to come by these days, so it's up to you to know how to safely can your food.  If you have any doubt, keep it in the fridge.

Affordable: Apples would have gone to waste as they fell off the tree far too early to ripen on their own.  Onions are from the garden.  That leaves the spices, raisins and sugar - so... totally guessing, let's pretend it's about $2 for this.  It made 6 and a half 8 oz jars full, which makes it 30 cents per jar.  This tastes almost identical to an English apple chutney I bought from the store once upon a time, which cost $8 for the same size.  That's a savings of $7.70 cents.  NICE!

To make it Vegan Friendly, you need to replace the sugar with a vegan friendly sweetener, and to be careful not to harm any worms that are probably living in your apples, thus causing them to fall before they were fully ripe.  


Saturday, October 4, 2014

One pot pasta comfort food or Un-recipe for pasta pottage

I've been in desperate need of comfort food lately, and when it comes to comfort food, there is nothing more soothing than pasta for me.

The trouble with pasta (aside from me eating too much) is that it's fussy.  Pasta wants specific timing, and water and sauce, and draining.  All of which requires my attention and additional dirty dishes.


As soon as I realized that it was possible, I set about finding a way to this recipe my own.  For starters, I cut down on the volume so that it's just enough to feed one hungry farmer.  I even started cooking it in the bowl I would eat it in - a special korean ceramic bowl specifically for cooking on the stove.


The beauty of this is that it's simple, doesn't mind being left cooking for an extra two hours, and of course, it's delicious.


My un-recipe for Pasta Pottage:


  1. Get a small handful of pasta from the cupboard and put it in the pot.  Add water so that all the pasta is covered.
  2. Go to the garden and fetch something that looks yummy.  Beans, tomatoes, whatever.  Chop them up and toss them in.
  3. Go to the cupboard and/or fridge and fetch something that looks yummy.  Sundry tomatoes, capers, olives, pre-cooked chickpeas or lentils, can tuna drained, leftover chicken breasts.  Chop it up and toss it in.
  4. Spice it up.  Salt.  Pepper.  Fresh or dry herbs.  A few drops of Spicy Rooster sauce. All of the above.  Whatever floats your boat.
  5. Put a lid on it.
  6. Cook on medium low for at least 20 minutes, or it comes to a boil and the pasta is tender.
  7. Add cheese.
  8. Mix it all up.
  9. Enjoy.
There you go, nine simple steps to delicious pasta.


It is an awful lot like an old fashioned pottage.  Only, unlike the pottage of old, this cooks up in as little as 20 minutes, not 6 hours.  Although, I have been known to leave it cooking for up to 3 hours.  The pasta is a bit mushy by then, but the flavour is great.


Affordable?  I think so.  Because I cram so much extra veg and stuff in the pot, I don't use much pasta.  Maybe a quarter cup at most.  And as for the additional ingredients, when I do the purely store bought stuff, I use two sundried tomatoes, half a teaspoon of capers, quarter teaspoon of chopped olives, and a few drops of spicy rooster.  Unless I have some other protein in it, I use about two tablespoons of cheese.  Somewhere between 50 cents and a dollar for a hearty meal.  Include leftovers and garden veg, replace some of the pasta with pre-cooked chickpeas, and the price plummets.  

Healthy?  That all depends on what gets tossed in the pot.  I use wholesome and simple ingredients, most of which were living plants just prior to cooking.  Of course I'm sure there is a way to make this unhealthy, but you would probably have to try really hard.  

I think this would be great for camping.  One dish, everything tossed in together: This really should be called pasta pottage.

How about allergy friendly?  A simple un-recipe like this is very simple to modify for dietary needs.  Chances are the pantry is already stocked with things you can eat, and probably also things you like to eat.  It's just a matter of going to the cupboard and finding something good.  By the way, pickles taste great in this for some weird reason - if you can find a pickle you can eat.

I think this is a fantastic dish for making use of local resources and therefore a great transitional food.  Of course when the balloon goes down, or up, or whatever they say, I imagine that dry pasta would be harder to come by as it's manufactured and shipped from far away.  But when that happens we can go back to the more traditional pottages of beans with a smattering of fresh pasta tossed in at serving time.


Thursday, July 31, 2014

Saving Seeds

This year I had the great joy to participate in the Victoria Seed Library.  The beginning of the growing season I choose 6 different seed kinds from their lovely list of things to grow, and received tiny envelopes with a pinch of seed in each.  The goal is to plant the seeds in the garden, nurture them, then select and save seeds from the best plants.


I'll save a few seeds for myself and in the case of dried beans and peas, a handful for a meal, then give the remaining seeds back to the library so they can share the seeds with people next year.

It's not only a lot of fun, but it's also a good reminder about how precarious our food future is and the importance of maintaining genetic diversity in our gardens.

The Seed Library is free to participate in, free workshops and free seeds.  The only thing you are obligated to do is to give back some of this years seeds and a record of how the plants grew, conditions, &c.

We have sandy soil that we augment heavily with manure and compost, a long dry summer, and a weak well.   So when I selected the plants worth keeping seeds from, I choose those that were most drought tolerant and good producers.

Here are some observations on the seeds I choose and how they grew on our farm.


Tangerine Marigold (which I suspect are actually Tangerine Gem Marigolds)


Tiny little flowers that smell like apple candy.  Grow in a bush formation about 8 inches high, and make a nice border.  I thought maybe I would use these for dyeing yarn, but given how tiny they are, not much hope of collecting enough for that.  However, they may make a good companion plant, as the insects seem to avoid them.  More research is needed, but yes, I think I'll grow these again next year.

Drought tolerance?  About 1/4 died from drought, but what did survive thrived!

I started these inside then planted them out in the garden when danger of frost had past.

Green Lentils

Moderate drought tolerance, but the number of pods that filled out was lower than I would prefer.  For the pods that did fill out, there was only one lentil per pod instead of the two there should have been.  I hope it was simply the lack of water and not a flaw of the plant that prevented the beans from forming.

Also, as the lower pods dried out, they started to split open and spit out their seeds, so I ended up harvesting the plants much earlier than I would have hoped.


Hutterite Soup Beans

These make really nice snacking beans as well as dry soup beans.  They do have a climbing tendency despite what the internet says.  The beans aren't ready yet, but when they are, I think I'll separate the ones that like to climb from the ones that prefer to bush.

I had a lot of trouble starting these seeds, though I think the soil was warm enough.  In the end, about half survived to reproduce.


Wild Cherry Bush Tomato


This has been an outstanding success.  Every single one of these seeds I planted grew, and my garden is overwhelmed by tiny tomatoes growing on massive bushes.  The most sturdy of tomato cages cannot contain this plant.  I had so many germinate that I started giving the extras away.

Funny thing is, the ones with the richest soil aren't growing as well as the ones with sandy loam.


Darlaine Pea - yellow soup pea

More drought tolerant than regular garden peas, these little gems taste delicious at different stages.  The shoots are delicate and sweet.  The young pods can be consumed whole like you would snow peas, the mature pods make great boiled peas and finally the dried peas... well they are just like yummy dry peas.

Woad

Didn't grow :( despite planting the seeds in different environments and time of year.  No seeds left.  Maybe the Library will accept bread poppy seeds instead.


All in all, it's been an enjoyable experience.  It's nice to be reminded that gardening is not a solitary act.

A strange dream about vegan and omnivore long term sustainability

I had a strange dream the other night that has been haunting my waking world.  I was living in this long term experiment where we had a small community and we had to survive with as low an environmental impact, and as self sufficiently as possible.  There were two teams, one who worked with animals and the other team lived a pure vegan life.  I was part of the first team but was for some reason giving lessons and advice to both teams.  It involved all sorts of people, historians, enthusiasts, ecologists, gardeners, and a transient student population.

In my dream, the goal of the study was to discover if it is possible to combine current day knowledge and to some extent technology with traditional methods and wisdom.  The aim is to supply a surplus of necessary resources (food, clothing, shelter, entertainment) while leaving the soil and overall environmental stability in a better state than when we started.

The other part of the experiment was to investigate if a Vegan way of life was actually ecologically friendly when compared with a similar community living the same lifestyle but also using and on occasion consuming animals.  Can a vegan live a nutritionally fulfilling diet on local resources alone?  How would a vegan cloth themselves in the winter if they can't depend on industrial fabrics made from plant pulp and petroleum?  Would the soil deteriorate without the addition of animal manure or would it thrive on compost alone?

The groups would meet weekly, talk about problems, observations, and questions of things that needed more in depth study.  For example testing the fertility of different soil management methods by careful record keeping, or testing the nutritional density of apples grown in a regular orchard, or in an orchard that had a herd of sheep grazing on it.  For those sorts of things, our academic counterparts would arrange lab work or perhaps research methods for solving a problem, or stuff like that.

It was a very precise dream with a strong structure to the experiment.

At one time in the dream, there was a great debate as to whether it was in agreement with vegan principles to use worm composting - the debate spread across the world and many university students and teachers wrote in with their opinions.  In the end, it was decided that worms confined in a bin were not whereas worms in a compost pile were fine.  For some reason undisclosed in my dream.

Originally, my dream memory tells me, it was suppose to last 4 years.  The first three years to build fertility in the soil, and by the end of the third year, be almost completely independent.

There were some interesting differences in the vegan vs the omnivore groups.  The vegan group had to grow extra acres of oil seed crop to use as fuel for their tractor, whereas the omnivore's could use cattle to pull the equipment.  For some reason horses weren't multipurpose enough for us.  The downside with the cattle was that we needed to grow extra feed for them during the winter.  However, something happened and the tractor the vegan group used broke down just at a vital point at some agricultural even - harvest or planting, or something vague.  It wouldn't be a dream worth remembering without obstacles to overcome.

And so the dream went.  The original four years, was expanded to six, then ten.  We built different houses out of local materials.  The vegans yurt was fantastic in the summer, but an utter failure for winter warmth.  However, they had super awesome luck with their cob construction and after a few years made one large house that they all lived in.  The omnivore's eventually had mostly yurt living spaces with wattle and daub communal buildings.  Both living arrangements had their advantages and disadvantages.

Although it was almost a contest between vegan and omnivore living, we did live side by side, and as the years progressed, the two communities came closer together, learning from each other, sharing resources when times were tough (to the chagrin of the professors managing the experiment).  We had become so independent, or perhaps codependent, that there was less and less desire to interact with the outside world.  The tidal influx of students participating in the study was sufficient for us to feel connected to life outside.  By year eight, it was a very pleasant rhythm.

But also, great inspiration to the world at large.  Academics built their reputations talking about our endeavours.  Political decisions were influenced by our accomplishments.  Even corporations took notice and started to make changes to the way they managed their resources.  As we produced so much excess food, other cities started to plan farming communities like ours to provide supplies for emergency situations.

But like I said, it was just a dream I had.


What a strange dream though.

I've been thinking for a while lately about how eco-friendly a vegan diet is.  Compared to the Western Diet, it's very good.  However, compared to my personal situation, I think that a vegan lifestyle would have a devastating impact on the environment.  But maybe I'm wrong.  Academics can make good arguments for both sides; science can confirm the validity of both opinions.  That leaves us with no way to discover the truth - unless we actually try it.

I've been trying it a little bit on the farm here in real life.  One of the gardens I grew flax in this year, I used animal manure on one half of the garden, and compost on the other.  Other than that, both halves received the same treatment.  However, the flax on the manure side grew a good foot and a half taller than the compost side.  One garden is not enough evidence.  That is why more practical research needs doing - not just reading reports, but actually having people living the life on a day to day basis.  I think it's a fantastic idea and I loved participating in the experiment in my dream.

As much as the world needs to know more about this kind of thing, I don't imagine there are enough people in the Western World up for this sort of a challenge.  Though I wish they were because I would jump at the opportunity in a heart beat.

Wednesday, July 30, 2014

Mystery Squash Becomes Pumpkin Bread Recipe - aka, Mystery Squash Bread Recipe

What to do when one's garden has become invaded by squash?  Make squash bread of course.  

There are these three plants, began innocently enough, tiny tender things, needing coaxing and care to begin their life in the soil.  I created pots from old newspaper and filled them with finely sifted soil.  Placed one seed carefully inside each pot and watered it with dedication.  When the moment was right, I dug a hole in the garden, not too big, but not too small, and pressed the tender shoot, pot and all, into the soil.  Covered it with a cold frame made from old windows, and with some words of encouragement, left it to fend for itself.


Well, perhaps I gave it a little too much encouragement.  Each plant sent out, at first one long searching vine, then another and another, until each one had produced over a dozen vines, climbing over fence and pea plant with equal enthusiasm.  June was scary!  The vines would grow over a foot a day, each morning I had to hack my way past over-enthusiastic squash, just to get into the garden.  Finally the vine growth seems to have reached the limit at just shy of 25 feet, the bright yellow blossoms are gone, replaced with splendid orange squash.

you can get an idea of how large these squash are

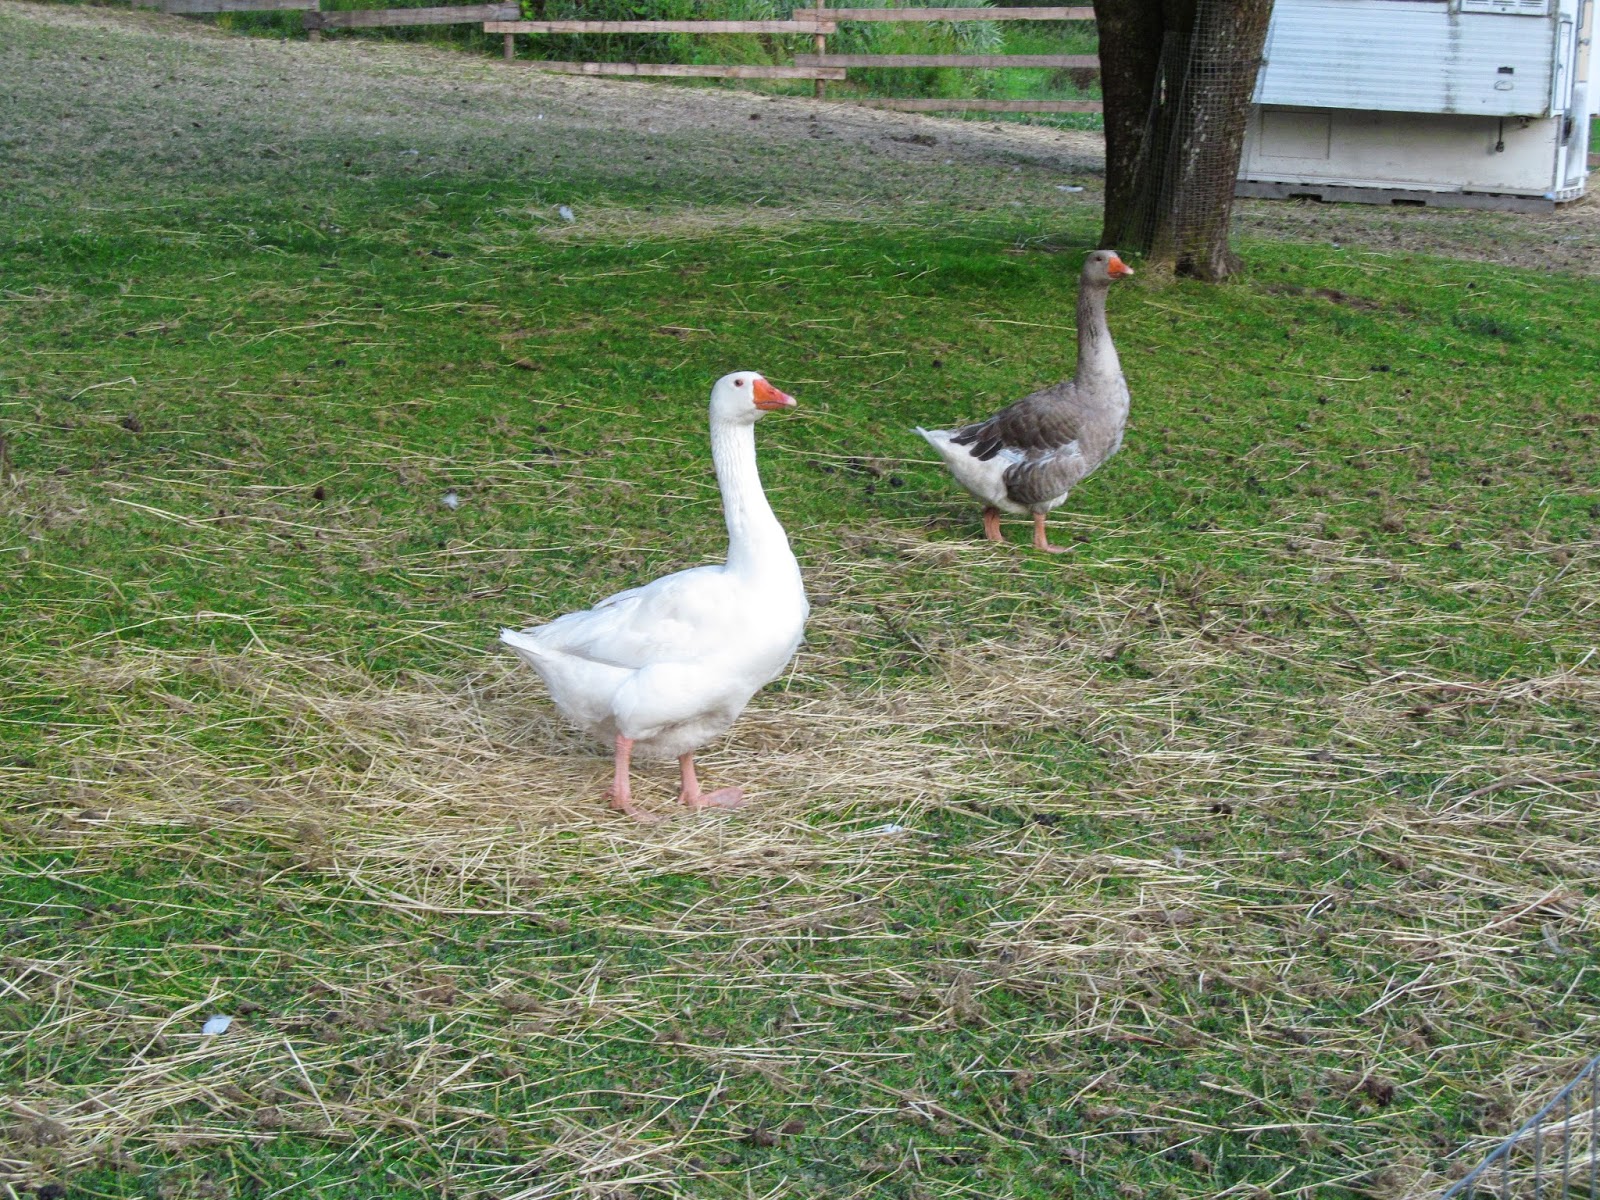
week old gosling named Chesnut
I'm guessing they are pumpkins.

After bumming around the internet for a few hours, I finally came across a squash recipe I liked: Savory Pumpkin Rosemary Bread.  The flavours in this recipe look really good, so I thought it would translate nicely to sourdough.  I started roasting the squash at midnight - the only time of day when the kitchen is cool enough to cook - and made pumpkin mush the next morning.  

Disaster struck when I got my sourdough starter out of the fridge - BLACK MOLD.  

I'm not hugely squeamish with mold, but when black mold happens I won't touch it.  Even if it isn't real black mold, just black colour mold, it's just not worth the risk.  

So sadness, my sourdough starters are all dead.

I blame myself, because I know during the summer the water in the well kills starters.  Something from one of our neighbours uphill from us seeps into the water table and devastates my cultures.  I suspect it's the time of year when swimming pools are emptied and cleaned.  From June through August, I always try to boil my water before using it in any culture that relies on bacteria.  But this year, we had a new filtration system installed, so I thought I could be lazy... sniffle... oh well.

Good thing I know how to make more starter, but that takes time and doesn't help me with all this squash/pumpkin mush.  So commercial yeast it is.

The recipe linked above looks fantastic, but relies heavily on mechanical devices to mix the dough.  I changed an ingredient or two, the method, the order of adding, timing, and even some of the ratios, so I'm going to post my version of this recipe for those of you who don't have a standing mixer or who enjoy kneading by hand.

mmm, pumpkin bread
sorry about the lighting, late night photos are not my strong suit


Mystery Squash Bread


The night before

at least 1 lb squash or pumpkin (without seeds)
olive oil
flour, whole wheat if you have it
water
yeast

  • Cut up the squash into 3 inch chunks - about that size, don't be fussy unless you want to.  Rub with oil and place on a roasting tray in the oven.  350F for about 30 min, or until it's mushy.  Remove from oven, and cover with a clean towel.  Leave on the counter overnight or until cool enough to handle.
  • In a small dish, make a poolish or biga by combining 2 cups of flour with a pinch of yeast and enough water to make it into a thin batter.  Cover with a cloth and leave on the counter overnight.  

Baking day

The roasted squash (or 2 cups canned squash mush)
The poolish from the night before
1 cup warm water
2 Tbs instant yeast
small drizzle honey
1Tbs sea salt
flour (I used all purpose, but next time I'll use a mix of 1 cup whole grain and the rest all purpose)
about 1 tsp fresh rosemary finely chopped, or 1/2 tsp dry
olive oil

  • Get your big bread bowl out and in it, combine the honey, yeast and warm water.
  • Scrape the squash off it's skin directly into a blender or blitzer.  And blend/blits until mush.  Alternately you could just mush it up with a fork.  I don't think there are any rules as to how lumpy or smooth your squash mush is.  
  • The yeast should be starting to work by now.  If not, leave it 5 min before continuing.
  • Next add the squash mush, poolish, and salt to the yeast water.  Mix together well.  
  • Add about one cup of flour (the whole grain if you are using it) to the mix, and mix.
  • Mix in about 1 handful of flour at a time, until you get the traditional shaggy mess that bread recipes always talk about.
  • Put your shaggy mess on a well floured countertop and take the bowl immediately to the sink and wash it.  Some people think this is an optional step and we should just get another bowl out of the cupboard, but there are good reasons for putting the effort in.  One, it lets your dough rest.  Two, the bowl is easier to clean now than later.  And three, you don't have to hear the person who does the dishes complain about how they love your bread but hate the mess it makes.
  • Dry the bowl with a clean cotton or linen towel (keep the towel to one side for covering the dough later) and pour a generous glug of olive oil in the now dry bowl.
  • Go back to your shaggy mess and knead it till it's smooth and elastic - about 2 to 10 min.  Shape your dough into a ball like shape, put it upside down in the bowl and get the top good and oily.  flip it right way up, and cover it with your cloth.  Leave it to rise until it's about double in size.  Usually under an hour. 
    • If this was sourdough bread, I would shape the loaves immediately after kneading it to give it a more rustic texture with probable air pockets.  But since we are using commercial yeast, I feel the taste isn't very good with a single rise.  Best to do the double rise thing even if it makes a softer bread.
    • Also, a lot of people recommend a damp cloth - I don't quite understand why they think this is a good idea.  It's such a short rise time, and if you were generous with the oil, then the slight dampness left on the towel from drying the bow is plenty.  The dough isn't going to dry out in an hour.  Besides, as the dampness on the cloth evaporates, it cools the dough.  This isn't what you really want when working with commercial yeast.  Long rise sourdoughs on the other hand... they love a cooler clime.  
      • But you know, it's your bread, do what you like.  I'm not going to come to your house and yell at you if you don't do things the way I say.  
  • When it's risen, punch it down.  Divide into two and shape into loaves.  Whatever shape you like - round with a cross on top, loaf pan, braided, pumpkin shape... whatever floats your boat.  Score the top of the loaf (if you like) to make it rise more evenly.  Cover again with the cloth and leave till double in size (about 20 min).  I do round loaves traditionally, so if you are doing something different you may need to adjust your cooking time.
  • I cooked mine at 425F for 45 min.  Next time I'll cook at 400F for about an hour as I didn't like the crust at the higher temp.  It's ready if it sounds hollow when knocked.  
  • Eat anytime after 10 min, or leave to cool 12 hours before putting in plastic bag.

Affordable?  If you wait till squash season, people will almost pay you to take their excess squash off their hands.  I imagine you could use just about any winter squash - maybe even summer squash, but probably have to either grate it or roast it differently.  You can make loads of pumpkin mush and freeze it in 2 cup servings.  You can use more or less pumpkin according to your tastes.  I think it would be really good with leftover lentils or other pulses.  In fact, forget about roasting squash specifically for this bread, use leftover squash from a family feast.

There's a decent nutritional value to this - but I'm going to hesitate pricing out the ingredients as I understand there is yet another bad harvest year for wheat (what's that? 6 years in a row now?) so expect the price to go up again this winter.  8 years ago a huge bag of flour was regularly on sale for $2.40, now it's never lower than $14.  You know things are bad when locally grown organic wheat berries are now cheaper than commercial flour.  

At the time of writing, this recipe is affordable.. but who knows what tomorrow will bring.

Vegi or fruit, either way squash is probably a healthy thing.  This is a good way to trick yourself into eating your veg - something I have to do often - by making a slightly sweet flavour bread that goes amazingly well with hummus or goat cheese.

How to make this Vegan Friendly: Replace the honey with a pinch of sugar.

I think this qualifies as a Transitional Food, not just because I'm cutting down on my oil dependence by using locally grown wheat, but also because pumpkins and squashes in general are one of the easiest things to grow.  Get the timing right, give them lots of water, and even the brownest of thumbs can look like they know what they are doing.    When we get back to a stage in society where the Victory Garden replaces the lawn, you need to realize that there are going to be a lot of squash.  Better learn how to cook it.

Tuesday, July 29, 2014

Headcheese - it's the weirdest cheese of them all, and possibly the hardest to make

Headcheese tops my list of weirdest foodstuff ever.  It's basically a hog's head, boiled, the meat removed, then the broth boiled down to make a thick jelly.  That's it.  That's headcheese.  Weird!


If I'm so grossed out by headcheese, why did I decide to make it?  Not sure really, perhaps because I've never done it before.  Though the more I think about it, the more I realize I made headcheese because I couldn't stand the idea of waste.  More and more I feel it necessary to honour the animals we eat by using every part of them.  

A couple of weeks ago, my friends butchered their oinkers, and I went to help.  Lovingly raised, these little piggies had it good: A warm cooked breakfast every morning, massages, and I suspect even songs.  It's a real privilege to give thanks to such well cared for animals before they met their end.


Next comes the most disgusting thing I've ever done - so far.


I brought home the head.

For the next 6 hours, myself and The Captain experimented with different ways to remove the bristles from the skin.  We tried scalding, skinning, plucking, shaving, and in the end we settled for a small blow torch and scraping.  Wish we had started with that to begin with, as it would probably have taken only about an hour.

Next came the part where we saw the head in half so we can scoop out the brain.  We can probably leave the brain in there, though I suspect it would make the final cheese cloudy.  Also, I'm not brave enough to eat brain yet, so I felt we needed to get it out.  A hack saw with a blade designed to cut metal was the best tool we found.  But if you ever have a chance to buy your own hogshead, get the butcher to cut the skull in half for you -  parts of the skull were nearly 4 inches thick.

There are a lot of recipes out there for Head Cheese, some simple, some beyond complicated.  I opted for one in the middle.  The recipe is from In The Charcuterie bye Taylor Boetticher and Toponia Miller.  I'm not going to copy the recipe here as most libraries have this book.  Besides, if you are interested enough in working with meat to read this post, you really need your own copy.

One change I did make is to make the brine using only a small amount of boiling water, than top it up with cold water once the head was ready to go in the vat.  Then in the fridge it goes overnight.

After that, the head comes out of the brine and into the largest pot in the kitchen.  A word of advice for any other crazy people who want to try this - make certain you have a large enough pot before you start.

Boiled with some vegetables for a few hours, until the meat falls from the bones.  Meat is removed, broth is kept and simmered down to make a jelly.  Add some extra spice to the meat, and eventually meat and jelly are combined in a loaf tin to make... drum roll please... head cheese.

Best tool for removing the meat - fingers
just make certain it's cool enough first
Leave it in the fridge overnight to set.  Keeps most of a week in the fridge.


If, by some miracle I ever make this again, there will be changes.  First off, never again will I do this in the heat of the summer.  It takes up far too much space in the fridge, and waiting till almost midnight for the kitchen to be cool enough to work in, makes for a grumpy me.

The second change I would make is to change the ratio of meat to jelly.  I would use almost equal parts of both so that the head cheese holds together better.  For this attempt, I used about 80% meat and only 20% jelly.

The third change is to save the excess jelly in small frozen servings so I can add it to pasta water, soups, and just about anything that could do with a boost of flavour and nutrition.  There is a lot of books that claim meat jelly can do wonders for osteoarthritis, so I jump at any excuse to add bone broth or jelly to the diet.


Affordable?  The head was free, in fact, I only used about half the meat on it.  The jowls I froze for winter curing.  Spices, salts, &c. comes in at roughly $3.  The electrical bill on the other hand was up about $20, and we have cheap rates here.  This could easily have made double or triple the amount of headcheese if I had been brave enough to add more jelly.  Since this is so flavourful and a tiny bit of head cheese goes such a long way, I'm going to say yes, it's worth it.  If you have a woodstove, or some other way of cooking then yes, it can be quite affordable.

Healthy?  There is a lot of salt in this, but it is balanced out by not eating much at one time.  On the other hand, there are often great poetical treatise on how good bone jelly is for a person, so I'm going to say, yes, it's healthy in moderation.

I'm also going to add this under the label Transitional.  As in it is a good food skill to cultivate for that time in the future when oil is sparse and we are forced to rely on local resources.  It's a way of using every last part of the animal and what's more, it makes a little bit go a long way.


Wednesday, July 2, 2014

Medieval Goose - two ways over an open fire

You remember Henry and William?  Two lovely geese I raised by hand from (not so) tiny eggs.

Maybe squeamish people should click away now, as this post involves processing and consuming my lovely boys.  But in a good way.  A very good and fulfilling way, with friends and free flowing mead.  It's been difficult gathering my feelings and thoughts to write about it, but I want to share the experience with you, if you'll let me.

Once a year I travel to the 14th Century for, what passes as a vacation.  A wonderful week or two among friends, dressed in funny clothes, eating medieval food, doing medieval things.  Living life just as they would in the year 1371, only we do it with potable water.

Things are never quite that simple, because while we are living a medieval life, we are also an interactive display for the public.  Visitors wander in and out of our camp while we cook, eat, spin yarn, weave, cast metals, practice combat... and all the regular day to day tasks correct for our period.  It's great fun interacting with them and showing off what we are doing.

A setting with good friends and a chance to educate random people about food and food choices - what  Pastafarian could pass up an opportunity like that?  So I brought my geese to the park, early one morning.  While The Captain and I hugged our feathered friends, they met their end.  I cried.  A lot.  But their end was just the beginning.

Plucking pheasants geese


As the day progressed a whole host of helpers plucked the larger of the two birds as we prepared him for roasting on the spit.  The smaller fella we skinned.  That took most of the morning, and some fun rhymes about pheasant pluckers and their sons.


With the smaller goose, we made a soup.  I carved off the meat and put to one side.  A broth was made from the bones, onions, carrot leaves and a few other tidbits that were kicking about.  After a few hours, we strained the broth, added it to some lightly fried veg, spices and the rest of the goose meat.  Delicious.


Goosefat


Not the most appetizing of photos, but very interesting for someone like me who hasn't worked with goose before.  First thing I noticed is how colourful the bird is under it's skin.  The yellow chunky bits are fat.

Fats of all kinds were highly prized in the middle ages, especially in Northern climes where there were very few sources of vegetable oils.  Fat was used to make soap, lotions, lighting, cooking, lubrication for wagon wheels, and many other things.  As we know now, fat is essential not just to make you feel full when eating, but also for brain development, skin, Vit D processing, and so many other things.  I had often read that goose fat was the most valued fat of all, but I never realized why before.

Unlike lard or tallow, when rendered, goose fat is liquid at room temperature.  It was quick and easy to render, especially because it's easy to see and trim the fat thanks to the natural colour coding inside the goose.  There is a lot of fat inside a goose!  It's also quite a mild taste, a lot like olive oil with a slight meaty undertone.  Very neutral flavour.


The roasted goose was much easier to process.  Just clean out the innards, trim some of the fat from the cavity, stick a stick in it and put it in front of the fire, turning from time to time.


"Is that a real goose?"


While we are working with the geese, the public flows in and out of the kitchen area and I talked with them about what we were cooking.  This probably the best part of the week for me.  I love hearing people's questions and listening to their stories.  Although, while working with the goose... things were a bit different.

The most common question of the day was, "Is that a real bird?"

The first few times I heard someone ask that, I wondered why we would be plucking an unreal bird?  What would an unreal bird look like?  How would it taste?

After a while, I decided (or at the very least hoped) they meant was, is it something that comes wrapped in plastic from a store or a bird we were in the process of transforming from live to dinner.  

Not surprisingly, many of the people were taken aback when they discovered what we were doing.  They had never seen anything like it before.  Even avid meat eaters didn't know what to make of it.

So I told them the story of the geese and how they came to be there.  I described how I hatched the eggs, raised the geese by hand, loved them and gave them a fulfilling life.  I shared how honoured I was that these geese would provide sustenance for us, and how we would honour them by making certain not a scrap would be wasted.  And most importantly, I talked about the difference between modern day methods of raising meat and the way it was done in the Middle Ages.  In the past meat was an infrequent luxury - and still is for most people who live on this planet today - so no part would go unused.  If we are going to eat meat, in our society today, we have the luxury of choice - we can choose to eat an animal who lived a miserable confined forcefed existence, or we can choose to eat fewer animals; ones who lived in a manner most true to their nature.  Why is it so many people proclaim they care about animals, but still buy miserable-meat?

I like to believe I got people thinking about what they eat when they eat meat.


Chowing Down (as in goose down... well, I tried)


Goose soup, goose livers and hearts fried in goose fat, and roast goose.  Add rice and a few veg to the mix and ring the dinner bell.


Everything was delicious.  We toasted the geese with homemade mead.

I don't know how to say this but while I ate, I was both incredibly sad and unbelievably joyful.  I was sad (and still am a little inside) because I'm always sad when one of my animals comes to an end - be it for food reasons or others.  These animals become my friends, even though I know that they will be food some day - I'm determined to give them the best life I know how.

But like I said, I was also joyful.  Amazingly so.  Enjoying the meal with my medieval friends was uplifting. I felt they honoured the lives of my animals - that it wasn't just meat to them.  It was sustenance, both of body and soul.

I'm losing the thread of what I was saying, but I doubt many people read to the end of a post this long.  Basically, what I am looking to say is: despite my conflicting emotional state, I am glad this happened.  I would do it all again  if it meant sharing a meal with these lovely people.  In fact, I already have a flock of replacement geese.  Between educating the public, learning new skills, and enjoying time with my friends, it was a very successful day.

Friday, June 13, 2014

Sourdough Nettle Rye Bread recipe - or let's get Medieval on Your Nettles

Yesterday I made an adaptation of an adaptation of a medieval recipe for Nettle Bread.  It's exceedingly delicious, with a sweet and moist rye bread crumb.  I like it sliced thin, lightly toasted and smothered in butter (homemade is best) and a few drops of honey on top.

Rustic nettle bread


We have the perfect growing place for stinging nettles, it's moist year round, it's acidic, it's downhill from the neighbour's manure pile so the soil is overloaded with nutrients.  There is not much else that will grow there, but the nettles thrive.  So I harvested a large basket full of just the leaves.  My nettles are getting a bit old and scraggly, but if you have young nettles, you can use the stem as well.

Although I made a huge batch of nettle bread this time, I'm going to scale down the recipe for you.  Those of you without constant access to nettles might have to wait till they are available in the shops in the spring... Far too expensive for something available free in the wild, but when that's all you have... well, you make do.  The bunches sold in the store are about a cup worth - but you can use more or less depending on what you have on hand.

blanching nettles
(in the water I used for brewing small ale later that day.
This should be interesting)


The recipe I used for inspiration comes from the beautiful book The Medieval Kitchen, a social history with recipes by Hannele Klemettila (the final 'a' in the name has those two little dots on top).  The author uses modern yeast and caraway seeds.  I hate caraway seeds, possibly more than I hate mushrooms.  They disgust me.

Last year I used Klemettila's recipe and it's quite nice (without the caraway seeds).  It's written in a way that assumes you are very comfortable baking bread and the recipe uses modern ingredients and methods that were not available in the middle ages.  Like most of the book, it is more an attempt to introduce the modern pallet to some of the medieval flavour combinations.  Combine that with the layout and gorgeous pictures, I think it's a good introduction to medieval food.

For me, it's not enough.  In the middle ages a person couldn't just drive down to the supermarket and pick up a packet of yeast.  They had to capture their own yeast, very much like we do with sourdough today.  In fact, in some parts of Europe, it was exactly like we do with sourdough today.  To keep the bread as medieval as possible, I used sourdough instead of modern yeast.

Because the nettles have so many natural sugars, I figured a heavy rye bread would do the trick.  And I was right.

This bread uses a sponge so start it the evening before you plan to bake.  It is also a bit different than many bread recipes in that I only rise it once.  It's a trick you can use for sourdough when you can't guarantee you'll be available to shape the loaves for the second rise.  This creates a more rustic texture, sometimes creating those big air pockets in the loaf.  I kind of like it.

Stinging Nettle Sourdough Rye Bread

About 1 cup of fresh nettles - or a lot more if you have it
1 tsp salt
Sourdough starter
Rye flour
Wheat flour
1/2 tsp Whole fennel seeds
1 tsp honey (optional - makes it no longer vegan)
water

The night before baking day, we make a sponge:

  • Put 2 Tbs sourdough starter (from the fridge or already active is fine), 1/2 cup water, and enough rye flour to make a thin batter.  Cover with a cotton or linen towel and leave on the counter overnight.  This is called the sponge.
  • Feed your starter as per normal - I'm assuming you are already slightly familiar with sourdough.
Now it's baking day, let's get's medieval on your nettles
  • Toast the fennel seeds in a dry fry pan until they smell amazing then put to one side to cool.  While it's toasting, you will want to shake or stir the seeds quite frequently to ensure nothing burns.  When cool enough to handle, coarsely grind it with a mortar and pestle or a spice mill.  
  • Bring a fairly large pot of water to the boil and dunk the nettles in the boiling water for about 3 minutes.  Take the nettles out and put them in a bowl, add about a cup of cold water to the nettles.  When the nettles are cool enough to touch comfortably, take them out of the cold water and strain them - keep the cold water, we're about to use it.  Let's call it nettle rinse water.
  • Combine the nettle rinse water, sponge, 1 tsp salt, toasted fennel seeds, a handful of flour, and a handful of rye flour.  If you are using honey, add it now too.  Mix it up well and put it to one side.  
  • Take the nettles that have drained, chop them up as finely or as coarsely as you like.  The cooking should have neutralized the sting.  Add this to the flour/sponge/fennel/water mix above.  Stir vigorously, almost whisking it in as this will help to activate the gluten in the flour and ensure the nettles are well incorporated into the dough.
  • Add another three or four handfuls of rye flour, or about 1/2 a cup, and mix well.
  • Add regular flour by the handfuls, mixing between each addition, until you have a shaggy mess.
  • Put the shaggy mess onto a well floured board or counter, kneed it until no longer shaggy, but instead a lovely smooth.  
  • Shape into one or two loaves, then put on a baking sheet.  Cover with a towel and leave it alone until double in size.  This may take an hour or it might take 8, depends on your yeast and many other factors... most of which are beyond your control.  A lot of people like to leave it somewhere warm, which is okay, but for me doesn't make as nice a texture or as long keeping loaf.  Just put it somewhere where it isn't in a draft.  
  • When it's double in size, preheat the oven to 400 F.
  • While the oven is heating up, use a very sharp knife to carefully cut some lines in the top of the bread.
  • Bake at 400 for 35 min for the small loaves, or 40 min for one large loaf.  Bread is done when it sounds hollow when you tap it on the bottom.
  • Take out of the oven, wrap the loaves in a cotton or linen towel and leave at least 12 hours to cool before storing in plastic.  Or if you are hungry now, wait at least 10 min before cutting into it.
So beautiful, ready to rise


Affordable: Yes, if you're harvesting your own nettles and not paying grocery store prices.  The nettles add a lot of nutrition and a little bit of bulk to the bread which is pretty awesome.  Nettles are very healthy - just google stinging nettles to find out all the good things they do.

If you omit the honey, this is a vegan friendly bread.

Tradition and transition?  It seems to have been quite common in medieval times, but the tradition has died out.  As a Transition bread, however, this is going to be a good recipe to keep around.  A dense nettle bread is very common during starvation times, like during World War 2 for example.  Usually wheat flour is one of the first things to be rationed, so breads were made with whatever grains were on hand, and often augmented with nettles and other nutritional weeds that are usually ignored in times of plenty.

We would be foolish to think that we won't ever have a starvation time again in The West, but for now, it's actually quite a yummy bread, the nettles adding  a little bit of tang, sweetness, and even help prevent the bread from going moldy.


nettle toast and honey, delicious.


Wednesday, June 11, 2014

Cucumber, garlic scapes, and dill fermented pickles recipe


Here's a very delicious fermented pickle I've had the privilege to make.  The garlic scapes are from my garden, but the cucumbers and dill are from the store.  I plan to make this again later in the year with my own cucumbers and dill, but use whole garlic instead of the scapes.  It's tasty enough, but the scapes add a special something that is really yummy.


The other day I was lamenting the price of cucumbers in the store.  It was considerably higher than normal for some reason, but fresh fruits and veg are doing this more and more frequently these days.  But I found some cucumbers that had just come in at my friends shop, and bought the lot.  They are those lovely small cucumbers, tiny little seeds, so crunchy and tender.  

A good 20 plus pounds of cucumbers plus a garden full of scapes, and a few other vegs tossed in the pot for good measure, means that I made 6 gallons worth of pickles in an afternoon.  This recipe isn't for that much, but you can easily scale it up or down to your liking.  I'll do it per pound, so per each pound of veg you add...x this and that... very simple.

My recipe is inspired from this... okay, it's basically the same only modified for the open vat ferment style instead of the small jar ferment style.  Very good recipe, but far too small an amount for how good it tastes.  The ratio of dill, garlic and cucs is up to you entirely.  If you want pickled garlic with a hint of cucumbers, do that, if you like cucumbers best, do mostly those.  If dill drives you crazy with love and passion, go nuts.  But basically, I tend for 10 to 50 garlic scapes per pound of cucs, or one bulb of garlic for 2 pounds of cucs - I love garlic.


Cucumber and Garlic Scapes Dill Pickles


  • cucumbers
  • garlic or garlic scapes or both
  • fresh or dry dill.
  • salt
  • optional - chili pepper, other veg like carrots
  • water
  1. Weigh out the veg.  For every pound of veg put aside 2 tsp of salt.  Add one Tbs of salt to the pile (for the pot as they say).  
  2. Cut up the veg how you like.  The more surface area the faster they will ferment.
  3. Layer it in a clean crock (no antibacterial soap, this will kill the bacteria that we need to ferment the pickle), layer of veg, sprinkle herb, layer garlic, layer of salt, layer of veg... and so on.  Save a good Tbs of salt for the top.  When you run out of veg, sprinkle the rest of the salt on top.
  4. Put a plate or cut a piece of plastic or wood or whatever you have on top of the veg/salt layers.  It needs to be smaller than the opening so it can weigh down the pickles, but not too much smaller that the veg can get around the inner lid and float.  Weigh it down with a jar of water or clean rock, or the like.
  5. cover the whole thing with a cotton or linen cloth to keep the bugs out and stop the dust getting in.
  6. Place somewhere at cool room temp, between 10 and 20 C is ideal and ignore it for 12 to 24 hours.
  7. The veggies will make their own liquid, but probably not enough.  Add clear, clean water to the vat until the veggies are submerged.  Cover it back up and ignore it.  
  8. After three days to a week, open up the vat and take out a few cucumbers (with clean hands/tools) to taste.  If you like it, put the pickles in jars in the fridge.  If you would like it more sour, replace the inner lid and weight to make certain everything is submerged.  Cover again with cloth and ignore for another week.
There may be mold.  It happens but is seldom harmful.  If the mold is black or the vat smells rotten - toss it it the compost immediately!  Otherwise, trust your senses to tell you if it's okay to eat or not.  Mold isn't always bad for you.  In fact, a great number of molds are good - antibiotics come from mold, blue cheese, miso soup, sake rice wine... all contain friendly molds.  Most molds don't care about humans one way or the other, some are helpful and some are harmful.  But the point is, not all molds are bad.  If you feel uncomfortable with mold, then don't eat the vat.  If you don't mind it, and it's not black mold, then scrape off the mold, maybe sprinkle some more salt, and make certain everything is submerged below the water.

If you are making this in the heat of the summer, which is likely given the way cucumbers grow, and don't want to eat it right away, then feel free to add more salt.  In the summer, I usually put in 1Tbs salt per pound of veg.  In the winter, when it's cool, I'll add a lot less salt, maybe 1 tsp per pound of veg (this is my basic guide for all vegi ferments like kimchi or sauerkraut).  


You can make these pickles for the flavour, or to preserve the cucumbers or for the health benefits of probiotics.  I find this recipe very affordable, especially when my own cucumbers are in full production... although if you are buying the cucs, then maybe wait for them to be on sale.  

This is a traditional method to preserve cucumbers, and also one very good for transitioning away from dependence on big business and long range food transport.  Make this in the summer when you have cucumbers coming out your ears, then you will be able to enjoy pickles well into the winter, maybe even next spring.  For preservation, it's helpful to keep it in a cooler location.


Yes, this is vegan friendly.


Saturday, May 17, 2014

Vegi season has officially begun

Went to the garden today and suddenly I had an urge to cook something... don't know what yet, just something.  Got some young garlic, broccoli, broccoli greens, young onion, thyme, and the one sprig of asparagus.


I tossed the garlic and onion bottoms in some water, put it on to simmer for a while.  I will probably blanch the broccoli leaves then fry them with crunchy bacon.  mmm, bacon.  Just feel like broth and greens.

Thursday, April 10, 2014

Seed Library


Lately I've been so busy preparing food, that I haven't had much time to write.  Well, by preparing food, I mean this...


I'm not going to eat worms, but I wouldn't starve if that's all there was.  What I'm doing is digging the garden for spring planting.  Over the winter these lovely little soil dwellers have been transforming compost into soil for me.  Now that the soil is ready, it's time to start thinking about seeds.


Our local library service and LifeCycles have got together to create a seed library.  I've read about seed banks where you get a few seeds, plant them in the ground, select the best that grow and let them go to seed.  When you collect the seeds, you keep some for next year, and the rest you send back to the seed bank.  This Seed Library is a lot like that, only a bit closer to home.

What I really like about this is the sense of community it provides.  You know that the seeds you save and share might be going to your neighbour next year, or the person who runs the little shop down the road, or that person who stopped and helped you out when you had a flat tire, or.... That's why this idea works so well with the Library service.  Instead of borrowing books, we are 'borrowing' seeds.  It keeps things in the local community which I think is a feeling that the large seed banks don't have.

There is a big Launch/lunch tomorrow (Aprl 11, 2014), in the Central Library Branch courtyard, right downtown Victoria.  I wish I could go, but I have to go see a man about some moths.  But I'll be participating and doing my part to help maintain the seeds in the community.


Sunday, March 23, 2014

If you love bees...

 If you love bees... or eating food in general (without bees there would be almost nothing to eat, except maybe Soylent Green), then here's something you need to know about.

The bees are disappearing.  Even The Doctor knew it was important.  As weird as they are, bees aren't actually aliens (probably), but rather are a vital part of our ecosystem.  Not an ecosystem, but our as in the Human ecosystem that we depend on for survival.  Bees make the plants go happy (reproduce) which in turn participates to our breathing and eating abilities.  There are places in the world without bees, and they suffer.  It is unlikely that the amount of physical labour involved in living without bees could produce enough calories to sustain the population needed to produce that labour.

So basically, no bees quickly leads to no humans, or very few of us surviving, probably not you or me.  Even if we were only to loose the plants requiring direct bee intervention to stimulate their sexlife, then the other plants, the ones that don't need bees for all or any of their pollination would suffer.  Out of those plants we eat (or can eat) as humans, many of the ones that do not rely on bees, rely on human labour.  So reduction in food, leads to reduction in population, leads to a reduction of human labour... which will mean less food...  On top of that, the plants that don't require bees, do require plants that require bees for long term survival.  For example, bigger plants protect smaller ones from extreme weather and capture (and slow the release of) water, which limits the extremes the smaller plants need to endure.  Smaller plants die off quicker, creating better soil conditions, but they also have lovely root systems that are good for reducing erosion, protecting the soil from extreme temperature fluctuations... and so on ad infinitum.  No bees means a good chunk of that sustainable system is lost, which puts more stress on the rest of the system, which soon leads to less food for humans... It's more complex than many of these 'what if there weren't any bees' theories take into account.  We can extend the time humans survive through chemicals, however, it appears that this technique only works as a short term solution, and actually reduces the capacity of the land to support food growth over the long term... and, in theory, long term survival of our species should be important to us.

We need to do something about this.

Here's something:


http://www.indiegogo.com/projects/open-source-beehives


This is a beehive.  What's really neat about it, and why it captured my interest is that it combines really old and really new technology together to create something more accessible and functional than the modern or ancient technology can do on it's own.

It's called an Open Source Beehive and it's plan is to provide a make your own, printable top bar beehive.  You use this mighty router table printing thing and special, bee friendly plywood to make a flat-pack hive that fits together like a piece of Ikea furniture.

Now I've been wanting a beehive like this for years.  I've even started building (not one, but) two.  Only things came up and the wood I had ready got used for other things.  It takes many tens of hours to make one of these things if you don't have the skills or tools (or in my case, neither).  So being able to 'print' a beehive in about half an hour or so, is fantastic.  I just need to find a router printer thing big enough.

The other half of this project is to monitor the health of the hive using a sensor.  This part doesn't interest me as much, I don't have wifi and cell coverage is poor here.  But for those of you who are interested in this, it attaches to the beehive and tells your smart phone (something else I don't have) if there are any changes in air quality or hive temperature.  It's really useful if you aren't talking to your bees daily.


This open source beehive project is currently in the crowd funding stage.  Basically they ask people to donate money if you believe in this project and want to support it.  You can donate one dollar or one million... they probably accept euros and yen as well.  If you go to the link and look at the right, at different donation marks, you get a reward.  The theory behind crowd funding is a lot like knitting.  Every stitch counts towards a sweater, every dollar donated adds up and make the project happen.


My motive for sharing this isn't just to rant about the importance of bees.  There is a method to my madness:

First, the crowdfunding only has a few days left and they aren't quite at their goal yet.  Even if you don't donate, maybe you could mention it to your bee loving friends.

Second, I'm searching for people in the local area interested in working together to make some of these hives, with the theory that if we buy in bulk, it gets the price down and when the bees arrive, we can support each other with advice and stuff.


Friday, February 21, 2014

Homemade pepperoni - my first dried sausage adventure


For the holidays I received this wonderful book called In the Charcuterie by Taylor Boetticher and Toponia Miller.  It's full of beautiful photos and well worth a gander.  Most of the book is about working with fresh meat, how to create beautiful finished dishes like roasts and instruction on how to debone and create different cuts of meat from a carcass.

The section on curing sausages is short but empowering.  The authors give a general recipe on how it's done, including different casing sizes, drying environments and all the necessary and sufficient conditions to be a success.  For example, lamb casings or thin hog casings are more forgiving and don't need as specific an environment to ferment and dry in than great big fat bung casings.  Which means, that if I turn the heat off in my room for two weeks, in the middle of winter, I can cure and dry my own sausages.

I followed the recipe for pepperoni except that I used smaller hog casings and changed the drying time/conditions accordingly.  But this book is friendly towards that kind of change.  Basically they take the attitude that people have been curing sausage like this for a few thousand years, without refrigeration or fancy electrical curing chambers. What's more, they didn't have shops to buy specific fermenting cultures from, instead they used things like a splash of wine in the mix.  This stance is quite different from the usual 'you must do this specifically and buy all this fancy stuff, or everyone dies' approach to curing meat.

Feeling empowered by the book, I gathered together my spices, curing salt, and garlic.  I used 7 lb of old goat, 1 lb of pork and 2 pounds of pork fat.


Mixed it in with the cubes of meat and stuck in the fridge overnight.  


Laundry rack transformed
into sausage hanger
I have this antique meat grinder that I found at a yard sale, so I thought I would give it a try.  It works marvelously well, just like the books say they should.  When I tried my modern grinder that I bought from BigBoxMart (I'm not proud of that), I could see that all the problem's I've had making sausages in the past were not me, it was the tool being completely useless.  This made me giddy with joy to have a meat grinder that works effortlessly, although, it was a bit small and can only process 1 tablespoon at a time - I am going to keep an eye out this year for a much larger one.


After stuffing the sausages, making sure all the air is removed (both of which I need more practice with as I'll show you later), then it's time to hang them to dry.  Ideally the temperature will be between 65 and 70F, and be constant for the two weeks.  I choose 68 degrees because, well it's cold enough thank you.  Each room has a thermostat so it was easy to keep my room a steady temp.  As the humidity was dry that week, I lightly misted the sausages with fresh water a few times a day for the first three days.

I was a bit disappointed because none of the friendly white mould formed on the outside of the sausages.  This mould is suppose to help keep things safe and prevent bad microbes from settling in.  Next time I think I'll pick up a piece of sausage from the local Salumeria and put it in the same room as my hanging sausage, the mould should migrate just fine.

After a week, we started testing them, yummy, but still a bit raw texture in the middle.  Left them another week, and much better.


Look how beautiful and red that meat is.  This tastes amazing!

But wait, not all of them look like that.  Some of them look like this:


Sort of yellow/brown inside.  Not appetizing at all.  Though they smell okay, I'm not happy with them, so they get tossed out.  I don't know why they look like this, but I have suspicions.  Maybe, I didn't get all the air out of the casings - I admit, I did have problems with this - or stuff them full enough.  Or possibly the outside casings dried too quickly leaving the moisture inside to rot the meat instead of fermenting and drying it.  I don't think this second one is what happened because I would expect a bad meat smell, where there is no real change in smell from lovely red insides and ugly brown ones.  Only about a quarter of them turned ugly, so three quarters good, that's great for a first attempt.

What I've learned from ugly brown insides is that I need more practice making cured sausage.  How exciting.  I wonder what flavour to make next.

Cooking with Allergies:  There is a lot of room to adjust for allergies when making your own sausage.  If you have problems with meat and mould, this is probably not the recipe for you.  However, spices, wine and other allergies issues can easily be accommodated.  In the book there is a recipe for your basic cured sausage with specifies the ratios of meat, salt, curing salt and fat.  Page 232 gives you everything you need to know about this, and you can play with your spices and herbs from there.

The recipes in this book do not include commercial starter or filler which can be a source of allergies.  HOWEVER, it does include nitrates (curing salt #2).  Some people are sensitive to this.  There isn't any mention on not using curing salts (nitrates/nitrites).  From the research I've done, omitting nitrates/nitrites from whole muscle cured meats like bacon is possible, just increases the risk of spoilage. However, omitting it from dried sausages is not a good idea for a person with a Western immune system.  If you want to omit the curing salt #2 from your dried and cured sausages, do your research first!  And know that in the West our bodies are no longer trained to handle a strong bacterial load (both good and bad).

Affordable?  Pork cost about $3 a pound, pork fat $1, the goat roughly $4 a pound.  The goat was old and angry, so the meat isn't much good for roasting or much else.  This used all the little scraps of meat that would often go to waste in butchery.  That's about 7 percent of hanging weight that would usually be lost.  So do we count the cost of the goat since it's salvaged material?  I think I will because it makes a fair comparison for later on when I run out of angry goat.

Meat was $33, but it was (mostly) grown on the farm and raised organically.  Spices, garlic, wine, casings, let's round it up to $2.  Take into account that although I started with 10 lbs of sausages, they lose about 30% of their weight so I ended with 7lbs.

$35 for 7 lbs of artisan cured sausage that I know exactly what went into it, is $5 a pound.  I don't think that's bad at all, though I can't remember off the top of my head what the going rate is in the shops, but I wouldn't be surprised to pay between 2 to 4 dollars an oz for artisan sausage.

Then again, I do need to knock off a quarter of the finished amount for my learning mistakes.  So really, this batch was almost $7 a pound.  But I expect to get better at this and have less waste in future.

Healthy?  Yes.  In small amounts.  There are some medical studies kicking about these days that say you should have less than 1 oz of cured meats a day.  I suppose if you are on a fully Western diet full of wonderfully creative preservatives and manufactured salts like MSG, adding cured meats to your diet would increase the stress that salt puts on your body.

However, that said, people have been eating this sort of sausage for several thousand years, and up until the last 120 years or so, the amount of salt used, and nitrate/nitrites used were considerably higher.  This kind of food was a staple in the diet, and the diseases attributed to cured meats only started appearing in the last hundred years.   My interpretation of this is that perhaps cured meats is simply a scape goat for a greater problem in the Western diet.

But even still, the flavour of this is so intense, it makes a better condiment than main dish.  I know everything that went into my sausage, so compared to big factory made peperoni, I feel this is healthier.

Safety?  Since I have no artificial colours or aesthetic ingredients added to the meat, I can tell right away if there is something wrong with the appearance or smell.  Because they are made in small batches, it is easy to do quality control.  Though large scale, factory production of cured meats don't fulfill these conditions, they are usually safe.  But when they go wrong, they go wrong on a big scale.  There has been a few issues with cured meat production in Canada over the last few years, with deaths.  I feel safer doing things at home, however, I arm myself with the knowledge needed to create safe food.

Tuesday, December 10, 2013

Bento: Shiokoji chicken, rice, tomatoes, cabbage and pickled daikon

Today's bento was rice, shio koji chicken, tiny tomatoes, cabbage kimpira and those pickled radishes I told you about the other day (very tasty, if a bit spicy).


The little triangles contain raisins and toasted almonds for emergency energy.


For tea, I combined some green tea with some herbs I gathered and dried during the summer - gunpowder green tea, sage and mint.  Brew it, strain it, put it in my to-go mug.  yum.


Affordable: probably 3 to 5 dollars for the entire lunch, depending if the veg and chicken are on sale or not.

Healthy: yep, though I maybe don't need such a large portion size, as packing this lunch box averages 750 calories, nearly half my daily intake.  But if we aren't counting calories, then everything in here is yummy and good for me.


Shared on:


Bento Lunch