Friday, March 29, 2013

Making Pastirma at home - plus recipe

I'm intrigued by stories of food from the Old Country.  Traditional recipes that combine preservation and deliciousness are always up my alley.

A friend of mine from Lebanon was telling me about this cured meat he knew as a youth.  Back in the old country, it was made from goat or mutton, coated with a spicy paste, and dried for ages before enjoying as a breakfast meat of all things.  In North America it's easier to get beef, so when I saw an Eye of Round Roast on sale, I picked it up and set to work.

Pastirma has several different names depending on the region, and different variation on the spice mix.  But what they do all seem to share in common are that the meat is pressed and the spice mix includes fenugreek and garlic.  Legend has it that in past days nomadic tribes would press the meat between the thy and the horse as they road along.  The salt from horse and rider sweat would help cure the meat, then it would be coated in spice and hung from the saddle as they road from place to place - how much of this is true, I don't know (I wasn't there).

Pastirma is also the ancestor of several different cured meats.  You can see how it travels West across Europe   There is Bresaola, and even Pastrami and Corned Beef are very similar to this style.  Interesting how more sedentary cultures use a brine cure, where as more mobile cultures use a dry cure.  If I was still an anthropology student, I would write a paper on this.

The modern method does not require a horse.  After much questioning of my friend and research (both in books online) I found two recipes for pastirma that I liked best: Middle East and Africa Cooking & Baking recipe for Basturma and TheArmenianKitchen.com Homemade Basterma.  I ended up combining Folklore with these two recipes.

I adore how this turned out and can easily see why it is so popular in the middle east.  I just want to gobble it all down, but it's so rich that only a few shaved slices is enough for me.  I can also see why it's so expensive to buy in the shops; it took over 5 weeks to make.  If I had a better set up for curing my meat, I think I could have done a better job, but even with my limited resources  it makes a very friendly start to dry curing meat.  It's also very forgiving about timing, humidity, temperature, &c.... which in my opinion are the best qualities of any long-term, farmhouse, homemade, foodstuff.


You can use any lean cut of red meat: lamb, goat, horse (if you are into that kind of thing), moose, dear, antelope, beef, or well, just about anything.  My understanding is that the better quality the meat, the better the finished product, so for my next go at this recipe I'll be using some goat that was raised on this farm.  Then again, it turned out this good with some commercial feed lot beef, so I can't imagine how good it will be with some real meat!

My Pastrima Experience

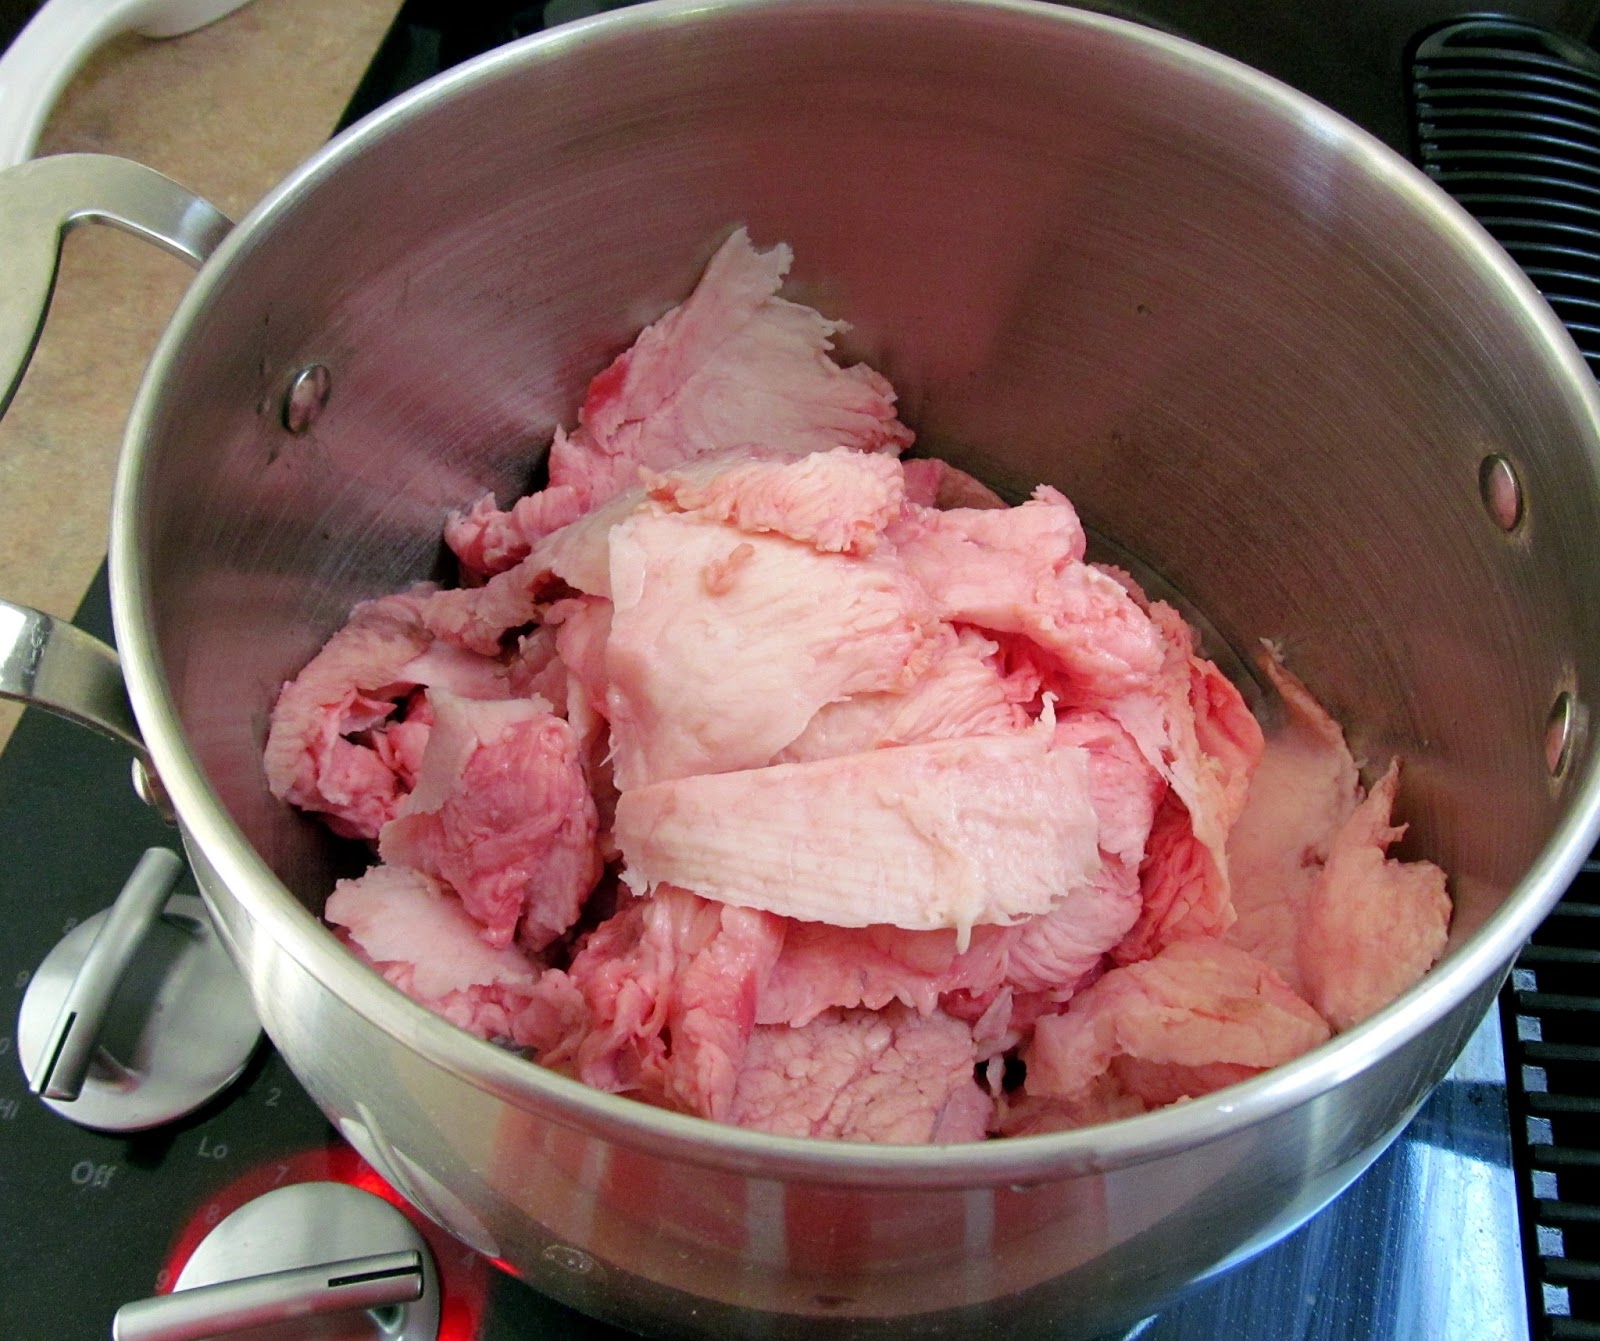
About 4lb meat (I used eye of round cut in half lengthwise)  no more than two inches thick.
eye of round
less than 1 cup kosher salt


  • Trim as much fat and silverskin as you can from the meat, slice it in half longwise if it's more than 2 inches thick, and rub the salt into the meat.  Put into a ziplock bag, remove the air from the bag the best you can, and leave in the fridge for 4 to 6 days.  It will be firm to the touch when it's ready.
  • Rinse off and soak in cool water for 1 to 3 hours.  Rinse and dry before moving onto the next step.
  • Wrap the meat in cheesecloth and press.  I used an old crock and some boards and rocks (bleached with H2O2, both before and after).  Press in the fridge for about 2 days.


getting ready to press the meat
meat wrapped in cheese cloth and a board for pressing.

pressing the meat in the fridge

  • Take some kitchen or butcher twine and place in boiling water to sterilize.  A darning needle too.
  • Thread the string through the narrow end of the meat, tie in a loop so you can hang the meat by this.
  • Unwrap the meat, and wrap again in clean cheesecloth. Hang for 10 days for 2 weeks (I hung in the fridge, but anything below about 10 degrees C should be fine if you salted it enough in the first step.


hanging in the fridge
meat after hanging in the fridge
    spices ready to mix
  • Prepare the spice mix.  I used:
1/3 cup Paprika
1/4 cup Fenugreek
1 Tbs Alspice
1 Tbs Black Pepper Corns
1 Tbs Cumin Seeds
1 tsp Cayanne
1 Bud (not clove, the entire bud) of Garlic
1 Tbs salt
about 1/2 to 1 cup cool water

  • I ground any spices that needed grinding, then mixed in the cool water a little at a time to make a thick paste.
  • I unwrapped the meat and carefully coated it with the spice mix.  It smelled amazing!  I was very careful to get every bit of surface area covered, it took a while.
  • at first I hung it near the hearth,
    then I remembered fire makes heat,
    so I moved it to the cupboard
  • Hang to dry somewhere out of the way.  Ideal would be about 60 degrees F, and moderately humid.  Ours was decidedly less humid and warmer (but don't tell the experts, it still turned out amazing).
freshly sauced meat


  • The spices are mega bug repellents so don't worry about that.  But you probably want to avoid somewhere with drastic changes of temperature or too much sunlight.  After the outer coating started to dry, my final hanging place was in the bottom of the pantry, next to the sauerkraut.
  • Hang for 2 weeks.
  • If there is black or fuzzy mould, worry.  Or if it smells rotten, then you worry. Otherwise, so long as you didn't skimp in the salt on the first step, then there shouldn't be any reason to worry.
  • When the time is up, grab a beer, have a party, and enjoy your Pastirma (ps, beer intensifies the spicy flavour, not calms it like with a curry).


Lunch!
If you get that far, you can see why it's traditionally shaved off with a hatchet.  It's very firm and the knife needs to be very sharp and strong to slice into it.

Shave thinly as you intend to eat it.  Don't cut up too much before hand because it won't keep as long.  You can store at room temperature in a pinch, but it will continue to dry out, so best to wrap in some butcher paper and put in the fridge.

I'm very impressed how delicious this is.  I'm going back for seconds now, and I might try putting some in a pasta dish tonight for dinner.

Affordable Cooking: It cost me $15 for the meat, another $3 for the spices and salt (probably less) so that's $18 for 2.5lb.  A brief look at the internet says that it runs about $20 a pound to buy ready made Pastirma (plus shipping), but I haven't found any sellers that will ship to Canada, so I think you would have to find a speciality shop for that.  I think there's one fellow in Vancouver that makes it on a large scale, but you have to be a friend to buy it off him.  So to buy this much Pastirma retail, it would be at least $45 plus shipping.... I'm happy with how little it cost me and (provided I can get the meat for a good price) will make this again.


Cooking with Allergies:  This is pretty good.  You can choose the meat and to some extent modify the spices (just be sure to keep the salt, fenugreek and garlic the same) and it does not contain nitrites/nitrates which can cause a reaction in some people.  However, it does have a high salt content.  It needs it to kill off the evil bacteria, so if you are on a low salt diet, only have one or two slices.  The current recommendation is that you have no more than one ounce of cured meat a day, so it's a good aim to um,. well to aim for.


Monday, March 25, 2013

2 recipes: hot cross buns and sourdough hot cross buns

Earlier I talked about how to convert a regular yeast bread recipe to a sourdough recipe.  Although the theory is pretty straight forward, I've always felt rather intimidated by the idea of trying it.

Finally, my desire for sourdough hot cross buns overcame my fear of failure, and I set to work converting an old favourite recipe from commercial yeast to sourdough.


This first recipe come from one of my all time favourite bread (and cake books) Homemade Bread by the Food Editors of Farm Journal   It's out of print now, but if you ever see a copy at a second hand bookshop or yard sale, snatch it up.  Not only is it full of yummy bread recipes, the decidedly sexiest attitude is always good for a laugh.

Hot Cross Buns

Easter Buns with frosting crosses - traditionally served on Good Friday

1/4 cup milk
1/3 cup sugar
2/4 tsp salt
1/2 cup shortening
2 pkgs. active dry yeast
1/2 cup warm water
3 eggs
4 cups sifted all-purpose flour (about)
3/4 cup currants
1 egg white
1 tsp cold water
white frosting (recipe below)


  • Scald milk,add sugar, salt and shortening; cool to luke warm.
  • Sprinkle yeast on warm water; stir to dissolve.
  • Add eggs, yeast and 1c flour to milk mixture; beat with electric mixer at medium speed about 2 minutes, occasionally scraping the bowl.  Stir in currants and enough remaining flour, a little at a time, to make a soft dough that is easy to handle.  Beat well.  Place in lightly greased bowl' turn dough over to grease top.  Cover and let rise until doubled, about 1.5 hours.  Punch down.  Turn onto lightly floured board.
  • Roll or pat to 1/2" thickness.  Cut in rounds with 2.5" bisket cutter; shape cutouts in buns.  Place about 1.5" apart on greased baking sheets.  Cover and let rise until doubled, about 1 hour.
  • With a very sharp knife, cut a shallow cross on top of each bun.  Brush tops wit unbeaten egg white mixed with cold water.
  • Bake in moderate oven (375F) 15 minutes  or until golden brown.  Cool on wire racks about 5 minutes.  Then with tip of knife or teaspoon, fill in the crosses on buns with White Frosting.  Best served Warm.  Makes about 18 buns.
White Frosting: Combine 1c. sifted confectioners sugar, 1/2 tsp vanilla and 2 Tbs hot water.  Mix until smooth.


Now, the above recipe makes a decent hot cross bun, but I do usually add spices and candied peal to it.  I also find it a wee bit sweet for my taste, particularly the frosting.

This next recipe takes a long time to make, but it's so worth it.  I recommend making the sponge in the morning, the first part of the dough late in the evening, leaving it to rise overnight, then shape and do the second rise in the morning.  The buns should be ready for late afternoon on the second day.  Doing the second rise overnight ends up drying out the surface of the buns before they go in the oven which makes them hard to cut.

It's also very difficult to photograph these hot cross buns.  By the time I have the props and camera ready, the buns are all eaten.  Three days of baking from dawn till 3am the next day and I finally learned to hide the buns while they cool so that they didn't get snatched up.  (I did a lot of test batches and testing, so I'm confident they are fantastic).

Sourdough Hot Cross Buns


A word about Sponge.  Although the word sponge can mean different things in various parts of the word, I use it here to mean a fairly active runny batter like substance made of sourdough starter, flour and water.  Make the sponge at least 4 hours before you plan to begin the bread.  I usually make mine the night before.  Mix at least 1/4 cup flour, 1/4 cup water (or more) and at least 1/8th cup sourdough starter.  Mix them well to make a runny batter, and leave in a warm corrner of the kitchen, covered with a cotton or linen towel.  After a few hours, depending on your temperature, the weather, whatnot, it should be bubbling.  You know the yeast is active in it.  If you leave it more than 24 hours, you need to feed it again.

1/4 cup sourdough sponge
1/4 cup milk
1/4 cup honey/maple syrup/or other sweet liquid (I use the juice the fruit is candied in if there is any left over)
1/2 tsp salt
1/2 cup butter/lard/or other fat (butter is best)
3 eggs
less than 4 cups flour (your choice but I recommend the first cup be all purpose or bread flour).
1/2 cup raisins
1/2 cup candied ginger (optional)
1/2 cup other dried or candied fruit or peal
pinch each nutmeg, cinnamon, allspice, and cloves


  • Scald milk, add honey, salt, butter.  cool to luke warm.
  • In a big bowl, add eggs, sponge, 1 cup of flour, and milk mixture.  Mix a lot.  What you are trying to do here is to blend everything and activate the gluten in the flour.  It takes about 5 to 6 minutes to mix this by hand.  I do it in 2 min sessions, with a min or two rest in between.  Wooden spoon is my favourite tool for this.  Alternately, you could mix in electric mixer for 2 min.
  • Add spices, and fruit, mix some more.
  • Mix in the flour a little at a time until a soft dough forms.  Should be barely firm enough for you to handle.
  • Place in a lightly greased bowl, grease the top of the dough, and cover with a linen or cotton towel.  Rise until double in size.  Even with a very active sourdough starter, THIS TAKES A LONG TIME SO YOU MIGHT WANT TO DO THIS OVERNIGHT.
  • Punch down and break off egg sized balls of dough.  Form into bun shapes and place in a lightly greased tray or baking pan.  Cover and raise till double in size.
  • Carefully cut the cross in the top with a VERY sharp knife.  Optional:brush with egg white mixed with 1 Tbs of cold water.
  • Bake at 375 degrees F for 20 to 25 min.  


I'm not bothering with the egg wash (I don't like egg whites much, especially with bread) or frosting, but feel free to do it if you like.

Ideas for fruit to put in them: dried currents, dried cherries  dried raisins  dried peal, freshly grated organic citrus peal, candied peal, dried pineapples, dried anything... make sure you pit and chop up anything bigger than a raison.  My favourite is to get the chunky runny marmalade they have in Europe and strain off the juices (use this instead of honey) and the chunks of orange as the fruit for the bun.

Healthy: well, um.  I don't recommend  eating as many as I have this week.  But hey it's only once a year and when compared with commercial made hot cross buns full of highly processed ingredients and florescent coloured lemon peal like substance, YES they are much healthier.

Affordable:  I have no idea.  I don't even want to price these out, they are so delicious.  They do however help use up the left over dried fruit you have in the back of the cupboard... that's got to count for something I suppose.

These are NOT suitable to serve to your Vegan Friends because of the egg, honey, butter, &c.  See this vegan friendly recipe for hot cross buns.

Allergies: This is fairly easy to modify for allergies.  I don't recomend cutting down on eggs and butter though, it is what makes the dish.  If these are the things you are allergic to, then please make the vegain version I just linked to in the last paragraph.


Sunday, March 24, 2013

Converting a normal bread recipe to sourdough

First stage, to write out a recipe based on the
original hot cross bun recipe, yet incorporates sourdough
I almost never have commercial yeast in my house any more  I much prefer to make and eat bread with sourdough.  This is mostly because I'm lazy.

Lazy because commercial yeast acts really quickly and you have precise timing for each stage - sourdough is less fussy and gives you an hour or two leeway.

I also really enjoy the flavour of sourdough.  I can make it strongly sour (making a stiff sponge) or mild and lofty (a runny sponge started several days before baking day).  With sourdough you are the master.


Been hankering for a sourdough hot cross bun recipe but I haven't found one yet that captures that certain I don't know what, I remember from my youth.   The Vegan Sourdough Hot Cross Bun Recipe I posted earlier is very good, but I'm looking for something a bit more old fashioned and full of eggs.  So instead of working from a sourdough recipe, I decided to start with a recipe I know and love, and transform it into sourdough.
highly amusing bread book

The recipe I'm starting with is from my most favourite bread book ever:  Homemade Bread by the Food Editors of Farm Journal.  Now, I don't recommend this book to everyone.  In fact, I think most people would be offended by it's attitude towards woman.  But I find it a funny attempt to counter the feminist movement.  I laugh at descriptions how on election night, a woman should be in the kitchen baking Election Night Bread (be careful how you spell that folks) to serve to her husband and his friends from work as they gather around the television watching the polls.
I have Baking with Sourdough
on my kindle

The other reference I'm using to convert this modern recipe is Baking with Sourdough (Storey's Country Wisdom Bulletin) by Sara Pitzer.  It's an excellent reference for beginners and experienced sourdough lovers alike. I find myself referencing it time and again.  I highly recommend it.

Sara writes:

"To adapt a yeast recipe, begin with a small amount of starter, about 1/4 cup... Mix the starter with some flour and some of the liquid from the basic recipe you want to convert.  Figure that 1/4 cup starter has replaced about 1/4 cup flour and slightly less than 1/4 cup liquid in the recipe.... "  She goes on to describes the method of making a sponge, mixing some of the flour and liquid with the starter and letting it sit 4 (for mild flavour) to 24 (for strong flavour) hours.  Then proceed with the regular process, being careful to get the right texture of the dough (it helps to have made the recipe using commercial yeast before hand so you know what the desired texture and consistency of the dough should be) and allowing for longer time rising the dough.  Sara finishes up saying, "If it 'thinks good,' try it." which is exactly what I plan to do.


A few things to note (and Sara's book goes into more detail about this) is that you can control how strong a flavour your sourdough starter gives your bread.  You are not at the mercy of your starter.

One way to control the flavour, making it more mild, is to create a runny sponge a few days before hand.  I usually keep my starter extra-thick and then create a runny sponge from it (using by volume 1 part starter, 1 part flour, and 2 parts water).  Feed it at least once a day for at least 2 days, twice for a more mild texture, don't worry if you make too much, the extra sponge can become sourdough crackers or bread.  By having the sponge runny and at room temperature for a few days before baking day helps make the bread more lofty and less sour.


UPDATE: I just tried my buns and they are officially delicious.  Be posting both recipes very soon.


Saturday, March 23, 2013

Sausage making marathon

 I just spent the last two days learning to make sausages.  Well, I say learning when in fact it's more like floundering.  But we did it.  One small 25lb leg of pork is now sausages.

I'm exhausted.

And elated.

But in the end I learned a lot about meat, equipment, sausage making and myself.  I also learned that no matter how sexual or sensual food is, there is nothing quite so pornographic as stuffing your own sausage. And because I want this to be an all ages friendly blog, I'm not describing that part any further.  *shudders*.

One thing I learned about myself is that I don't enjoy a meaty sausage (stop snickering, I'm serious).  I like there to be a little bit of filler (okay, I'll join you in a snicker) in the sausage, like bread crumbs.  So I experimented with 5lb batches until I got something that I really enjoyed.  I also played around with what order we add the spices, how much liquid, what ingredients that sort of thing.

Being a pork leg, it was rather lean, so I ran out of fat really quickly.  But I had some beef suet in the freezer that I made do.

I also learned that the hand grinder and sausage stuffer I picked up at (brace yourself) Walmart completely sucks!  It is not properly cast, the threading on the ring is a different TPI than the body of the machine.... and well, I wrote rather a scathing review over on their site, so I'm not going to complain too much here.

What I did ending up doing was using my Universal Food Chopper (which according to most people cannot handle raw meat at all, never, ever, ever!

oh, yah, you can see how much trouble it's having.
I said that last bit sarcastically by the way

This is on the coarse setting for the first pass
My favourite way to make sausage was to chop the fat up by hand, fairly fine (1/2 inch pieces) add to the meat (roughly 2" pieces), mix with the spices, herbs and whatnots.  Freeze for half an hour, chop (technically this machine isn't grinding) on coarse  mix in the bread crumbs, freeze another half an hour, chop on fine, and then mix in the wine.  Freeze 30 min and then stuff away.  It's a lot of work, but the end result this way is in my opinion the most tasty.

sausage resting, waiting to be made into links
looks pretty discussing at this stage.

Still getting the hang of stuffing the sausage and making links, but I was pleasantly surprised when I saw this:


They actually look like sausages when you fry them up.  Isn't that nice?

A bit of mustard, a crust of sourdough and some home made sauerkraut and I'm happy as Larry at Lunchtime. 


I'll post my variation on a garlic sausage recipe later, I want to have a few more taste tests to make sure I got it right before I commit anything to the internet.  


Affordable Cooking: Oh yes!  Pork was 98 cent a pound, bread crumbs were made with dried bits crust that would have otherwise gone to the chickens or compost.  Spices (most of which were already in the garden) were next to nothing.  The only real cost would be the 1.5 cups of Plonk (red wine) I used in the garlic sausage.  But if you live outside of Canada or make your own, red wine for cooking is far more affordable.  Casings can be bought at Stuffers and are good quality and affordable.  If you are a home sausage maker like me, go for the discount scrag ends casings.

I'm going to say it cost me $1.25 per pound of finished sausage.  I don't remember how much sausages cost in the shops, but chances are they aren't made to your specific dietary needs and desires.  

Cooking with Allergies:  A major yes for this one.  Sausages are infinitely variable.  you can even go the vegan rout and get artificial casings and fill them with spiced up lentil mush.  

By making my own sausage I can eat sausages for the first time in my life without getting a stomach ache. 

Healthy? Mostly yes since you are choosing your own ingredients and salt content.  Sausages need quite a bit of fat (20 to 40%) to have the right texture, so this may pose a problem for some people.  However, I don't eat many sausages (one a meal is plenty for me) and always match it with something like sauerkraut to aid in digestion. 

With my basic understanding of healthy eating, I would say yes, these sausages are good for you when taken internally and in moderation.

Thursday, March 21, 2013

Making Hummus Manually - introducting the universal food chopper

  
Hummus is one of my favourite feel good foods.  It's simple yet flavourful.  It's spicy yet somehow also soothingly mild.

Hummus gets along well with everyone, be it cheese or crackers, carrots, or apples.  It's the perfect food for dipping, or just dipping one's fingers in and licking them sensually.

Hummus is perhaps the second most sensual food, after chocolate of course.  If you make your own, you can make it crunchy or silky.  Piquant or soothing.  It stimulates the senses and the appetite.


As some of you may have figured out by now, my blitzer and I do not get on well.   An, my blender... well... we don't talk any more.  But I did happen to get my hands on rather a nifty gadget at a junk shop the other day.  It's called a universal food chopper and according to the ephemera of it's time (circa 1890s through 1960s) it can handle anything.  But can it handle hummus?

Yes.  It can.


Using my standard hummus recipe, and the nut butter attachment, I pealed and used the food chopper to mush up the garlic, then went to work on the well drained chickpeas.


The chickpeas come out looking rather flaky, but they are soft as butter.


I mixed in the usual and massaged it with my hands for about 10 seconds to blend well.  I suppose I could use a spoon (and would do if I was cooking for someone else) but hey, it's an excuse to get my hands dirty.


Time-wise, including cleaning, it took the same amount of time as using a blitzer.  It did take more concentrated effort on my part, but that might be part of the learning curve.  I now know I can make hummus if the power goes out, which is a good skill to be able to have during storm season or zombie apocalypse.

Tuesday, March 19, 2013

Bring your own toppings

5 year old (ops, my mistake, 6 years old in a few weeks)
and 2 year old enjoying vegetable rich pizza
Homemade pizza can be a delicious and healthy treat for kids.

We had a top your own pizza party for lunch the other day.  It went really well and I can't wait to do it again.


I had the grups (grown-ups) bring their own toppings and cheese,  I provided the crust and the sauce.

I'm very impressed by how many more vegetables parents feed their kids these days, compared from when I was younger.  Broccoli, spinach, mushroom, and ham were the toppings chosen by H (the oldest who topped her own pizza).  She even shared a bite with her little sister.

First time the little ones are eating pizza so it took a bit of getting use to.  But once they figured it out, boy did it go down fast.


For this I used my regular sourdough bread dough, raised once and put in the fridge for at least 24 hours.  Then, the day of the party, get the dough out a few hours before hand to wake up.  Set someone to grate the cheese, another person to set up the topping station, and a third person to fry the bacon while you break off egg sized balls of dough and roll them out into roughly pizza shaped flat pieces.

By now the topping station should be finished and that person can be in charge of putting the crust on the pan, and saucing it up.  The cheese person is done now, so she or he can guide the kids as they top their own pizza.

individually topped pizzas, ready to pop in the oven
Bottom shelf of the oven at 425F, for roughly 14 min and presto pizza!  Don't put more than one layer of pizzas in the oven at a time, it makes the crusts go soggy and not cook right.


mmmm, yummy.
Very allergy friendly: this is great because you can make the crust from scratch and each person can bring toppings they like.  That way you don't have to fret about accommodating specific food needs.  You can even make yeast free or gluten free crusts if need be.  

Healthy? Oh yes!  Did you see all those vegetables.  I've noticed that if the grown up isn't scared of eating a little veg, neither is the kid.  It's a fairly balanced meal, so long as you don't over do the cheese and meat.  Make the crust thinner for diabetics and people trying to loose weight.  

Affordable cooking:  This is a great twist on the pot luck where everyone shares the labour and the price of ingredients   It probably costs a total of $1 to $4 per personal pizza, which to be honest, is more than I like to spend per person usually, but it's well worth it when you see how much the kids are enjoying the process of making their own pizza.

This can be made Vegan Friendly, but it takes a bit of effort.  If you are like me and like to cook for your vegan friends, then I recommend running the recipe for the crust by your vegan friend first.  There are vegan cheese out there, but chances are your friend has a particular brand they like and knows which ones melt well and which ones turn to glue when heated.  Get him or her to bring their own toppings and treat it like you would a strong allergy (their toppings go separate and don't get mixed with the non-vegan food).  If they are strict vegans, then keeping their pizza on a separate tray to the meat pizzas, is a must.  Cook theirs first so that they don't accidentally get any meat or cheese on the pizza from the cutting knife.  Just little things like this make a huge difference and help your friend feel comfortable.  


Monday, March 18, 2013

Transitioning Back to Solid Foods - recipes

Bread soup, looks disgusting, tastes yummy
After a week on a clear liquid diet, it was time to begin eating solids again.  My stomach is still very grumpy, so I decided to make a slow transition back to solid foods by starting with some stomach-mild mushy foods.

The nice things about these recipes is that it helps to use up all that extra broth left over from the previous week.


Bread Soup

This is a very British food, traditionally fed to the very young and sickly.  Also makes a good breakfast for the healthy.


A couple of bread crusts, or slices of bread.
A teaspoon of butter  (not Marg unless you are vegan or can't eat butter for some reason. I use goat butter because it's easier to digest.  I can't remember the specifics, but there is something in butter that helps wake up your digestion system, when taken in moderation)
some broth
optional broth cube


  • Cut or crumble up the bread into bite size segments and put in a bowl with a tsp of butter.  Optional, add a crumbled up broth cube.
  • Bring the broth to a boil and pour over the bread.  Stir and add more broth if you need it.
pretty simple.


Rice Mush


About 1/4 to 1/2 cup of rice
roughly 2 cups of dashi stock (or just water)

  • Wash the rice in cool water at least three times
  • If you have a rice cooker, follow the instructions for rice porrage that came with it.
  • Otherwise, combine washed rice and dashi stock in a pot, bring to boil, cook covered on low for about an hour or until mush.
  • Serve with ume boshi (pickled plum) if you can, as this helps aid digestion.  Wakame seaweed and nuka pickled veg are also great additions to this dish and help wake up the gut.
A word about rice.  As tempting as it is, stay away from brown rice the first day or two.  High fibre foods can really set back your recovery.  Rather, stick to low fibre foods, lots of moisture, and whatever your doctor recommends. 


Affordable cooking: yes.  most of these use up leftovers, but even cooking from scratch, it's still pennies a bowl.

Vegan?  Could be if you use vegan broths and marg instead of butter

Healthy: there is a lot of nourishment in these recipes, but I would be leery of having a restrictive diet of just mushy stuff without a doctors consultation and monitoring.   

Possible allergy conflicts: if you are using commercial made broth, there will most likely be soy and lots of yeast, both common allergens.  

Sunday, March 17, 2013

Vegan Sourdough Hot Cross Bun Recipe

Happy Springtime everyone
Hot cross buns, my most favourite bread.

Recently I discovered this very delicious looking recipe for vegan friendly, sourdough hot cross buns.  SAChoirgirl gave me permission to share it with you here.

I haven't tried this myself yet, but it looks like it's going to be yummy.  It's got all the right stuff in it.  If you do end up trying it, please let me know how it turns out.


Here's what SAChoirgirl has to say:


South African hot crossed buns are different from American ones. Typically they are more spicy, darker, and less sweet. 
I adapted this recipe to suit my taste, so it might not be quite what you are looking for, but it is not hard to adapt, and I think if you want something sweeter and lighter it would mean using all unbleached white bread flour, and perhaps a sweeter glaze. 
The diastatic malt powder is in there more as a dough enhancer, but it does also add a little sweetness. Bonus: I use fresh orange zest, and candied peel is optional, so you could use what you have available.


1 cup mature sourdough fed no more than 12 hours earlier 
1 cup water 
1 rooibos or English breakfast tea bag (optional) 
2 tablespoons coconut oil (you could substitute any neutral vegetable oil, if you prefer) 
1 cup mixed raisins and saltanas (golden raising). candied peel optional. 
1/2 cup almond meal (optional. The buns are lighter without it) 
1/2 cup flax meal (optional. buns are also lighter without it. I use golden flax, and add it for texture and fiber) 
1/4 cup sugar 
1 teaspoon salt 
340 g unbleached bread flour 
160 g white whole wheat or traditional whole wheat flour (can be substituted with unbleached bread flour) 
1 teaspoon diastatic malt powder 
1 Tablespoon grated orange zest 
1 Tablespoon cinnamon 
1 teaspoon ginger 
1/2 teaspoon nutmeg 
1/2 teaspoon allspice 
(all spices are optional, and can be substituted or left out to suit your taste)
Method: 
  • Heat the water to 180 degrees f (hot but not boiling. Exact temperature is not critical) and add teabag and raisins. Allow to cool until tepid. Strain, saving the water, discarding the tea bag, and setting the raising aside. 
  • Mix together the sourdough culture, the soaking water, sugar, and salt. 
  • Add the flax meal and almond meal if using, and the diastatic malt powder, and allow to rest for 15 minutes. 
  • Add the spices, and then begin mixing in the flour a cup or so at a time, until the dough pulls away from the sides of the bowl (I start with the white whole wheat flour, and then add the white flour, adjusting the amount based on the response of the dough and my current kitchen conditions. In general you want a slightly drier dough than the typical artisan sourdough, because the sugar tends to draw moisture and make the dough more sticky overnight. Avoid a very dry or stiff dough, though, as it won’t rise as easily). 
  • Kneed until the gluten is well developed (roughly 25 minutes on medium speed in a mixer. Hand kneeding sometimes goes faster). 
  • Put the dough in the middle of your work surface and let it rest for 15 minutes (I don’t use a floured surface at this point, because I don’t want to incorporate more flour. I use a rolling mat intended for making pie crusts. You could also use a vinyl table cloth or a stone or granite work surface, if it isn’t too rough). If the dough flattens noticeably, incorporate additional flour, and rest again. 
  • Once the dough holds its shape for 15 minutes, flatten it into a rough rectangle, and sprinkle 1/3 of the raisins and orange zest over the surface. Fold the dough in thirds (sometimes called a “letter fold”) and flatten again. Repeat with the remaining fruit and zest. Flatten and fold once more without incorporating anything. Then flatten again and pull the corners of the dough towards the center, shaping a tight ball. Seal the seam (dampen your fingers if necessary), turn the ball over, and tighten the outside surface by tucking it under and rolling the ball around. This is exactly light shaping a boule, and will help the dough rise. Don’t worry if some raising poke out, but try to avoid breaking the surface tension if possible. A
  • llow the dough to rise overnight or 8-12 hours. 

  • The next day make a think paste of flour and water, and fill a piping bag with a round nozzle. tip the dough onto your work surface and allow to rest for 15 minutes. If it spreads out too much, kneed in more flour. 
  • Divide into 12 and shape buns. 
  • Pipe a cross over the surface of each and allow to rise for 2-4 hours, or until puffy.
  •  Glaze with topping of your choice (egg if you don’t want it sweet, sugar and water or strained and diluted apricot jam if you prefer it sweet) and bake at 375 F until golden and cooked through (20-35 minutes). 
  • Wrap in a towel to cool, and if using a sweet glaze, reglaze once only slightly warm.

Thursday, March 14, 2013

Three Nutrious Recipes for a Clear Liquid diet

I spent the last week on what the doctor calls a clear liquid diet.  It's not much fun.  There are all sorts of reasons why a doctor might recommend this, but in my case it comes from a reoccurring problem with my gut.  When I eat a food that I'm sensitive to then my digestion shuts down and there is much pain.  It's my primary motivation for cooking everything from scratch and why I started this blog.  Surely I'm not the only one out there with these interests.

By making my meals from ingredients instead of ready-made food-like items, then I know everything that goes into what I eat.  But every now and again, I grow slack, eat something where I don't know who made it, and this is what happens.

For the clear liquid diet, the doctor recommended for me to have mostly fruit juice and broth.  No tomato, no dairy, low to no fat, and for me no soy.

The biggest problem I had with this diet was that there is nothing to grab hold of the 'food' in the stomach and slow release it.  Bread, pasta, and other carbs hold on to the food and slow the digestion, which makes one less likely to spike your bloodsugars.  Protein also helps regulate how the body absorbs energy from the food.  On top of all this, the fruit juice is very high in sugars, so my first day on this diet was a real roller-coaster.  Even without diabetes  I could feel my bloodsugars soar and plummet in the space of a few minutes.  It was exhausting and, well if you know a person with diabetes  you know how dangerous it can be.

Day two, I focused on broths and strained soups, with a bit of watered down fruit juice.  This went much better.  I didn't want to just use packet and cube broth because there tend to be a lot of salt (and finding a soy-free broth is not easy).

As I didn't know how long this diet would go on (a couple of days or a couple of months) I wanted pack as much nutrition as I could into liquid form without, and since puréeing food is not an option (I checked with my doctor)  I read a bit then set to work making broths.

Here are a few recipes that I enjoyed the most.

Soy Free Miso Soup

This can be made vegan friendly by making the dashi stock from just kombu (seaweed) and leaving out the bacon.

Speaking of bacon, check with your doctor specifically about bacon, even as a flavouring for your soup broth.  In some cases this is a huge no-no.  Given that I'm using my own home made bacon and I know exactly what went into curing it, I felt okay to put a small amount in my soup.


For the Dashi Stock  

See Just Hungry's post for a more in depth look at making Dashi.

About 4 inches of Kombu
Generous handful of dried fish like tiny anchovies, or shrimp
Small handful bonitio flakes
Water
South River makes a soy free miso
that is rather chunky

Note how we are using so much more in this than usual, that's because we are just eating the broth and trying to get as much flavour into it as possible.


  • Put the Kombu in the water and soak for at least 10 min.  
  • Add the fish and bring to a slight boil.  Add the fish flakes.
  • Simmer for about 10 min.  You don't need to strain because we will be straining it as we pour it into the mug.

For the miso soup

Soy free Miso paste (or you can use any good regular miso paste if you can handle soy).  I'm using South River Chick Pea Miso paste, which is chunky  which is fine most of the time, but for this, it needs to be mashed into a paste before using
About 1" of 1 rasher of bacon chopped
one green onion.

  • Add the miso paste and bacon to the Dashi and simmer for about 10 min.
  • Just before serving, turn off the heat and add the green onions.
  • Strain into a mug.

Roasted Chicken Broth in a slow cooker

If you are a fan of roasting whole chicken, then you probably have a few carcases in your freezer.  But if not, then you can either leave the house while the rest of the family enjoys a roast chicken or you can buy some chicken bones from your local butcher.  It won't have the same flavour with raw chicken bones as with roasted, but it will still be very yummy.  

Just know that either way, if you choose fresh or roasted, the better quality the bird, the better the broth.  

1 chicken carcase from a roast chicken, or the equivalent amount of bones (fresh or frozen is fine)
One onion
2 carrots
Two gloshes (larger than a glug) of a natural vinegar like apple cider
Bay leaf
3 pepper corns
1 large Tbs salt
(if you like some other veg like celery, fennel, whatever.)

  • Wash and roughly chop the veg.  No need to peal anything, although personally I peal the onion.
  • Put the carcase and everything else in the slow cooker.  Cover with water.  Put on high for at least 2 hours, then turn to low.  About 8 hours later (I do this overnight) it should be done.  
  • Strain and put broth in fridge, and when it's completely cool skim off the fat from the top.
  • Heat up to serve.  If it's too mild tasting, you can lightly fry some garlic in the bottom of the pan before adding broth, bring to boil, add salt to taste.  Strain into a mug.

Why Vinegar?  It helps extract nourishment from the bones and reduces any gamy taste that the meat may impart into your broth.

Why skim the fat?  Well, normally I'm a huge advocate of having more brain healthy fats in the diet, but in this instance, one wants to avoid anything that makes the digestive system work hard, which includes fat.


Bone Broth

Herbs and spices
This recipe is more a guideline than an actual recipe.  There are many ways of making bone broth.  I like a stronger vegetable flavour to the broth and use the bones more as added nutrition than flavour.  

Lamb bones are best if you are having trouble with inflammation   It's one of the only  meats they recommend for a low-inflammation diet.  But they aren't always easy to get, so my second choice would be ox tail for flavour.  Any marrow bone would do however.

Get out your cast iron pot if you have one.  Not only does it have great heat distribution  it adds trace amounts of iron to your food.


Some veg ready to go in
Some bones, lamb, goat, beef, or even oxtail if you can get it

1 large, sweet onion
2 carrots
2 stick cellery
1/2 inch ginger
some fennel fronds
several cloves of garlic
a handful of fresh thyme (or herb of your choice)
2 bay leaves, 4 pepper corns, a pinch of chily flakes, 1 Tbs sea salt
Generous glug of natural vinegar like apple cider or wine


  • place a generous glug of olive oil in the bottom of the pan, preheat on medium while you chop the onions.  Fry the onions slowly at medium to medium low heat while you chop up the rest of the veg.
  • Wash the rest of the veg and herbs (no need to peal the carrots so long as it's well washed) and divide into two sections.  Hard veg like carrots, celery sticks, and the stocks of the fennel fronds go roughly chopped in one pile, and soft veg like thyme, fennel leaves, and spices go in another.  
  • When you've got the rest of the veg ready, crank up the heat on the onions and stir constantly until it just barely starts to brown.  
Fry the onions

  • Toss in the hard veg (carrots, celery, &c) and fry while stirring for about 3 to 6 min until they start to sweat (this helps release more flavour to the broth).
  • Turn down the heat and add the bones, vinegar, and some cool (not too cold or you may damage the pan - but you want cool water as it helps bring more flavour from bones and veg.) water so that it comes almost to the top (leave room for bubbling and for adding more stuff.)
  • Bring to a boil, then add the rest of the ingredients  and simmer for several hours.  At least 4 hours. Skim off any froth you see forming on top.
  • broth simmering away
  • Taste and add more salt as needed.
  • Turn off the heat and let cool for a short time, then strain and place the broth in the fridge.  
  • When completely cold, the fat will be hard and floating on the surface, skim this off.
  • Reheat to serve.


 Don't skimp on the herbs, they are full of amazing super-food-goodness-stuff.  Add a whole 'nother layer of nourishment to your meal.


Here's a tip to add more nutrition and keep your bowels happy during this difficult time; HOWEVER, it's very important to ask your doctor specifically about this before you try this as it can be counterindicated in some situations.

If you make your own kimchi or sauerkraut (not the stuff that's been heat treated or from a can) then you can add one tsp of kimchi or sauerkraut juice to each mug of broth (but not to the boiling liquid as it will kill off the good bacteria).  This adds flavour and probiotic bacteria that will help repopulate your gut with healthy (I'm pretty sure the word I'm looking for here is flora, or is fauna?).


Over all, the key with this clear liquid diet is have a little bit constantly and not try to have set meals.  There aren't that many calories in broth, so unless you go completely overboard (which is doubtful when you feel this miserable) you are not going to have a problem.

One nice thing about this clear liquid diet is that it's affordable, healthy (when guided by your health care professional) and not too challenging to make yummy sustenance.  Chop, Fry, Boil, Strain (easier than pasta).


On a personal note, one of the best things that has come out of all this mess is that I had my blood tested for all sorts of vitamin insufficiencies.  Not only did all the results come back fine, they came back IDEAL!  According to the doc, I have perfect amounts of nutrition in my blood, they can tell how well my body is using things like iron, and the ratios between Cal., Mag. and Zinc.  It's better than most healthy people.  And for a person with a dodgy digestion and who shuns supplements (except in extreme cases) I'm doing so well, they want to retest me to make certain it wasn't a lab error.  (but I know it wasn't).  Well, actually, I'm surprised the iron and B vits are so well balanced given that I eat very little meat (maybe an oz or two a day, not including poultry and fish - even if I'm always blogging about it), and only eat beef every few months.  I must be doing something right.

By stocking my kitchen full of ingredients (instead of ready-made foods) and pairing my foods together in a way to maximize nutritional absorption (fermented cabbage like Kimchi or Sauerkraut with pork, Olive oil with Tomatoes) and by eating a lot of live culture foods, I've managed to create a balanced diet.

Now, if only I could learn not to eat stuff made by strangers.


Once I get some of my energy back, I'll write a post for you about transitioning from a clear liquid diet back onto solid foods.

Tuesday, March 5, 2013

How to Render Fat

Until recent years, fat was one of the most sought after and difficult to acquire foods (unless you lived in the Arctic  but that's a story for another day).  Fat isn't just a high source of energy, it can be used to improve the tasted of breads, create the texture that we know and love in pie crusts, flavour stews and cooked grains, as well as preserving foods for long periods of time.  People also made soaps, lotions, and boot polish from it.

When you think about what the Western World use to be like pre-1950s, fat was an important ingredient to life.

Quite often, when engaging in historical cooking pursuits, be it reproducing recipes from the Middle Ages, American Civil War, or even war time cookery, you will find recipes calling for rendered fat.  Here is a real simple way to render beef fat, albeit, it takes a very long time.


HOW TO RENDER ANIMAL FAT


For every pound of raw fat, place half a cup of water in the sauce pan (don't use your best sauce pan for this, it's a real bugger to clean).  Place the pan on low, and lightly simmer with the lid off for many hours.  Don't cook it too high or the fat will scorch and impart an unpleasant taste to whatever you cook with it.  If the fat turns brown or smells scorched, toss the whole batch and do better next time.

When all the fat is melted, strain through a cheese cloth and leave the fat to cool before putting the lid on and storing it someplace cool (like the fridge).

I try to use this within 6 months.  It will eventually go rancid  sometimes after just a few months, sometimes it takes more than a year.  You can smell it when it does, it's very distinctive.


I'm using beef fat that would have normally gone in the trash.  After reading some WWII household manuals, I decided it would be nice to waste less.  So instead of tossing out the fat and buying lard, I decided to render it down and use it to make meat pie crusts later this month.  I don't normally have this much fat in one go, but I figure from now on, I can keep the little bits of raw fat I trim off roasts in a bag in the freezer, then when I have enough, I can render it.

I'm still not very good at trimming the fat off the meat, so there are a lot of bits of beef left over.  Aim to do it better than I did, but if you are as rubbish at trimming raw meat as I am, don't stress over it.

I'm thinking of taking these left over bits of beef, trimming them up and putting them in a curry or possibly doing what my Great Grandmother would have done, toast them in a hot oven till crispy.


In Victorian days, they would have done this on a warm, but not too hot, part of the cook stove, for sometimes several days until the fat has completely rendered out.  The stove is already being heated for other purposes, so it's not taking up a dedicated burner like me.  I did mine on the electric stove, which wasn't the most economical method.  I suspect a slow cooker would have been better, so I'll try that next time.


Sunday, March 3, 2013

Recipe: Simple Sourdough Crackers (including a blue cheese sourdough cracker recipe)

Once you have a sourdough starter, it's very easy to have too much sourdough starter.  It is for that reason that I hunted high and low for a simple, affordable, and healthy sourdough cracker recipe.

If you don't have a sourdough starter already, you could get some from a friend, or start your own.  I keep a rye starter going in my kitchen but you can use whatever type you like.

To me, these crackers have a distinctly sour taste, which is quite pleasant  but rather different than anything you would buy in a store.

The basic cracker recipe is Vegan Friendly when made with olive oil, however the blue cheese version of this cracker is not.  If you are cooking for your vegan friend you need to leave off the butter (both steps) and reach for the olive oil instead.

Not necessary, but it really does go great with wine.


Simple Soudough Crackers


1/2 cup sourdough starter or sponge
about 1/2 cup flour plus more for dusting
2Tbs olive oil (for the vegan version) or better still melted butter (not-vegan)
pinch salt
more olive oil or butter for brushing
a bit more salt for sprinkling on top

Please note if you keep an excessively stiff starter like I do (I'm talking can stand a spoon in it one evening and it will still be exactly where you left it the next morning - kind of stiff), you may need to add 1/8th cup water to the mix.

You can start with the sourdough starter at room temp (best) or even at fridge temp (takes longer to 'age')


  • Combine starter, (optional water, see note above), salt, flour and oil (or butter), to make a very stiff dough.  Kneed till smooth and elastic.
  • Cover and set aside at least 1/2 an hour at room temp, although the longer the better.  I usually leave it for 2 hours at room temp before moving on to the next step.  Although over night in the fridge will also work.  I've had times when I was interrupted half way through making these, banged the remaining dough in the fridge for 3 days, then made the crackers - the result was a bit more sour than usual, but still quite yummy.
    • This ageing the dough is an important step for melding the sourdough flavour and it also helps to break down elements in the wheat that can be hard to digest.
  • Roll out the dough very thin on a lightly floured surface.  The thinner the more crisp the crackers will be.  Use cookie cutters or a sharp knife to cut the dough into desired shapes.  In my case I like long strips, about 1/2 an inch wide.  Be creative but not fussy.  Rustic is the name of the game.
  • Place on a baking tray and brush the oil or butter on top.  Sprinkle VERY lightly with salt.
  • In the oven at 350F for about 10 min.  But keep an eye on them, they could be ready in as little as 5 min if you made small thin crackers, and as long as 20 min if you made thick, large crackers.
  • When done, take off the rack and cool before eating.

Sourdough Cracker Verriations on the Basic Recipe

Blue cheese

about 2 Tbs blue cheese crumbled and at room temperature

  • When you get to the part where you roll out the dough, roll it out fairly thin.  Sprinkle the crumbled blue cheese on one half of the dough, and fold over the dough to make something like a sandwich - dough, blue cheese, more dough.
  • Roll out the dough again until it's very thin.  Then cut into shapes, place it on the cooking tray, brush with melted butter.  Sprinkling salt is option as the cheese is quite salty.  Cook as above

cheese sprinkled on half the dough

fold the dough over
(sorry, I know the photo din't come out all that great, but you get the idea)

rolled out thin again
with the cheese sandwiched between two layers of dough


Other variations I've tried include herbs like rosemary and thyme, and toasted sesame seeds.

Although easily enjoyed on their own, these plane crackers go great with hummus.  Very impressive when served at a dinner party.  Will keep for about 4 days in an air tight container at room temp.


Affordable cooking? Oh yah!  This makes several dozen crackers for next to no cost.  I'm actually not sure how to price it out.  I normally make this as a way to use up too much sourdough starter or sponge that would otherwise go in the compost.  1/2 cup of flour, plus some more for dusting - well, I'm guessing it costs between 1 to 25 cents depending on the flour you use.  Another few pennies for salt and melted butter.  And as for the cheese, I only add that if I have a bit of blue cheese that got pushed to the back of the fridge and is far too pungent to eat on it's own.

So, I'm going to guess an average of 15 cents for the ingredients, another 50 cents to $1 for the oven.  So, about 75 cents and as high as $1.50 for about 6 to 10 dozen crackers.

These are Bento Friendly, just don't pack them next to wet food or they will go soggy.

Allergy friendly?  Mostly.  Beware of yeast and flour sensitivities; also dairy if you choose to use butter and/or cheese.

Healthy?  I think so.  Not only does the sourdough help to render the wheat more digestible and make more nourishment available to your body, you can also control the amount of salt you use.  The recipe is easily adjustable to suit your health needs.  You can even grind your own flour (if using coarse flour, let the dough rest longer before rolling it out) or include sprouted grains.

Earth Friendly: When compared to commercial made crackers that are made with dubious ingredients and shipped long distances, this is an earth friendly food.  Of course, you could go all out and grow your own grain, grind your own flour, &c.


I like to make half plane and half blue cheese and cut them different shapes so I can quickly tell which is which.


Saturday, March 2, 2013

Lamb Sausages - kitchen failure? Almost.

My friend said it would be easy to make sausages.  Um, well, um, it turns out that easy is a relative term.


But what the heck, why not give it a shot.

He lent us his sausage maker and gave us some spices, which we mixed up with some already ground lamb we had in the freezer.  We soaked the lamb casings in water, and rinsed them really well.  

Next came the hard part, putting them on the stuffer tube.  The stuffer tube is just slightly larger than the casing, and the casings don't stretch much at all.  So with much struggle we managed to get the casings on the tube - minus a few rips here and there.  But hey, it's my first time.

While one person was struggling with the lamb casings, another mixed the meat and spices together.  Today was lamb and Mediterranean style spice mix.

Because I don't have a grinder yet, I'm working with pre-ground lamb.


As you can see, we made sausage:


Well, um sort of.

Lots of little breaks in the casings, stuffed it too full for the twisty thing to work.  But we put it in the fridge and fried it up for dinner the next day.


All in all, I'm up for trying sausage making again.  It's um... an interesting experience.

What I didn't like most was putting the casing onto the stuffer tube (going to try hog casings next time).  That and the sausages were actually too meaty.  Never had this problem before, but I think I have a solution for this.  Maybe try adding 20% bread (by weight) crumbs next time.

The things I liked best was how fresh it tastes and that I didn't need to worry about the ingredients and my allergies.

I can most definitely see a meat grinder (or two) in my future.