Showing posts with label British. Show all posts

Wednesday, August 5, 2015

An excellent sweet 'mango' chutney - sans mangos

No photos today, just a quick recipe before I forget how to make this amazing condiment.

A couple of weeks ago, a branch from an apple tree broke because the apples on it were too heavy.  Unfortunately, the apples weren't ripe yet.  Then I remembered about this Victorian recipe I read for mango chutney, only it didn't have a single mango in it.  Instead, it had unripe apples.  Perfect!

Based loosely on recipe 392 of Mrs Beeton's Book of Household Management, I had to make a few changes.  I have a tender place in my heart for anyone who applies garlic by the quarter pound, I must admit that some of the other ingredient quantities were a bit unusual to the modern taste.  So changes were made to method and quantities but without Mrs B's little book, I wouldn't have thought to make such a scrummy chutney.

Here's a little note that Mrs Beeton gives regarding her version of the recipe:

This recipe was given by a native to an English Lady, who had long been a resident in India, and who, since her return to her native country, has become quite celebrated amongst her friends for the excellence of this Eastern relish.

Sweet "Mango" Chutney

All ingredients are approximate

3 large onions
drizzle olive oil
2 Tbs mustard seed
1 Tbs powdered ginger
4 dry chilies lightly crushed (seeds included)
a large handful of garlic
At least 6 unripe apples, peeled, cored and cut into chunks less than 1 inch cubed.
1 cup raisins
2 cups apple cider vinegar or equivalent
1 to 2 cups of sugar
boiling water
2 Tbs salt


  • Chop the onions into about 1/2 inch chunks, in a large heavy bottom pot, fry onions on medium-low with olive oil until transparent
  • add mustard seed, ginger, chili and garlic to the onions, stir well, cook about one min
  • add apples, raisons and vinegar to the onion mix, bring to boil and then turn off heat
  • Mix 1 cup of sugar with 1 cup of boiling water to make a syrup.  Mix until sugar is dissolved
  • Add syrup and salt to the apples.  Mix well and bring back to a boil.  Taste and add more sugar as necessary.  Boil on high for about 5 to 15 min or until enough liquid has evaporated.  Mixture will thicken as it cools.
  • Place into washed (and if you like, sterilized) jars, seal with lid as per normal.  Because of the spices, salt and sugar, I didn't heat process these jars.  Mrs B never did, she just tightly wrapped the mouth of the jars with sheep bladders.  But as sheep bladders are hard to come by these days, so it's up to you to know how to safely can your food.  If you have any doubt, keep it in the fridge.

Affordable: Apples would have gone to waste as they fell off the tree far too early to ripen on their own.  Onions are from the garden.  That leaves the spices, raisins and sugar - so... totally guessing, let's pretend it's about $2 for this.  It made 6 and a half 8 oz jars full, which makes it 30 cents per jar.  This tastes almost identical to an English apple chutney I bought from the store once upon a time, which cost $8 for the same size.  That's a savings of $7.70 cents.  NICE!

To make it Vegan Friendly, you need to replace the sugar with a vegan friendly sweetener, and to be careful not to harm any worms that are probably living in your apples, thus causing them to fall before they were fully ripe.  


Wednesday, July 2, 2014

Medieval Goose - two ways over an open fire

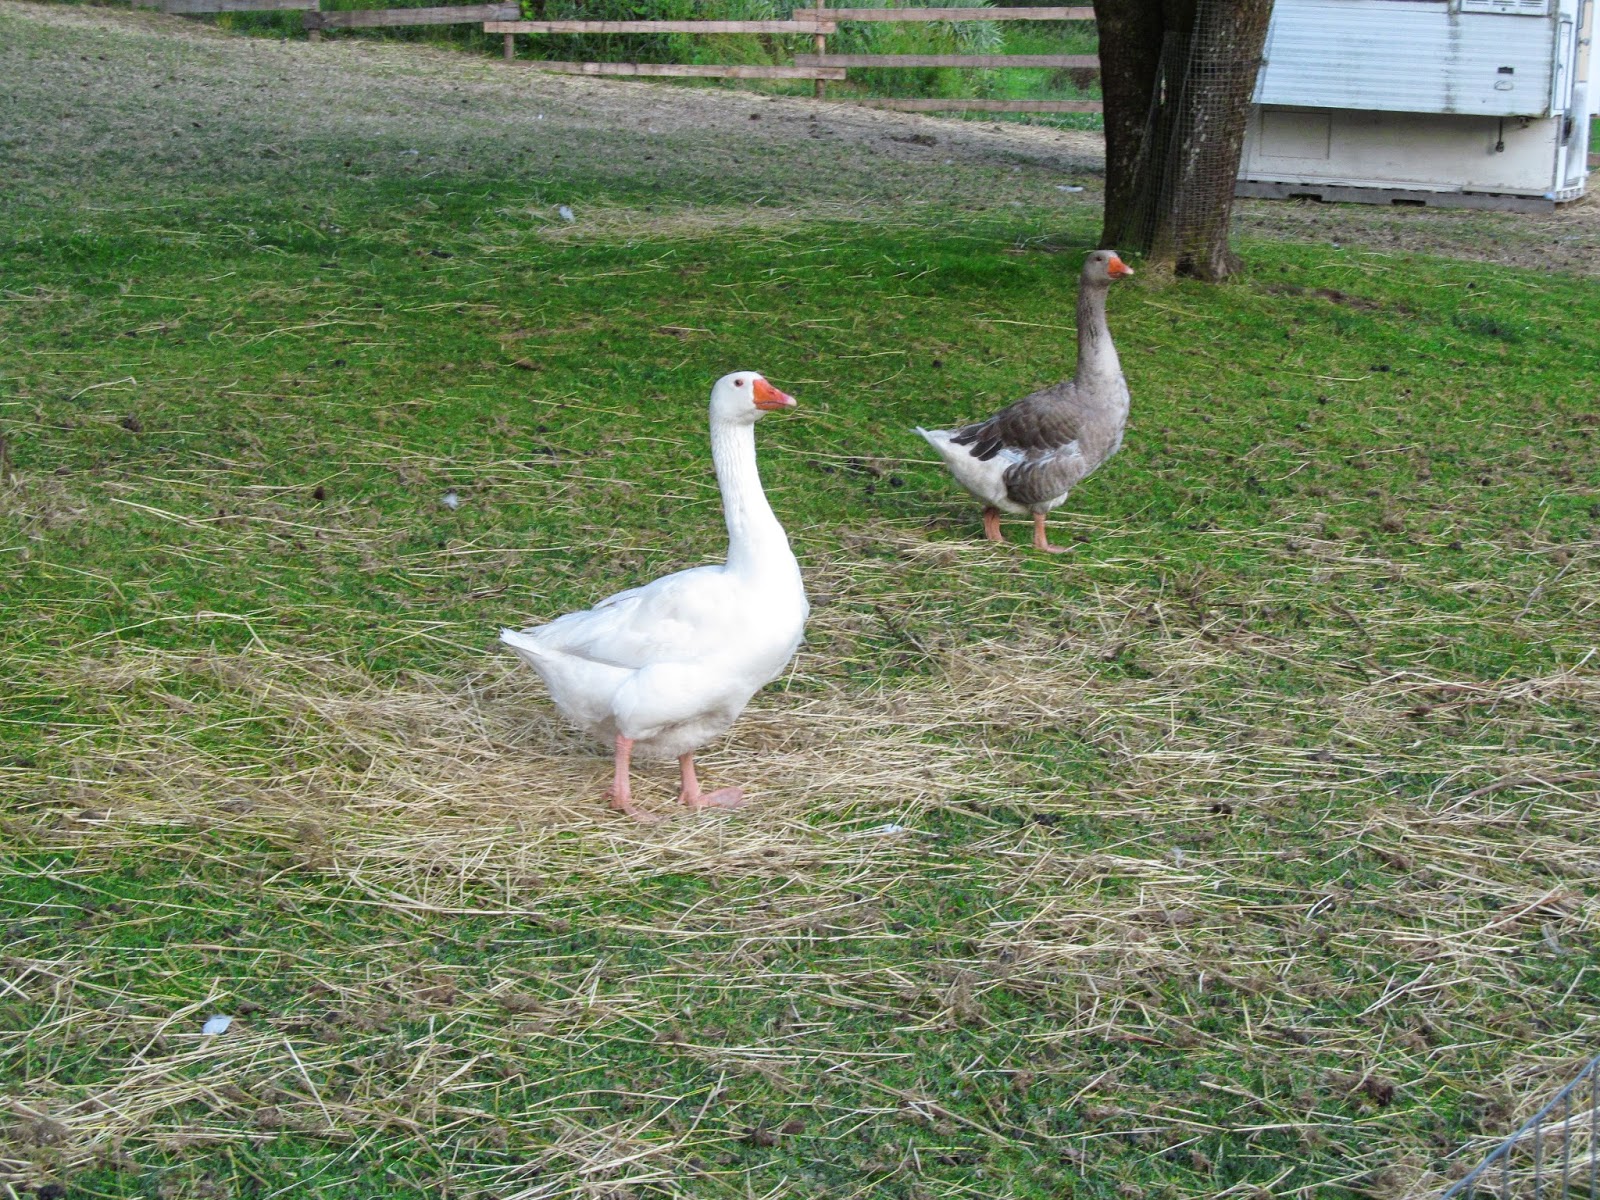
You remember Henry and William?  Two lovely geese I raised by hand from (not so) tiny eggs.

Maybe squeamish people should click away now, as this post involves processing and consuming my lovely boys.  But in a good way.  A very good and fulfilling way, with friends and free flowing mead.  It's been difficult gathering my feelings and thoughts to write about it, but I want to share the experience with you, if you'll let me.

Once a year I travel to the 14th Century for, what passes as a vacation.  A wonderful week or two among friends, dressed in funny clothes, eating medieval food, doing medieval things.  Living life just as they would in the year 1371, only we do it with potable water.

Things are never quite that simple, because while we are living a medieval life, we are also an interactive display for the public.  Visitors wander in and out of our camp while we cook, eat, spin yarn, weave, cast metals, practice combat... and all the regular day to day tasks correct for our period.  It's great fun interacting with them and showing off what we are doing.

A setting with good friends and a chance to educate random people about food and food choices - what  Pastafarian could pass up an opportunity like that?  So I brought my geese to the park, early one morning.  While The Captain and I hugged our feathered friends, they met their end.  I cried.  A lot.  But their end was just the beginning.

Plucking pheasants geese


As the day progressed a whole host of helpers plucked the larger of the two birds as we prepared him for roasting on the spit.  The smaller fella we skinned.  That took most of the morning, and some fun rhymes about pheasant pluckers and their sons.


With the smaller goose, we made a soup.  I carved off the meat and put to one side.  A broth was made from the bones, onions, carrot leaves and a few other tidbits that were kicking about.  After a few hours, we strained the broth, added it to some lightly fried veg, spices and the rest of the goose meat.  Delicious.


Goosefat


Not the most appetizing of photos, but very interesting for someone like me who hasn't worked with goose before.  First thing I noticed is how colourful the bird is under it's skin.  The yellow chunky bits are fat.

Fats of all kinds were highly prized in the middle ages, especially in Northern climes where there were very few sources of vegetable oils.  Fat was used to make soap, lotions, lighting, cooking, lubrication for wagon wheels, and many other things.  As we know now, fat is essential not just to make you feel full when eating, but also for brain development, skin, Vit D processing, and so many other things.  I had often read that goose fat was the most valued fat of all, but I never realized why before.

Unlike lard or tallow, when rendered, goose fat is liquid at room temperature.  It was quick and easy to render, especially because it's easy to see and trim the fat thanks to the natural colour coding inside the goose.  There is a lot of fat inside a goose!  It's also quite a mild taste, a lot like olive oil with a slight meaty undertone.  Very neutral flavour.


The roasted goose was much easier to process.  Just clean out the innards, trim some of the fat from the cavity, stick a stick in it and put it in front of the fire, turning from time to time.


"Is that a real goose?"


While we are working with the geese, the public flows in and out of the kitchen area and I talked with them about what we were cooking.  This probably the best part of the week for me.  I love hearing people's questions and listening to their stories.  Although, while working with the goose... things were a bit different.

The most common question of the day was, "Is that a real bird?"

The first few times I heard someone ask that, I wondered why we would be plucking an unreal bird?  What would an unreal bird look like?  How would it taste?

After a while, I decided (or at the very least hoped) they meant was, is it something that comes wrapped in plastic from a store or a bird we were in the process of transforming from live to dinner.  

Not surprisingly, many of the people were taken aback when they discovered what we were doing.  They had never seen anything like it before.  Even avid meat eaters didn't know what to make of it.

So I told them the story of the geese and how they came to be there.  I described how I hatched the eggs, raised the geese by hand, loved them and gave them a fulfilling life.  I shared how honoured I was that these geese would provide sustenance for us, and how we would honour them by making certain not a scrap would be wasted.  And most importantly, I talked about the difference between modern day methods of raising meat and the way it was done in the Middle Ages.  In the past meat was an infrequent luxury - and still is for most people who live on this planet today - so no part would go unused.  If we are going to eat meat, in our society today, we have the luxury of choice - we can choose to eat an animal who lived a miserable confined forcefed existence, or we can choose to eat fewer animals; ones who lived in a manner most true to their nature.  Why is it so many people proclaim they care about animals, but still buy miserable-meat?

I like to believe I got people thinking about what they eat when they eat meat.


Chowing Down (as in goose down... well, I tried)


Goose soup, goose livers and hearts fried in goose fat, and roast goose.  Add rice and a few veg to the mix and ring the dinner bell.


Everything was delicious.  We toasted the geese with homemade mead.

I don't know how to say this but while I ate, I was both incredibly sad and unbelievably joyful.  I was sad (and still am a little inside) because I'm always sad when one of my animals comes to an end - be it for food reasons or others.  These animals become my friends, even though I know that they will be food some day - I'm determined to give them the best life I know how.

But like I said, I was also joyful.  Amazingly so.  Enjoying the meal with my medieval friends was uplifting. I felt they honoured the lives of my animals - that it wasn't just meat to them.  It was sustenance, both of body and soul.

I'm losing the thread of what I was saying, but I doubt many people read to the end of a post this long.  Basically, what I am looking to say is: despite my conflicting emotional state, I am glad this happened.  I would do it all again  if it meant sharing a meal with these lovely people.  In fact, I already have a flock of replacement geese.  Between educating the public, learning new skills, and enjoying time with my friends, it was a very successful day.

Monday, October 28, 2013

Homemade Tikka Paste and Chicken Tika recipe


I am very fond of curry.  Though, I must admit, not too spicy.  But that's the great thing about homemade curry, you can make it as are-you-certain-this-is-curry-mild or as call-the-fire-department-hot as you like.  If you don't like chicken in your tika, try lamb, or shrimp.  If you don't like coconut then omit, or try a Tablespoon of Kechk powder instead.  There are so many choices, and it's hard to do wrong when it comes to curry.

Increasingly these days, there is a problems with curry.  A Lot of curry pastes sold in stores, contain soy, or nuts, or other potential allergens.  Vegans have a similar problem, as often these jar pastes will contain animal products like butter.  Thank goodness it's easy to make your own curry paste, especially if you have a food processor at home, but you can also do it by hand, just give yourself more time.

When I'm making my own curry paste, I like to put it together the day before I cook a curry, that way, the flavours blend together better and, in my opinion, make a nicer curry.  But other people like to make it up fresh each time, so it's really a matter of personal taste.  


Tikka Paste

1 super hot chile
4 cloves of garlic
half an inch of fresh ginger
1 tsp cayenne pepper
1 Tbs smoked paprika
2 tsp garam masala
1/2 tsp salt
2 Tbs oil
one small tin tomato paste
1 tsp ajwain (whole)
1 tsp fennel (whole)


  • In a dry fry pan, toast the ajwain and fennel on medium high until they start to change colour and smell fantastic.  Remove from heat, allow to cool a bit then grind to a fine powder.
  • Combine all the ingredients in a food processor or blender and blitz until well blended.  Add more oil if needed.  
  • Keep in an sealed container in the fridge for a couple of weeks.


Chicken Tikka

2 to 4 skinless, boneless chicken breasts
1 large sweet onion
1 chile fresh or dry (optional)
1/2 inch fresh ginger
olive oil
1/2 cup tikka paste
1 can diced tomatoes
water


  • Slice the chicken into 3/4 inch strips (or cubes if you like), put to one side
  • Finely slice the onion, chili (optional) and ginger.  In a heavy bottom pot (my favourite is the cast iron, stove friendly dutch oven) heat a few glugs of oil and fry on medium heat, the onions, chili and ginger until onions start to turn golden.  
  • Add the curry paste, give it a stir, then add the chicken.  Cook, stirring frequently, until the chicken is seared on the outside.
  • Add the tomatoes and then fill the tin about 3/4 full with water, and add that.  mix well and bring to a boil.
Two choices here
  1. simmer on the stove with the lid on, for about 20 minutes, string often to make certain nothing burns on the bottom.  OR...
  2. Put the lid on the pot and put it in the oven, at 325 F for at least half an hour, and up to 2 hours.
  • Serve with rice and optional a dab of yogurt on top.


This recipe is (heavily) modified from Jamie Oliver's book Food Revolution.  He has a nice selection of easy to make curry pastes, from super-spicy Vindaloo, to a nice everyday Korma paste.  Each of these pastes lasts one to two weeks in the fridge, and in my mind are just as good as any commercial curry paste. If you end up getting that book, I highly recommend the Vegetable Bhajis as a side dish to the chicken tikka, served with a simple salad and a bed of rice.  His Aloo Gobhi recipe is a fantastic vegetarian (omit the butter for a vegan friendly) curry.

Another source of curry recipes is 1000 Indian Recipes by Batra.  There are some fantastic recipes in this book, but I find it a bit difficult to use.  Most recipes include well over a dozen, in some cases up to 3 dozen, ingredients, and often refer you back to other recipes, that require yet other recipes... and so forth.  But for someone truly enamoured with Indian cooking, it's a fantastic reference.  The flat breads are especially yummy and even nicer when adapted to use sourdough yeast.

Affordable?  Yep.  If you have the tikka as a main, then you only need about 1 chicken breast per person, however, if you keep it as a side dish with rice and a vegi dish, then you can feed 2 or 3 people per chicken breast.

This is exceptionally yummy in bento.  Reheat leftover Tikka and pack with fresh rice.  Allow everything to cool before closing the lid.  The spices in the tikka help keep the meat fresh longer at room temp, but of course, always use your common sense if keeping meat at room temp for more than a few hours.


Wednesday, September 11, 2013

Medieval Ginger Bread Recipe

It's funny.  When I imagine gingerbread, I think of a sweet, hard cake or cookie like substance, shaped as cute little people, houses, rounds, with icing and colourful candy.  The thing I don't think about when people say the word gingerbread, is... bread.

But that's exactly what gingerbread was in the middle ages: Ginger Bread.  That's two words, not one, to indicate that literally, there is ginger, there is bread and they get combined somehow.

Reading the book Pleyn Delite, by Constance Hieatt and Sharon Butler, I came across a delicious looking gingerbread recipe from the Middle Ages.  This book contains all sorts of recipes from historical sources, including a lot of the recipes in the original text, and the modern day translation.  What I love best about this book is that the authors actually cooked a lot of these recipes.  I suspect that this is not the norm when translating historic cooking techniques into modern methods.  But these two have done a really good job of it.

I've tasted a few dishes cooked from the Pleyn Delite (which I say in my head as Plain Delight) and loved most of them.  This gingerbread, I didn't love as much.  I found it too crunchy, but I'm in the minority on this one.  Everyone else has gobbled it down, making me fend them off with a fork and a cunning plan to have enough left over for the photograph.

I suspect their plan was to finish it off quickly so that I would be forced to make a second batch if I wanted to take any pictures for the blog.

Before I write the recipe for medieval gingerbread, I feel compelled to confess that not much is changed from the version in Pleyne Delite, except maybe the quantities of the spices and wording.  It's a difficult recipe to improve on.  I would change a bit of the method if given a second chance to make this - which I may just be strong armed into doing.

Medieval Ginger Bread

Bread crumbs - about a 1 lb loaf of bread dried and finely ground
a generous teaspoon of ginger powder
a generous pinch of cinnamon
a dash of ground pepper or a pinch of Poudre Forte
1/2 cup of honey


  • In a large pan, bring honey to boil, remove from heat.  Add the spices and stir well.
  • Add the bread to the honey a little at a time, return to medium low heat if needed, stirring well after each handful of breadcrumbs.  When the mixture is really thick and hard to stir, turn out onto a layer of parchment paper.  spread it out evenly as best you can, then put another layer of parchment paper on top.  Use your hands or rolling pin to smooth out the gingerbread to make it as even and as thin/thick as you like.  Thinner is better in my opinion. 
  • Leave covered to cool for about an hour, cut into shapes.  You want to do this today and not a few days from now, trust me.  It gets more difficult as it ages.


This keeps well at room temperature for several days and travels well in a bento box, just wrap with a bit of parchment paper and you are good to go.


Affordable cooking? - Very much so, provided you use bread that would have gone to the chickens/garbage otherwise.  Not so much if you are buying bread or bread crumbs just for this recipe.  

Cooking for your Vegan friends? - It can be made vegan friendly by replacing the honey with a different liquid sweetener.  


Cooking for Allergies - not many allergies here at first glance, but it's good to be careful about the ingredients of the bread crumbs (commercially made usually contain soy and other problems), spices (sometimes processed with oils or lecithin which can include soy).  Just remember that your ingredients these days, have ingredients lists of their own.  With that in mind, this is a very flexible recipe.  You can choose any kind of bread, be it gluten free, yeast free, whatever you  need.


Saturday, September 7, 2013

14th century cooking: Caudle of Almonds Recipe

Caudle of Almonds is a kind of medieval almond milk made with wine or ale.  According to Peter Brears book, Cooking and Dining in Medieval England, it was considered especially good for people with a dodgy tummy.

Cooking with and drinking almond milk was a frequent occurrence during the 14th Century.  Not only was it considered a healthy milk substitute, in the middle ages there were many days in the Christian calendar that forbid the consumption of dairy products.  Isn't it nice that almonds don't come from a cow?

I suspect almond milk may have become more popular as the populations in cities increased during the 13th and 14th century.  Suddenly you have all these people living in close quarters, with most of the dairy products being shipped in from the countryside or from cattle being raised in close quarters in town.  Cows living in small yards, with no access to fresh grass, can lead to some milk borne illnesses...unhealthy cow creates inferior milk.  So, if you can afford almonds, you make almond milk.

Now, quite frankly I strongly dislike almond milk.  It doesn't taste like almonds and it doesn't taste like milk... it tastes like powered over sweetened chalk in water.  But that's the almond milk out of a box from the supermarket... Since I'm doing a lot more medieval cooking these days, I decided it was time to try making my own almond milk.  Since I'm a coward at heart, I decided to try the more flashy version of almond milk:

Caudle of Almonds

Inspired heavily by Cooking and dining in Medieval England, by Peter Brears, with a few changes of my own.

A pint of white wine or wine and water mixed
a large handful of almonds  (I used raw)
Honey to taste (or for vegan version, a different liquid sweetener)
Poudre Forte or you could just use cinnamon and/or nutmeg mixed.


  • Bring the wine to a boil, take off the heat and add almonds, about half a teaspoon of honey, and a generous pinch of spice.  Leave to steep for an hour or so to cool.  
  • Take the almonds out (keep the liquid) and smash them good.  Mortar and pestle is fine, or use the blitzer.  The aim is a fine mush.  Add the liquid back to the almonds and pound or mash again - this is the tricky part for me.  apparently my blitzer does not fit a full pint of liquid and makes a huge mess all over the kitchen when I ask it to try just this once.  Also the blades aren't sharp enough to mash the almonds fine enough.  So I did about half way in the blitzer then transferred small batches to work in the mortar.  
  • Strain the milk through a fine sieve or cheesecloth. Flavour with more honey and spices if needed, and sprinkle a few spices on top.

I loved how this tasted!   I cannot tell you how different this Caudle of Almonds was to boxed almond milk without falling into a huge pit of cliches - It's not even the same planet, worlds apart!  And I don't think it's just that this was made with wine, wine is lovely and all, but it was the pure almond-ness quality, the almond milk qua almond, that made is delightful.  

The Caudle of almonds also helped settle my stomach.  I had a very stressful day and my stomach was acidic and full on reflux.  I drank it warm with some extra honey, but I don't think I boiled off the alcohol from the wine, as I was quite sloshed after drinking a pint of Caudle.  Very delicious and I can see making this again soon. Just need to find a better method for creaming the almonds.  Got an idea brewing for that though...

Vegan friendly? - you need to substitute the honey with your favourite sweetener for this to be vegan friendly.  It's easy enough to do, so I am going to give it a qualified yes.

Affordable? - um... depends.  If you are like me and do not trust the bulk food bin and have to special order almonds from a place that doesn't mix nuts, no it is not even a little bit affordable.  But as far as normal people go, it's probably okay on price.

Allergy issues - depending on your allergy it can be a friendly or feendish drink. 

See my affordable section above about mixed nut contamination which a lot of people who don't have nut allergies in the family aren't use to taking into account, and not suitable for people with allergies to almonds.  Some people may have reactions to the sulphates (assuming you are using a commercial wine) in the wine.

However, it makes a great substitute for milk and is excellent substitute for warm-milk-before-bed drinks like horlicks.  


Tuesday, April 30, 2013

Mutton Bacon: that's right, you heard me, I made bacon from a sheep - here's the recipe

I don't know if it can be rightly called bacon in the purest use of the word.  Bacon is made from pork.  But this cured and smoked mutton belly is to me far more tasty than any bacon I've ever consumed.

Even though I've been working with wool for a long time now, it's only recently I started thinking of sheep as a sources of food.  Locally, lamb is a very expensive meat, and very limited. There are lamb legs, lam ribs and lamb chops... and nothing else.  One would imagine there is more to a lamb than two legs and some chops.  Mutton is unheard of here, not even considered fit for pet food.  This is a shame.

Traditionally, sheep have been a major meat source in Europe  the Middle East, and North Africa.  England especially has a long history of wool and mutton.  The more I read about history, the more I want to cook what I read about.  I wanted to experience mutton.  And when I finally did, I found I liked it.  I like it a lot.  When prepared right (and by prepared I don't just refer to how it's cooked, how the animal is butchered and slaughtered have a large effect on taste and tenderness) it is exceptionally tasty.

As I mentioned, I butchered a ram not long ago.  There is a lot of meat on an adult sheep, and many cuts I don't know what to do with.  The belly had layers of meat and fat, and I didn't want it to go to waste.  Why not make bacon from mutton?  So that's what I did.

I used the Basic Dry Cure mix from the book Charcuterie: The Craft of Salting, Smoking, and Curing as a base for my mutton bacon.  It's been reproduced so many other places that I'm feeling okay to post it here as well.  You need to know that this book is a fantastic source of information and a great starting place for curing your own meat.

Basic dry cure

1lb kosher salt
8oz sugar
2oz pink salt (cure #1)

Mixed all together really well, label, and store away from children and foolish people who might eat it accidentally.


Mutton Bacon

For this recipe, I'm assuming you have some basic curing experiences   If not, try making regular bacon first.  If at any point the meat smells rotten, has fuzzy or black mould on it, then toss it out and start again.  if it gets a white mould on it, it's okay, but if the white mould is fuzzy then that's bad.

1 kilo mutton belly
1/4 cup basic dry cure
2 bay leaves (ground)
1 tsp each rosemary, thyme, juniper berries, pepper (dry and ground)
1/4 cup salt (on later reflection, I would leave this out next time)


  • Mix the cure together with the spices and extra salt.  Coat the mutton in the cure, and place in a ziplock bag with any remaining salt-mix.  Keep in fridge for about 7 days, massage the spices into the meat through the plastic daily.  Should feel firm.
  • Rinse the salt off and leave the meat to dry for at least an hour, uncovered in the fridge.
  • At this stage you can hang to dry in a cool place for 1 to 3 weeks, or you can smoke it.  I hot smoked mine with pear wood for 4 hours, then increased the temperature to make certain the internal temp of the meat was 140F or higher.   You can store the smoked meat in the fridge for a few weeks, or freeze it.
  • Which ever you choose, it tastes better for resting a day or two before slicing and frying or using the bacon in recipes.  If it's too salty, then boil the bacon for about 30 seconds before frying.  This is not an eat raw meat.
After the curing and drying, I divided my mutton bacon in three parts.  1 part I hung to dry in my curing chamber, the other two parts I smoked.  After smoking, half went in the freezer for later, and half went in the curing chamber to dry.  


I fried up a bit the day I smoked it and it's exceptionally yummy.  I'm very curious what the dried bacon will be like, as I've never tried this technique before.

The extra 1/4 cup of salt I used in this recipe may be optional.  I just felt more comfortable using more salt because I intended to hang it.  If you are just sticking it in the fridge after smoking, then you may not want to add this extra salt.  but then again, the flavour wasn't anywhere near as salty as I expected, so I leave it up to you.


Update:  Of the three methods I used to make this - hung cured, cured and smoked then hung, and cured and smoked and put directly in the fridge when cool - I liked the third best.  The first method of just cured and hung to dry developed some rather dodgy mold after a few days, so I tossed it.  The one that was smoked, then hung to dry was okay, but I suspect the temperature wasn't even enough during the drying.  If I had better temperature control, I think this would be my favourite method.

Affordable cooking? - can be, especially if you are butchering your own side or whole mutton.  Mutton use to be a very economical meat, but these days it's hard to come by.  This is a cut that is usually discarded, or sold for making lard.  Finding mutton belly, or whatever they call it these days can be very difficult and therefore expensive if you go to the wrong place.

Allergy friendly?  I think so.  You can adjust what spices you use, and it can be made without the Pink Salt (but you need to be more careful with meat safety and it won't have that rosy colour, but it can be done)

Monday, April 1, 2013

Leftover's (quite litterally) Shephard's pie


I found this absolutely fantastic gadget at the local junk-shop the other day.  It's a Universal Food Chopper and it is just the tool I've been looking for.

It looks like a meat grinder, but it does so much more.  It can chop, crumble, and make a paste out of most anything.  What it excels at is giving a whole new life to leftovers.

Which is a good thing because in this household, we are notoriously bad at eating up leftover roast and veg.


Universal Food Chopper
Leftover steamed veg usually go to the chickens, but instead I decided to keep them and make a shepherds pie from them and the roast.  I used the coarse plate on the chopper to pass the broccoli, cauliflower and carrot through.  Then I passed an onion through it.  This all took less time than it would have to find and set up my blitzer.

Next I more-or-less separated the meat from the gravy and passed the meat through the food chopper.  It was a roast lamb shoulder that had been browned and then cooked with garlic in a puddle of red wine.  The juices from the roast combined with the wine to make a fantastic gravy.  Oh, I put the garlic through the Universal too.

Last of all, I took a few slices of sourdough bread, chopped them up into about 1 inch cubes and passed them through the chopper to sop up all the juices.


In a large bowl, I mixed the chop stuff with the gravy and added some wine or beer or it might have been apple cider - whatever I was drinking at that time.  I even threw in a small handful of frozen peas and corn because I worry that we don't eat enough veg.  Salt and Pepper, and if I had thought about it, I would have added a finely chopped sage leaf.  (If you don't have enough gravy  you could mix a stock cube or a spoon of Vegemite with half a cup of hot water, then add to the mix).

Put filling into your baking dish, cover with mashed potatoes (leftovers or fresh or a blend of both).


These are mini-pies to go into the freezer for future dinners - there's only so much shepherds pie one family can eat at a time.

We put goat cheese and paprika on top.

Since everything is already cooked, you just need to heat it up enough so that the lovely juices bubble up and hopefully add a slight flavour to the mashed potatoes.  Somewhere between 30 min and an hour.


I apologize for this photo, but keep in mind, most of the family is just really hungry and quite often they serve themselves before I have a chance to find my camera.  But you get the general idea: chopped up leftovers in a gravy on the bottom and mashed potatoes on top.


It's a very British pie to make Mrs Beeton Proud - and is a True Shepherds' Pie.  It was made of lamb for the shepherd to eat while tending to the sheep.

two new additions to the farm


Affordable cooking: Yes!  All leftovers that may or may not have died a lonely death in the back of the fridge.  You can bulk this out with extra veg or even a bit more bread in a pinch.  It's great for feeding company that is here for a few days in a row, so they don't get board of eating the same leftover roast beast day in and out.

Allergy Friendly:  Yes!  Change the ingredients and sauce to suit your needs.  Allergic to potatoes?  Use bread dough or pastry dough for the topping.

Healthy: Yes!  It's a well balanced meal and you can always serve it with a salad.

It is NOT ACCEPTABLE to serve this to your vegan friends.


Monday, March 25, 2013

2 recipes: hot cross buns and sourdough hot cross buns

Earlier I talked about how to convert a regular yeast bread recipe to a sourdough recipe.  Although the theory is pretty straight forward, I've always felt rather intimidated by the idea of trying it.

Finally, my desire for sourdough hot cross buns overcame my fear of failure, and I set to work converting an old favourite recipe from commercial yeast to sourdough.


This first recipe come from one of my all time favourite bread (and cake books) Homemade Bread by the Food Editors of Farm Journal   It's out of print now, but if you ever see a copy at a second hand bookshop or yard sale, snatch it up.  Not only is it full of yummy bread recipes, the decidedly sexiest attitude is always good for a laugh.

Hot Cross Buns

Easter Buns with frosting crosses - traditionally served on Good Friday

1/4 cup milk
1/3 cup sugar
2/4 tsp salt
1/2 cup shortening
2 pkgs. active dry yeast
1/2 cup warm water
3 eggs
4 cups sifted all-purpose flour (about)
3/4 cup currants
1 egg white
1 tsp cold water
white frosting (recipe below)


  • Scald milk,add sugar, salt and shortening; cool to luke warm.
  • Sprinkle yeast on warm water; stir to dissolve.
  • Add eggs, yeast and 1c flour to milk mixture; beat with electric mixer at medium speed about 2 minutes, occasionally scraping the bowl.  Stir in currants and enough remaining flour, a little at a time, to make a soft dough that is easy to handle.  Beat well.  Place in lightly greased bowl' turn dough over to grease top.  Cover and let rise until doubled, about 1.5 hours.  Punch down.  Turn onto lightly floured board.
  • Roll or pat to 1/2" thickness.  Cut in rounds with 2.5" bisket cutter; shape cutouts in buns.  Place about 1.5" apart on greased baking sheets.  Cover and let rise until doubled, about 1 hour.
  • With a very sharp knife, cut a shallow cross on top of each bun.  Brush tops wit unbeaten egg white mixed with cold water.
  • Bake in moderate oven (375F) 15 minutes  or until golden brown.  Cool on wire racks about 5 minutes.  Then with tip of knife or teaspoon, fill in the crosses on buns with White Frosting.  Best served Warm.  Makes about 18 buns.
White Frosting: Combine 1c. sifted confectioners sugar, 1/2 tsp vanilla and 2 Tbs hot water.  Mix until smooth.


Now, the above recipe makes a decent hot cross bun, but I do usually add spices and candied peal to it.  I also find it a wee bit sweet for my taste, particularly the frosting.

This next recipe takes a long time to make, but it's so worth it.  I recommend making the sponge in the morning, the first part of the dough late in the evening, leaving it to rise overnight, then shape and do the second rise in the morning.  The buns should be ready for late afternoon on the second day.  Doing the second rise overnight ends up drying out the surface of the buns before they go in the oven which makes them hard to cut.

It's also very difficult to photograph these hot cross buns.  By the time I have the props and camera ready, the buns are all eaten.  Three days of baking from dawn till 3am the next day and I finally learned to hide the buns while they cool so that they didn't get snatched up.  (I did a lot of test batches and testing, so I'm confident they are fantastic).

Sourdough Hot Cross Buns


A word about Sponge.  Although the word sponge can mean different things in various parts of the word, I use it here to mean a fairly active runny batter like substance made of sourdough starter, flour and water.  Make the sponge at least 4 hours before you plan to begin the bread.  I usually make mine the night before.  Mix at least 1/4 cup flour, 1/4 cup water (or more) and at least 1/8th cup sourdough starter.  Mix them well to make a runny batter, and leave in a warm corrner of the kitchen, covered with a cotton or linen towel.  After a few hours, depending on your temperature, the weather, whatnot, it should be bubbling.  You know the yeast is active in it.  If you leave it more than 24 hours, you need to feed it again.

1/4 cup sourdough sponge
1/4 cup milk
1/4 cup honey/maple syrup/or other sweet liquid (I use the juice the fruit is candied in if there is any left over)
1/2 tsp salt
1/2 cup butter/lard/or other fat (butter is best)
3 eggs
less than 4 cups flour (your choice but I recommend the first cup be all purpose or bread flour).
1/2 cup raisins
1/2 cup candied ginger (optional)
1/2 cup other dried or candied fruit or peal
pinch each nutmeg, cinnamon, allspice, and cloves


  • Scald milk, add honey, salt, butter.  cool to luke warm.
  • In a big bowl, add eggs, sponge, 1 cup of flour, and milk mixture.  Mix a lot.  What you are trying to do here is to blend everything and activate the gluten in the flour.  It takes about 5 to 6 minutes to mix this by hand.  I do it in 2 min sessions, with a min or two rest in between.  Wooden spoon is my favourite tool for this.  Alternately, you could mix in electric mixer for 2 min.
  • Add spices, and fruit, mix some more.
  • Mix in the flour a little at a time until a soft dough forms.  Should be barely firm enough for you to handle.
  • Place in a lightly greased bowl, grease the top of the dough, and cover with a linen or cotton towel.  Rise until double in size.  Even with a very active sourdough starter, THIS TAKES A LONG TIME SO YOU MIGHT WANT TO DO THIS OVERNIGHT.
  • Punch down and break off egg sized balls of dough.  Form into bun shapes and place in a lightly greased tray or baking pan.  Cover and raise till double in size.
  • Carefully cut the cross in the top with a VERY sharp knife.  Optional:brush with egg white mixed with 1 Tbs of cold water.
  • Bake at 375 degrees F for 20 to 25 min.  


I'm not bothering with the egg wash (I don't like egg whites much, especially with bread) or frosting, but feel free to do it if you like.

Ideas for fruit to put in them: dried currents, dried cherries  dried raisins  dried peal, freshly grated organic citrus peal, candied peal, dried pineapples, dried anything... make sure you pit and chop up anything bigger than a raison.  My favourite is to get the chunky runny marmalade they have in Europe and strain off the juices (use this instead of honey) and the chunks of orange as the fruit for the bun.

Healthy: well, um.  I don't recommend  eating as many as I have this week.  But hey it's only once a year and when compared with commercial made hot cross buns full of highly processed ingredients and florescent coloured lemon peal like substance, YES they are much healthier.

Affordable:  I have no idea.  I don't even want to price these out, they are so delicious.  They do however help use up the left over dried fruit you have in the back of the cupboard... that's got to count for something I suppose.

These are NOT suitable to serve to your Vegan Friends because of the egg, honey, butter, &c.  See this vegan friendly recipe for hot cross buns.

Allergies: This is fairly easy to modify for allergies.  I don't recomend cutting down on eggs and butter though, it is what makes the dish.  If these are the things you are allergic to, then please make the vegain version I just linked to in the last paragraph.


Sunday, March 24, 2013

Converting a normal bread recipe to sourdough

First stage, to write out a recipe based on the
original hot cross bun recipe, yet incorporates sourdough
I almost never have commercial yeast in my house any more  I much prefer to make and eat bread with sourdough.  This is mostly because I'm lazy.

Lazy because commercial yeast acts really quickly and you have precise timing for each stage - sourdough is less fussy and gives you an hour or two leeway.

I also really enjoy the flavour of sourdough.  I can make it strongly sour (making a stiff sponge) or mild and lofty (a runny sponge started several days before baking day).  With sourdough you are the master.


Been hankering for a sourdough hot cross bun recipe but I haven't found one yet that captures that certain I don't know what, I remember from my youth.   The Vegan Sourdough Hot Cross Bun Recipe I posted earlier is very good, but I'm looking for something a bit more old fashioned and full of eggs.  So instead of working from a sourdough recipe, I decided to start with a recipe I know and love, and transform it into sourdough.
highly amusing bread book

The recipe I'm starting with is from my most favourite bread book ever:  Homemade Bread by the Food Editors of Farm Journal.  Now, I don't recommend this book to everyone.  In fact, I think most people would be offended by it's attitude towards woman.  But I find it a funny attempt to counter the feminist movement.  I laugh at descriptions how on election night, a woman should be in the kitchen baking Election Night Bread (be careful how you spell that folks) to serve to her husband and his friends from work as they gather around the television watching the polls.
I have Baking with Sourdough
on my kindle

The other reference I'm using to convert this modern recipe is Baking with Sourdough (Storey's Country Wisdom Bulletin) by Sara Pitzer.  It's an excellent reference for beginners and experienced sourdough lovers alike. I find myself referencing it time and again.  I highly recommend it.

Sara writes:

"To adapt a yeast recipe, begin with a small amount of starter, about 1/4 cup... Mix the starter with some flour and some of the liquid from the basic recipe you want to convert.  Figure that 1/4 cup starter has replaced about 1/4 cup flour and slightly less than 1/4 cup liquid in the recipe.... "  She goes on to describes the method of making a sponge, mixing some of the flour and liquid with the starter and letting it sit 4 (for mild flavour) to 24 (for strong flavour) hours.  Then proceed with the regular process, being careful to get the right texture of the dough (it helps to have made the recipe using commercial yeast before hand so you know what the desired texture and consistency of the dough should be) and allowing for longer time rising the dough.  Sara finishes up saying, "If it 'thinks good,' try it." which is exactly what I plan to do.


A few things to note (and Sara's book goes into more detail about this) is that you can control how strong a flavour your sourdough starter gives your bread.  You are not at the mercy of your starter.

One way to control the flavour, making it more mild, is to create a runny sponge a few days before hand.  I usually keep my starter extra-thick and then create a runny sponge from it (using by volume 1 part starter, 1 part flour, and 2 parts water).  Feed it at least once a day for at least 2 days, twice for a more mild texture, don't worry if you make too much, the extra sponge can become sourdough crackers or bread.  By having the sponge runny and at room temperature for a few days before baking day helps make the bread more lofty and less sour.


UPDATE: I just tried my buns and they are officially delicious.  Be posting both recipes very soon.


Monday, March 18, 2013

Transitioning Back to Solid Foods - recipes

Bread soup, looks disgusting, tastes yummy
After a week on a clear liquid diet, it was time to begin eating solids again.  My stomach is still very grumpy, so I decided to make a slow transition back to solid foods by starting with some stomach-mild mushy foods.

The nice things about these recipes is that it helps to use up all that extra broth left over from the previous week.


Bread Soup

This is a very British food, traditionally fed to the very young and sickly.  Also makes a good breakfast for the healthy.


A couple of bread crusts, or slices of bread.
A teaspoon of butter  (not Marg unless you are vegan or can't eat butter for some reason. I use goat butter because it's easier to digest.  I can't remember the specifics, but there is something in butter that helps wake up your digestion system, when taken in moderation)
some broth
optional broth cube


  • Cut or crumble up the bread into bite size segments and put in a bowl with a tsp of butter.  Optional, add a crumbled up broth cube.
  • Bring the broth to a boil and pour over the bread.  Stir and add more broth if you need it.
pretty simple.


Rice Mush


About 1/4 to 1/2 cup of rice
roughly 2 cups of dashi stock (or just water)

  • Wash the rice in cool water at least three times
  • If you have a rice cooker, follow the instructions for rice porrage that came with it.
  • Otherwise, combine washed rice and dashi stock in a pot, bring to boil, cook covered on low for about an hour or until mush.
  • Serve with ume boshi (pickled plum) if you can, as this helps aid digestion.  Wakame seaweed and nuka pickled veg are also great additions to this dish and help wake up the gut.
A word about rice.  As tempting as it is, stay away from brown rice the first day or two.  High fibre foods can really set back your recovery.  Rather, stick to low fibre foods, lots of moisture, and whatever your doctor recommends. 


Affordable cooking: yes.  most of these use up leftovers, but even cooking from scratch, it's still pennies a bowl.

Vegan?  Could be if you use vegan broths and marg instead of butter

Healthy: there is a lot of nourishment in these recipes, but I would be leery of having a restrictive diet of just mushy stuff without a doctors consultation and monitoring.   

Possible allergy conflicts: if you are using commercial made broth, there will most likely be soy and lots of yeast, both common allergens.  

Sunday, March 17, 2013

Vegan Sourdough Hot Cross Bun Recipe

Happy Springtime everyone
Hot cross buns, my most favourite bread.

Recently I discovered this very delicious looking recipe for vegan friendly, sourdough hot cross buns.  SAChoirgirl gave me permission to share it with you here.

I haven't tried this myself yet, but it looks like it's going to be yummy.  It's got all the right stuff in it.  If you do end up trying it, please let me know how it turns out.


Here's what SAChoirgirl has to say:


South African hot crossed buns are different from American ones. Typically they are more spicy, darker, and less sweet. 
I adapted this recipe to suit my taste, so it might not be quite what you are looking for, but it is not hard to adapt, and I think if you want something sweeter and lighter it would mean using all unbleached white bread flour, and perhaps a sweeter glaze. 
The diastatic malt powder is in there more as a dough enhancer, but it does also add a little sweetness. Bonus: I use fresh orange zest, and candied peel is optional, so you could use what you have available.


1 cup mature sourdough fed no more than 12 hours earlier 
1 cup water 
1 rooibos or English breakfast tea bag (optional) 
2 tablespoons coconut oil (you could substitute any neutral vegetable oil, if you prefer) 
1 cup mixed raisins and saltanas (golden raising). candied peel optional. 
1/2 cup almond meal (optional. The buns are lighter without it) 
1/2 cup flax meal (optional. buns are also lighter without it. I use golden flax, and add it for texture and fiber) 
1/4 cup sugar 
1 teaspoon salt 
340 g unbleached bread flour 
160 g white whole wheat or traditional whole wheat flour (can be substituted with unbleached bread flour) 
1 teaspoon diastatic malt powder 
1 Tablespoon grated orange zest 
1 Tablespoon cinnamon 
1 teaspoon ginger 
1/2 teaspoon nutmeg 
1/2 teaspoon allspice 
(all spices are optional, and can be substituted or left out to suit your taste)
Method: 
  • Heat the water to 180 degrees f (hot but not boiling. Exact temperature is not critical) and add teabag and raisins. Allow to cool until tepid. Strain, saving the water, discarding the tea bag, and setting the raising aside. 
  • Mix together the sourdough culture, the soaking water, sugar, and salt. 
  • Add the flax meal and almond meal if using, and the diastatic malt powder, and allow to rest for 15 minutes. 
  • Add the spices, and then begin mixing in the flour a cup or so at a time, until the dough pulls away from the sides of the bowl (I start with the white whole wheat flour, and then add the white flour, adjusting the amount based on the response of the dough and my current kitchen conditions. In general you want a slightly drier dough than the typical artisan sourdough, because the sugar tends to draw moisture and make the dough more sticky overnight. Avoid a very dry or stiff dough, though, as it won’t rise as easily). 
  • Kneed until the gluten is well developed (roughly 25 minutes on medium speed in a mixer. Hand kneeding sometimes goes faster). 
  • Put the dough in the middle of your work surface and let it rest for 15 minutes (I don’t use a floured surface at this point, because I don’t want to incorporate more flour. I use a rolling mat intended for making pie crusts. You could also use a vinyl table cloth or a stone or granite work surface, if it isn’t too rough). If the dough flattens noticeably, incorporate additional flour, and rest again. 
  • Once the dough holds its shape for 15 minutes, flatten it into a rough rectangle, and sprinkle 1/3 of the raisins and orange zest over the surface. Fold the dough in thirds (sometimes called a “letter fold”) and flatten again. Repeat with the remaining fruit and zest. Flatten and fold once more without incorporating anything. Then flatten again and pull the corners of the dough towards the center, shaping a tight ball. Seal the seam (dampen your fingers if necessary), turn the ball over, and tighten the outside surface by tucking it under and rolling the ball around. This is exactly light shaping a boule, and will help the dough rise. Don’t worry if some raising poke out, but try to avoid breaking the surface tension if possible. A
  • llow the dough to rise overnight or 8-12 hours. 

  • The next day make a think paste of flour and water, and fill a piping bag with a round nozzle. tip the dough onto your work surface and allow to rest for 15 minutes. If it spreads out too much, kneed in more flour. 
  • Divide into 12 and shape buns. 
  • Pipe a cross over the surface of each and allow to rise for 2-4 hours, or until puffy.
  •  Glaze with topping of your choice (egg if you don’t want it sweet, sugar and water or strained and diluted apricot jam if you prefer it sweet) and bake at 375 F until golden and cooked through (20-35 minutes). 
  • Wrap in a towel to cool, and if using a sweet glaze, reglaze once only slightly warm.

Tuesday, March 5, 2013

How to Render Fat

Until recent years, fat was one of the most sought after and difficult to acquire foods (unless you lived in the Arctic  but that's a story for another day).  Fat isn't just a high source of energy, it can be used to improve the tasted of breads, create the texture that we know and love in pie crusts, flavour stews and cooked grains, as well as preserving foods for long periods of time.  People also made soaps, lotions, and boot polish from it.

When you think about what the Western World use to be like pre-1950s, fat was an important ingredient to life.

Quite often, when engaging in historical cooking pursuits, be it reproducing recipes from the Middle Ages, American Civil War, or even war time cookery, you will find recipes calling for rendered fat.  Here is a real simple way to render beef fat, albeit, it takes a very long time.


HOW TO RENDER ANIMAL FAT


For every pound of raw fat, place half a cup of water in the sauce pan (don't use your best sauce pan for this, it's a real bugger to clean).  Place the pan on low, and lightly simmer with the lid off for many hours.  Don't cook it too high or the fat will scorch and impart an unpleasant taste to whatever you cook with it.  If the fat turns brown or smells scorched, toss the whole batch and do better next time.

When all the fat is melted, strain through a cheese cloth and leave the fat to cool before putting the lid on and storing it someplace cool (like the fridge).

I try to use this within 6 months.  It will eventually go rancid  sometimes after just a few months, sometimes it takes more than a year.  You can smell it when it does, it's very distinctive.


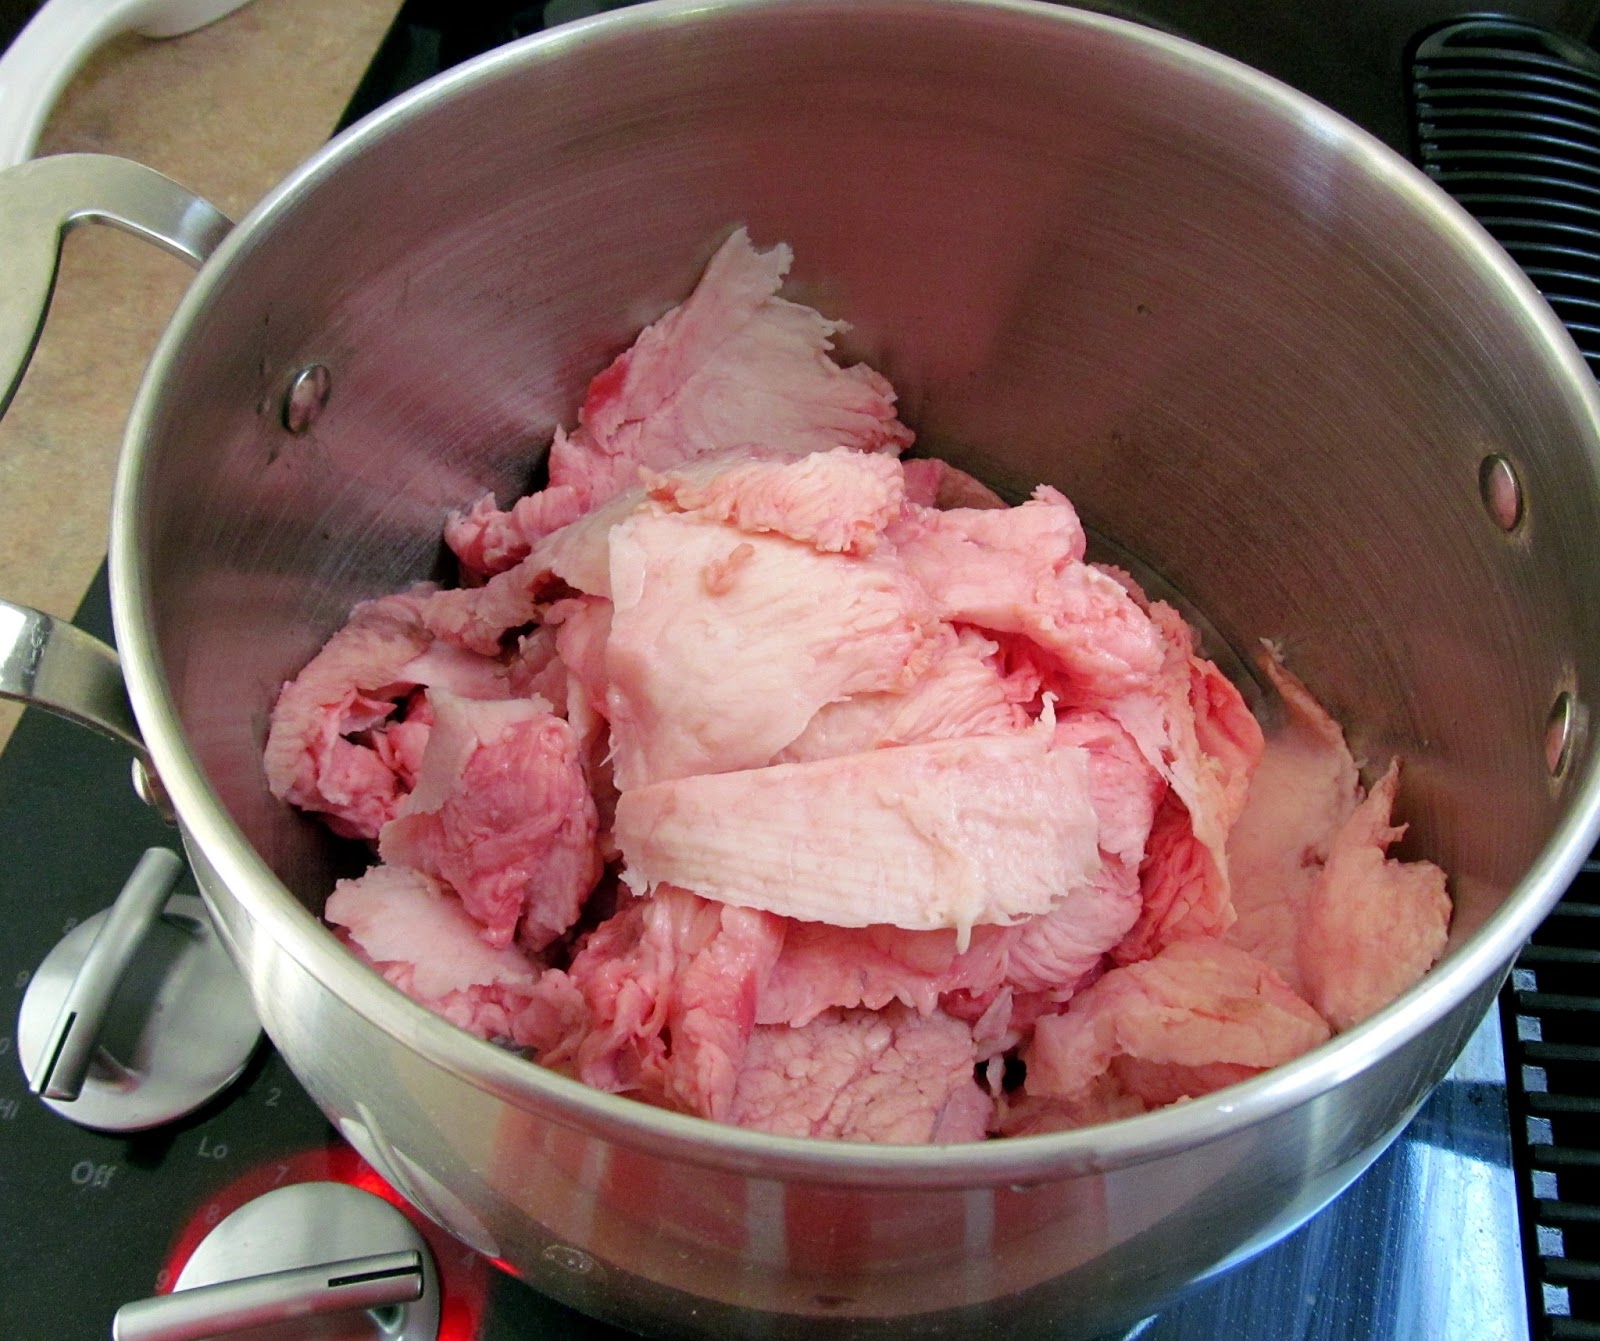
I'm using beef fat that would have normally gone in the trash.  After reading some WWII household manuals, I decided it would be nice to waste less.  So instead of tossing out the fat and buying lard, I decided to render it down and use it to make meat pie crusts later this month.  I don't normally have this much fat in one go, but I figure from now on, I can keep the little bits of raw fat I trim off roasts in a bag in the freezer, then when I have enough, I can render it.

I'm still not very good at trimming the fat off the meat, so there are a lot of bits of beef left over.  Aim to do it better than I did, but if you are as rubbish at trimming raw meat as I am, don't stress over it.

I'm thinking of taking these left over bits of beef, trimming them up and putting them in a curry or possibly doing what my Great Grandmother would have done, toast them in a hot oven till crispy.


In Victorian days, they would have done this on a warm, but not too hot, part of the cook stove, for sometimes several days until the fat has completely rendered out.  The stove is already being heated for other purposes, so it's not taking up a dedicated burner like me.  I did mine on the electric stove, which wasn't the most economical method.  I suspect a slow cooker would have been better, so I'll try that next time.


Tuesday, February 12, 2013

Pancake Tuesday - search for the perfect recipe.

Today is Pancake Tuesday, and I am looking forward to making pancakes for dinner.

Often my 'pancakes' look like this, but not today!
Pancake Tuesday is a tradition that originates in Western Europe; directly related to the celebration of Lent and Easter.  But it's roots are something far more agricultural.

Back in the day before food that comes from a can or supermarkets, or refrigeration   Back when what you had to eat was what you grew yourself.  Back then, this time of year is the time when food is scares.  It's a period when the pantry is barren and there isn't much food to be had anywhere.  Not in the fields, not in the hedge rows, not in the cellar.

In a few weeks, the new shoots will come out on the hedge rows, which are very tasty to snack on.  The ground will thaw and we can dig up roots.  But in the mean time, for a traditional, agricultural society, it's a time to tighten the belt and be frugal with your food.

Which isn't such a bad thing, especially when you think about how much weight people put on in the fall and winter, especially in an agricultural society, but even in our modern age as well.   It's natural to stock up (both in the pantry and the belly) for winter, then sluff it off during the trim time in the spring.

But as sort of a last haza, it's nice to eat up all the eggs and other foodstuff that are at risk of going off after a long winter storage.

In some parts of Europe it's hot cross buns, in other's it was some other eggy bread, and in some places (like much of England and Scotland), it was pancakes.

As for me, well, I'm not picky.  I'll accept any excuse to make pancakes, and if I can make them for diner, so much the better.

What I need now is a good recipe.  A recipe for sourdough pancakes.

What I would like to make for dinner tonight is sourdough drop scones style pancakes, but to find a recipe that isn't too sour and not too rich, that only makes enough for 2 to 3 people, and not an entire army and their camp following.  That's going to be a challange.

Sunday, December 16, 2012

Sort-of Sorted Brioche

I do not know what is more attractive, a man who loves cooking or a British accent. Lucky for me I don't have to choose.

The fellows at Sorted, a rather impressive cooking site, show how easy and manly it is to love creating food. They even have their own cook book, Beginners Get ... Sorted .  I can't wait to try some more of their recipes.


Since I'm in the middle of a bread obsession right now, I started with a Brioche recipe.  Although, probably not the correct definition, a brioche is a sweet, light, eggy bread that tastes FANTASTIC!


I made a few changes to mine (oh, golly, gosh, gee, you say?).

Making this brioche all started when I saw dried pineapple in the store.  I thought to myself, Mmmmm... sure apricot goes well with chocolate but pineapple would be exactly that holiday flavour I'm looking for.  

I also have not yet found a chocolate chip that tastes good and has no soy, so I got a dark chocolate bar and  chopped it into chunks.


Most of the chocolates from Denman Island Chocolates are soy free and tastes amazing, just like chocolate should.  It's my first time cooking with it like this, and I'm really happy with how it turned out.  The taste is more intense than I remember chocolate chips being, so I wouldn't put as much chocolate in it as the recipe calls for.

While I was mixing up the dough I felt that it needed some vanilla extract.  Only when I got to the cupboard, there was also almond extract - so I used half a tsp of each.

I don't have any sugar in the house right now (Almost never do, except for the hummingbirds) so I used an equal amount (by volume) of maple syrup instead. 

The other thing I didn't use is a mixer.  


Sure, I have one, but I haven't used it in over two years.  I just find cooking by hand to be so much more satisfying.  The mixer is currently in the pile of things to sell, although mixing this by hand is giving me cause to reconsider.  


Check out the Sorted site and the video for brioche when you have a chance.  


I look forward to making more goodies from their site.  Just in case they are reading this, please do some recipes with chestnuts!  


Allergy friendly: as I've shown, the filling can be changed easy enough, but people with egg and yeast allergies as well as on glutin free diets should probably avoid this one.

Vegan friendly: not easy to make this vegan due to butter and eggs playing such a vital part in the structure of the bread.  But some kinds of vegetarians might be able to enjoy this - check before you bake this for them.