Showing posts with label Vegan Friendly. Show all posts

Sunday, January 24, 2016

My first Falafel - success!

Inspired by this recipe, I decided to try making my own falafels.


I made a few changes, as usual.  On the whole, a resounding success.


1 cup of dry chickpeas
1 cup fava beans (lightly crushed and skins winnowed)


  • Soak at least 24 hours with several changes of water.


1 leek
1 small onion
3 cloves garlic
2 teaspoons salt
2 Tbs flour
1 tsp cayenne pepper
pinch cardamom

Toasted whole then ground spices
3 pepper corns
2 tsp cumin
1 tsp coriander


  • Drain the beans, mash them up with all the other ingredients
  • form into falafel shapes (which happens to be the same shape as a large spoon) and deep fry medium heat


Affordable?  Yep.  I can buy three falafels for a dollar in the shop, or I can make this huge pile of falafels for the same amount.

Friday, January 1, 2016

New Years Day 2016, No-Soy Miso Club

The second annual meeting of The Victoria Miso Club went wonderfully well.


We began by opening last years Chickpea mugi (barley) miso.  It had an intense rich smell, and a robust miso taste.  The colour was much darker than I expected and we failed to get all the air pockets out, so there were a few spots of mold inside.  But otherwise a success.

This year is two batches of red miso.  We used the same recipe for both, only the beans were different.  For both, we used frozen koji rice from the local Japanese food store.

Adzuki Bean 1 year miso


  • 1 kilo dry adzuki beans
  • 500g koji rice
  • 200g sea salt (no iodine)

Chickpea 1 year miso


  • 1 kilo dry chickpeas (organic)
  • 500g koji rice
  • 200g sea salt (no iodine)


Method

  1. Examine beans and remove anything not a bean.  Wash.  Soak the beans overnight.  Rinse beans well.  Cook the beans in water until mushy.  The chickpeas I did in the pressure cooker in two batches, the adzuki on the stove in one big batch with just enough water to cover (add more water as needed).  The adzuki beans were ready about 2 hours before the chickpeas.
  2. Strain the beans - keep the cooking liquid - and mash the beans as much as you like.  We like chunky miso, so we just had a go with the back of the spoon.  You can make a smooth paste if you like.
  3. Combine some (about a cup) of the hot cooking liquid with the salt to dissolve the salt.  Mix this in with the koji rice when liquid is cool enough to put your hand in.
  4. Cool the beans so that they are cool enough to put your (clean) hand comfortably in.  Combine the beans, koji rice, salt, and enough water to make a paste.  If you remember (which we didn't) add a spoonful of last years miso,
  5. Put in vat, weigh down top, put in cold spot for 1 year.

As with last year, we relied heavily on Sandor Katz books, Wild Fermentation and The Art of Fermentation, for our miso recipe.  For a more in depth instruction on how to make miso, please see Katz. 

This year we are using plastic buckets to see how they work.


Affordable cooking:

Chickpeas were $7 this year, the rice about $6, and the salt, less than $1.  Let's say $14 for the gallon of miso.

Adzuki beans were about $4, the rice again $6, the salt less than $1.  About $11 for the gallon of adzuki bean miso.

To buy this miso in the store, it's about $16 a pound.  We made about 7 times that - to buy this much miso in the store would be around $100 - times two.

At a conservative estimate
Chickpea miso $100 - $14 = savings of $86
Adzuki miso $100 - $11 = savings of $89

That's not too shabby, especially when you consider we shared the expensive $25 between all the miso club members.  

Anyone who says you can't eat healthy on a budget hasn't made miso.


Tuesday, November 25, 2014

Review: Feeding Change Chickpea Miso

I was delighted the other day when I found another company making soy-free miso paste.  Feeding Change makes a Chickpea Miso paste that is "soy-free", "gluten-free" and (most importantly) "GMO-free".   It also claims to be 100% certified organic (awesome!).


Feeding Change's Chickpea Miso paste is smooth, sweet and salty tasting, and very delicious in cup of soup.  It's a sweet miso, meaning that it has a short (less than a year) fermentation period.  The website says it's a 60 day process, which is more than double most sweet miso ferments.  It's packaged in glass, with a plastic label and plastic lined metal lid. (Why the sudden interest in plastic in packaging? More on that later this week).

This miso paste is also Unpasteurized, which has it's advantages, and disadvantage (I'll get to that).  It is also Vegan Friendly.


After trying this paste in a few things, including my favourite breakfast cuppa-miso (I put some miso paste in a cup and pour hot water on it), I've come to the conclusion that there are definitely some aspects of this miso paste that I adore, and some serious room for improvement.

The thing I like best about Feeding Change Miso is the taste.  It's sweet and salty, has a smooth miso flavour, but not overpowering; has a smooth chickpea flavour, but again, not overpowering.  How to describe it?  The flavour is suitably strong, but not so aggressive that it can't be drunk on an empty stomach.

"Miso Happy There's No Soy", a slogan from Feeding Change's website.  With my sensitivity to soy and growing concerns about the sustainability of agriculture, having gmo-free, soy-free alternatives like this make my day.

Their website also claims that this chickpea miso paste is made (or at least hand stirred) in wooden vats - way to go for using traditional and renewable materials in production.  What they mean by double fermented, however, I don't know.  Unless they are referring to the koji growing part of production as a fermentation.  The word fermentation has so many uses these days, it's becoming quite the catch all.  But koji is a vital part of making real miso, so I'm glad they are including it.

Feeding Change Chickpea Miso is also a few dollars less than other chick pea miso(s) on the market right now. Every penny counts these days, and the only way I know to get a more affordable soy-free miso is to make it yourself.


And now for the needs improvement part of the blog post.  As much as I am enjoying this product, there are some areas the company can improve on.

First, the packaging.  Kudos to Feeding Change for using glass jar.  Not only is plastic touching food an increasing health concern, plastic waste (as I'm learning) is a major environmental issue and could doom us all if not dealt with soon.  However, plastic label on the jar indicates to me that they didn't think the plastic-free packaging all the way through.  The plastic on the inside of the lid is (more or less) unavoidable, and it's better than having the metal corrode into the food.

Next, I noticed that when I got the jar home and went to open it, there was an immense amount of internal pressure in the jar.  The lid shot off the top and landed on the far side of the room.  As startling as this is, it's not a health concern (like it would be in pasteurized food), it simply means that the miso paste has continued to ferment in the jar.  Being unpasteurized has major health advantages, however, it also means that the ferment will continue to 'breath' and gas build up is not uncommon.  I'm grateful that the jar was strong enough to contain the pressure, but I wonder how much longer it would have lasted before exploding.  Perhaps the miso paste was subjected to a prolonged period of un-refrigeration (or whatever the proper word is to describe being room temperature) during shipping or storage?  It certainly wasn't out of the fridge long enough on the journey home from the store to explain it.

As it was when first opened fresh from the store.
Not the tidiest presentation.


Another aspect of the packaging they need to improve is the size of the jar.  The jar is far too large for the product size which can lead the customer to feel short changed.  Though, I did check, that the weight of the chickpea miso paste (without jar) is as it states on the label (it is).  Still, having all that open space inside the brand new jar of miso has that negative psychological impact.

Again, as it was when first opened.
Notice the gap in the top and the large air bubble in the bottom right.


But that's not the biggest problem with the packaging.  Like the now defunct Organic Lives Chickpea Miso, another company with good ideas and lots of potential out of Vancouver,  There are a lot of air pockets in the miso.  When miso is packed with air pockets, it leaves it open for the possibility of mold growth.  Considering that koji (an essential ingredient in miso) is mold, the problem isn't one of safety.  The potential problem is two fold.  first, the  perception (so much of selling something relies on perception) that all mold is bad for us - not true - but still a prevailing meme in our society.  The other problem with mold growing in pockets of air is that it causes the miso around that pocket to develop a musty, unpleasant flavour.

These problems in packaging are very amateur and the company should have figured this out with the minimal research.  The Book of Miso talks a lot about this, and that's pretty much the go to English language book for learning how to produce miso both at home and commercially.

I'm confident as the company grows, they will find ways to improve their packaging.


One final thing, and please forgive me, I'm just being nitpicky here, however, the website brags that the Chickpea Miso paste is grain free - yet, the last time I checked (and every time before that), rice, a main ingredient in miso, is a grain.


Am I going to buy this again?  Yes, I think I will, especially if they fix how it is packaged in the jar.  Feeding Change is off to a good start with this product, and I can't wait to see how they evolve.

Saturday, November 8, 2014

Baked Samosas with chickpea and leftover rice filling

My current culinary quest - to learn to cook and love Indian food.  Today's experiment: Samosa!

I found this recipe in Everyday Indian by Bal Arneson.  A very enjoyable author who has a great selection of Indian-Canadian dishes with a Pacific coast twist.  I have a couple of books by her and I like how she isn't afraid to meld indian flavour with West Coast ingredients.  

Some of my modifications were to half the salt, change up the fats, and completely alter the ratio of the filling to match the collection of leftovers in my fridge.  Basically I took some leftover rice, leftover chickpeas, leftover fresh cranberries, replaced some of the whole wheat flour with white... &c. and used her recipe as a guide.  

stuffing the samosa


I'm not going to post my recipe here because it's a book well worth reading.  Your local library should have it, and if they don't have it, they should and you should tell them that they should.


The red sauce is Pataks mango chutney, which turned out to be a bit sweet for this meal.  The dark dot is tamarind chutney (recipe from the same book as the samosa).  Tamarind chutney is extremely flavourful, and impressively spicy.  

I'm very excited to find out what else I can stuff in these triangles.

Affordable Cooking:  The filling today was purely leftovers and spices.  Since the chickpeas I used were cooked from dry (about 1/4 cup when dry), it brings the price down quite a lot.  Even if I was starting with ingredients bought specifically for this meal, I estimate it would be between fifty cents to two dollars for eight samosas.  

Bento:  This looks like the type of food that will travel well.  I'm definitely trying this in bento.

Even though it's my first time eating samosas, I'm filing this under comfort food.  It's just that good.

Allergy friendly:  I don't know how well it would be with different flour, but just about everything else can be changed up, from oils in the dough, to filling.  

Health:  Yes!  Arneson talks about this as the health 'lunch to go' food that she often cooks for her daughter, a highschool student.  Chickpeas, spices,  whole wheat flour, are all good things and in good ratios.  I can't find any fault with the healthy aspect of this recipe... except it's yummy and makes you want to eat a lot of them.

Vegetarian and vegans:  The original recipe looks vegan friendly, but I added some ghee when I made mine (to replace some of the flavour lost from cutting down on the salt).  But even still, it's vegetarian friendly fare.


Thursday, July 31, 2014

A strange dream about vegan and omnivore long term sustainability

I had a strange dream the other night that has been haunting my waking world.  I was living in this long term experiment where we had a small community and we had to survive with as low an environmental impact, and as self sufficiently as possible.  There were two teams, one who worked with animals and the other team lived a pure vegan life.  I was part of the first team but was for some reason giving lessons and advice to both teams.  It involved all sorts of people, historians, enthusiasts, ecologists, gardeners, and a transient student population.

In my dream, the goal of the study was to discover if it is possible to combine current day knowledge and to some extent technology with traditional methods and wisdom.  The aim is to supply a surplus of necessary resources (food, clothing, shelter, entertainment) while leaving the soil and overall environmental stability in a better state than when we started.

The other part of the experiment was to investigate if a Vegan way of life was actually ecologically friendly when compared with a similar community living the same lifestyle but also using and on occasion consuming animals.  Can a vegan live a nutritionally fulfilling diet on local resources alone?  How would a vegan cloth themselves in the winter if they can't depend on industrial fabrics made from plant pulp and petroleum?  Would the soil deteriorate without the addition of animal manure or would it thrive on compost alone?

The groups would meet weekly, talk about problems, observations, and questions of things that needed more in depth study.  For example testing the fertility of different soil management methods by careful record keeping, or testing the nutritional density of apples grown in a regular orchard, or in an orchard that had a herd of sheep grazing on it.  For those sorts of things, our academic counterparts would arrange lab work or perhaps research methods for solving a problem, or stuff like that.

It was a very precise dream with a strong structure to the experiment.

At one time in the dream, there was a great debate as to whether it was in agreement with vegan principles to use worm composting - the debate spread across the world and many university students and teachers wrote in with their opinions.  In the end, it was decided that worms confined in a bin were not whereas worms in a compost pile were fine.  For some reason undisclosed in my dream.

Originally, my dream memory tells me, it was suppose to last 4 years.  The first three years to build fertility in the soil, and by the end of the third year, be almost completely independent.

There were some interesting differences in the vegan vs the omnivore groups.  The vegan group had to grow extra acres of oil seed crop to use as fuel for their tractor, whereas the omnivore's could use cattle to pull the equipment.  For some reason horses weren't multipurpose enough for us.  The downside with the cattle was that we needed to grow extra feed for them during the winter.  However, something happened and the tractor the vegan group used broke down just at a vital point at some agricultural even - harvest or planting, or something vague.  It wouldn't be a dream worth remembering without obstacles to overcome.

And so the dream went.  The original four years, was expanded to six, then ten.  We built different houses out of local materials.  The vegans yurt was fantastic in the summer, but an utter failure for winter warmth.  However, they had super awesome luck with their cob construction and after a few years made one large house that they all lived in.  The omnivore's eventually had mostly yurt living spaces with wattle and daub communal buildings.  Both living arrangements had their advantages and disadvantages.

Although it was almost a contest between vegan and omnivore living, we did live side by side, and as the years progressed, the two communities came closer together, learning from each other, sharing resources when times were tough (to the chagrin of the professors managing the experiment).  We had become so independent, or perhaps codependent, that there was less and less desire to interact with the outside world.  The tidal influx of students participating in the study was sufficient for us to feel connected to life outside.  By year eight, it was a very pleasant rhythm.

But also, great inspiration to the world at large.  Academics built their reputations talking about our endeavours.  Political decisions were influenced by our accomplishments.  Even corporations took notice and started to make changes to the way they managed their resources.  As we produced so much excess food, other cities started to plan farming communities like ours to provide supplies for emergency situations.

But like I said, it was just a dream I had.


What a strange dream though.

I've been thinking for a while lately about how eco-friendly a vegan diet is.  Compared to the Western Diet, it's very good.  However, compared to my personal situation, I think that a vegan lifestyle would have a devastating impact on the environment.  But maybe I'm wrong.  Academics can make good arguments for both sides; science can confirm the validity of both opinions.  That leaves us with no way to discover the truth - unless we actually try it.

I've been trying it a little bit on the farm here in real life.  One of the gardens I grew flax in this year, I used animal manure on one half of the garden, and compost on the other.  Other than that, both halves received the same treatment.  However, the flax on the manure side grew a good foot and a half taller than the compost side.  One garden is not enough evidence.  That is why more practical research needs doing - not just reading reports, but actually having people living the life on a day to day basis.  I think it's a fantastic idea and I loved participating in the experiment in my dream.

As much as the world needs to know more about this kind of thing, I don't imagine there are enough people in the Western World up for this sort of a challenge.  Though I wish they were because I would jump at the opportunity in a heart beat.

Friday, June 13, 2014

Sourdough Nettle Rye Bread recipe - or let's get Medieval on Your Nettles

Yesterday I made an adaptation of an adaptation of a medieval recipe for Nettle Bread.  It's exceedingly delicious, with a sweet and moist rye bread crumb.  I like it sliced thin, lightly toasted and smothered in butter (homemade is best) and a few drops of honey on top.

Rustic nettle bread


We have the perfect growing place for stinging nettles, it's moist year round, it's acidic, it's downhill from the neighbour's manure pile so the soil is overloaded with nutrients.  There is not much else that will grow there, but the nettles thrive.  So I harvested a large basket full of just the leaves.  My nettles are getting a bit old and scraggly, but if you have young nettles, you can use the stem as well.

Although I made a huge batch of nettle bread this time, I'm going to scale down the recipe for you.  Those of you without constant access to nettles might have to wait till they are available in the shops in the spring... Far too expensive for something available free in the wild, but when that's all you have... well, you make do.  The bunches sold in the store are about a cup worth - but you can use more or less depending on what you have on hand.

blanching nettles
(in the water I used for brewing small ale later that day.
This should be interesting)


The recipe I used for inspiration comes from the beautiful book The Medieval Kitchen, a social history with recipes by Hannele Klemettila (the final 'a' in the name has those two little dots on top).  The author uses modern yeast and caraway seeds.  I hate caraway seeds, possibly more than I hate mushrooms.  They disgust me.

Last year I used Klemettila's recipe and it's quite nice (without the caraway seeds).  It's written in a way that assumes you are very comfortable baking bread and the recipe uses modern ingredients and methods that were not available in the middle ages.  Like most of the book, it is more an attempt to introduce the modern pallet to some of the medieval flavour combinations.  Combine that with the layout and gorgeous pictures, I think it's a good introduction to medieval food.

For me, it's not enough.  In the middle ages a person couldn't just drive down to the supermarket and pick up a packet of yeast.  They had to capture their own yeast, very much like we do with sourdough today.  In fact, in some parts of Europe, it was exactly like we do with sourdough today.  To keep the bread as medieval as possible, I used sourdough instead of modern yeast.

Because the nettles have so many natural sugars, I figured a heavy rye bread would do the trick.  And I was right.

This bread uses a sponge so start it the evening before you plan to bake.  It is also a bit different than many bread recipes in that I only rise it once.  It's a trick you can use for sourdough when you can't guarantee you'll be available to shape the loaves for the second rise.  This creates a more rustic texture, sometimes creating those big air pockets in the loaf.  I kind of like it.

Stinging Nettle Sourdough Rye Bread

About 1 cup of fresh nettles - or a lot more if you have it
1 tsp salt
Sourdough starter
Rye flour
Wheat flour
1/2 tsp Whole fennel seeds
1 tsp honey (optional - makes it no longer vegan)
water

The night before baking day, we make a sponge:

  • Put 2 Tbs sourdough starter (from the fridge or already active is fine), 1/2 cup water, and enough rye flour to make a thin batter.  Cover with a cotton or linen towel and leave on the counter overnight.  This is called the sponge.
  • Feed your starter as per normal - I'm assuming you are already slightly familiar with sourdough.
Now it's baking day, let's get's medieval on your nettles
  • Toast the fennel seeds in a dry fry pan until they smell amazing then put to one side to cool.  While it's toasting, you will want to shake or stir the seeds quite frequently to ensure nothing burns.  When cool enough to handle, coarsely grind it with a mortar and pestle or a spice mill.  
  • Bring a fairly large pot of water to the boil and dunk the nettles in the boiling water for about 3 minutes.  Take the nettles out and put them in a bowl, add about a cup of cold water to the nettles.  When the nettles are cool enough to touch comfortably, take them out of the cold water and strain them - keep the cold water, we're about to use it.  Let's call it nettle rinse water.
  • Combine the nettle rinse water, sponge, 1 tsp salt, toasted fennel seeds, a handful of flour, and a handful of rye flour.  If you are using honey, add it now too.  Mix it up well and put it to one side.  
  • Take the nettles that have drained, chop them up as finely or as coarsely as you like.  The cooking should have neutralized the sting.  Add this to the flour/sponge/fennel/water mix above.  Stir vigorously, almost whisking it in as this will help to activate the gluten in the flour and ensure the nettles are well incorporated into the dough.
  • Add another three or four handfuls of rye flour, or about 1/2 a cup, and mix well.
  • Add regular flour by the handfuls, mixing between each addition, until you have a shaggy mess.
  • Put the shaggy mess onto a well floured board or counter, kneed it until no longer shaggy, but instead a lovely smooth.  
  • Shape into one or two loaves, then put on a baking sheet.  Cover with a towel and leave it alone until double in size.  This may take an hour or it might take 8, depends on your yeast and many other factors... most of which are beyond your control.  A lot of people like to leave it somewhere warm, which is okay, but for me doesn't make as nice a texture or as long keeping loaf.  Just put it somewhere where it isn't in a draft.  
  • When it's double in size, preheat the oven to 400 F.
  • While the oven is heating up, use a very sharp knife to carefully cut some lines in the top of the bread.
  • Bake at 400 for 35 min for the small loaves, or 40 min for one large loaf.  Bread is done when it sounds hollow when you tap it on the bottom.
  • Take out of the oven, wrap the loaves in a cotton or linen towel and leave at least 12 hours to cool before storing in plastic.  Or if you are hungry now, wait at least 10 min before cutting into it.
So beautiful, ready to rise


Affordable: Yes, if you're harvesting your own nettles and not paying grocery store prices.  The nettles add a lot of nutrition and a little bit of bulk to the bread which is pretty awesome.  Nettles are very healthy - just google stinging nettles to find out all the good things they do.

If you omit the honey, this is a vegan friendly bread.

Tradition and transition?  It seems to have been quite common in medieval times, but the tradition has died out.  As a Transition bread, however, this is going to be a good recipe to keep around.  A dense nettle bread is very common during starvation times, like during World War 2 for example.  Usually wheat flour is one of the first things to be rationed, so breads were made with whatever grains were on hand, and often augmented with nettles and other nutritional weeds that are usually ignored in times of plenty.

We would be foolish to think that we won't ever have a starvation time again in The West, but for now, it's actually quite a yummy bread, the nettles adding  a little bit of tang, sweetness, and even help prevent the bread from going moldy.


nettle toast and honey, delicious.


Wednesday, June 11, 2014

Cucumber, garlic scapes, and dill fermented pickles recipe


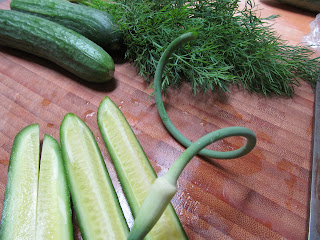
Here's a very delicious fermented pickle I've had the privilege to make.  The garlic scapes are from my garden, but the cucumbers and dill are from the store.  I plan to make this again later in the year with my own cucumbers and dill, but use whole garlic instead of the scapes.  It's tasty enough, but the scapes add a special something that is really yummy.


The other day I was lamenting the price of cucumbers in the store.  It was considerably higher than normal for some reason, but fresh fruits and veg are doing this more and more frequently these days.  But I found some cucumbers that had just come in at my friends shop, and bought the lot.  They are those lovely small cucumbers, tiny little seeds, so crunchy and tender.  

A good 20 plus pounds of cucumbers plus a garden full of scapes, and a few other vegs tossed in the pot for good measure, means that I made 6 gallons worth of pickles in an afternoon.  This recipe isn't for that much, but you can easily scale it up or down to your liking.  I'll do it per pound, so per each pound of veg you add...x this and that... very simple.

My recipe is inspired from this... okay, it's basically the same only modified for the open vat ferment style instead of the small jar ferment style.  Very good recipe, but far too small an amount for how good it tastes.  The ratio of dill, garlic and cucs is up to you entirely.  If you want pickled garlic with a hint of cucumbers, do that, if you like cucumbers best, do mostly those.  If dill drives you crazy with love and passion, go nuts.  But basically, I tend for 10 to 50 garlic scapes per pound of cucs, or one bulb of garlic for 2 pounds of cucs - I love garlic.


Cucumber and Garlic Scapes Dill Pickles


  • cucumbers
  • garlic or garlic scapes or both
  • fresh or dry dill.
  • salt
  • optional - chili pepper, other veg like carrots
  • water
  1. Weigh out the veg.  For every pound of veg put aside 2 tsp of salt.  Add one Tbs of salt to the pile (for the pot as they say).  
  2. Cut up the veg how you like.  The more surface area the faster they will ferment.
  3. Layer it in a clean crock (no antibacterial soap, this will kill the bacteria that we need to ferment the pickle), layer of veg, sprinkle herb, layer garlic, layer of salt, layer of veg... and so on.  Save a good Tbs of salt for the top.  When you run out of veg, sprinkle the rest of the salt on top.
  4. Put a plate or cut a piece of plastic or wood or whatever you have on top of the veg/salt layers.  It needs to be smaller than the opening so it can weigh down the pickles, but not too much smaller that the veg can get around the inner lid and float.  Weigh it down with a jar of water or clean rock, or the like.
  5. cover the whole thing with a cotton or linen cloth to keep the bugs out and stop the dust getting in.
  6. Place somewhere at cool room temp, between 10 and 20 C is ideal and ignore it for 12 to 24 hours.
  7. The veggies will make their own liquid, but probably not enough.  Add clear, clean water to the vat until the veggies are submerged.  Cover it back up and ignore it.  
  8. After three days to a week, open up the vat and take out a few cucumbers (with clean hands/tools) to taste.  If you like it, put the pickles in jars in the fridge.  If you would like it more sour, replace the inner lid and weight to make certain everything is submerged.  Cover again with cloth and ignore for another week.
There may be mold.  It happens but is seldom harmful.  If the mold is black or the vat smells rotten - toss it it the compost immediately!  Otherwise, trust your senses to tell you if it's okay to eat or not.  Mold isn't always bad for you.  In fact, a great number of molds are good - antibiotics come from mold, blue cheese, miso soup, sake rice wine... all contain friendly molds.  Most molds don't care about humans one way or the other, some are helpful and some are harmful.  But the point is, not all molds are bad.  If you feel uncomfortable with mold, then don't eat the vat.  If you don't mind it, and it's not black mold, then scrape off the mold, maybe sprinkle some more salt, and make certain everything is submerged below the water.

If you are making this in the heat of the summer, which is likely given the way cucumbers grow, and don't want to eat it right away, then feel free to add more salt.  In the summer, I usually put in 1Tbs salt per pound of veg.  In the winter, when it's cool, I'll add a lot less salt, maybe 1 tsp per pound of veg (this is my basic guide for all vegi ferments like kimchi or sauerkraut).  


You can make these pickles for the flavour, or to preserve the cucumbers or for the health benefits of probiotics.  I find this recipe very affordable, especially when my own cucumbers are in full production... although if you are buying the cucs, then maybe wait for them to be on sale.  

This is a traditional method to preserve cucumbers, and also one very good for transitioning away from dependence on big business and long range food transport.  Make this in the summer when you have cucumbers coming out your ears, then you will be able to enjoy pickles well into the winter, maybe even next spring.  For preservation, it's helpful to keep it in a cooler location.


Yes, this is vegan friendly.


Monday, December 9, 2013

It may work, don't know, let's find out.

I had some daikon in the back of the fridge that needed eating up, so I decided to make some fermented pickles.  Sliced it thin, mixed it with one chili pepper, also sliced thin, and added one generous teaspoon of sea salt per pound of veg.  Weighed it down and added water to make certain everything was submerged.


It's only been fermenting for three days now, but it is quite tasty.  I'm going to leave it a week or two, tasting it probably again in a week.  I really want the chilies to mellow and the daikon to spice up.  But who knows what will happen... it's all up to the invisible beasties now.

Affordable (they were all leftovers from the back of the fridge that were going to be tossed), healthy, vegan friendly and all that jaz.

Saturday, November 30, 2013

Fermented Hot Sauce Recipe from Dried Chilis and Excessive Amounts of Garlic

I adore those long, thin red spicy peppers that go so well in stir fry.  The garden centre calls them Super Hots, the grocery store Thai chilis, the grocery store in the garden center calls them chilis, and nothing else.  I call them yummy.


Every year I grow a few and buy a few, and it's always a few extra.  So they get threaded and hung to dry.  Dried chilis are great...except after a year or two of storage, they tend to loose their colour and pazaz.  So I decided to try a little experiment.

Fermented Hot Sauce with Garlic

For each 1/2 cup of dried chilis
1 clove head of garlic and
1 Tbs of salt
water


  • Roughly chop up the chilis, or not.
  • Peel the garlic and roughly chop it up or not
  • Combine salt, garlic and chilli in a small jar.  Add water to cover.
  • Use something to press down on the chilli mix so that every part of it is submerged.  I cut out a circle out of plastic container and then filled a small mason jar with water to use as a weight.
  • Leave on the counter for at least a week... I um, forgot about it and it was there for over a month.  If anything, I think the longer ferment was good for it.  Check it every couple of days (or not if you forget) to make certain everything is submerged and to scrape off any mould that forms.  If the mould is black, toss the whole thing, otherwise, it should be fine.  The spices, garlic and salt are strong enough to kill just about anything bad, but if it develops an off smell, don't eat it.
  • When it's time, place the chilis, garlic and brine in the blender or blitzer.  Blend or blitz till it's a lovely puree.  You may want to add a pinch of sugar or a few drops or honey.  A few drops of apple cider (or other natural) vinegar also go good in this.
  • Store in the fridge, eat within... I have no idea how long, but it will probably last a year.  You can store it at room temperature, but it may go mouldy after a month or so.

Roughly chopped
This is a fresh one I found in the back of the fridge
so I decided to toss it in with the others

chilis and garlic kept submerged in the brine

Very hot sauce with strong garlic taste.  yum.

Affordable:  Yep, the chillies were getting too old and destined for the compost, garlic was from the garden.  The only thing I paid for was the salt.  But to buy these ingredients in the store are usually cheaper than buying a good quality hot sauce.

Vegan-Friendly: Yes....unless you add honey at the blending stage.

Healthy and allergies:  By making your own hot sauce, you can avoid any additives or ingredients that you may be allergic to.  Also the probiotics from eating a live food, are good for you too.

I could do the same old song and dance about this being a good Transitional food, but you know it all by now.  Encourages self-reliance, and stuff, so forth.

Tuesday, November 26, 2013

Soy Free Sweet Miso Paste Recipe, with just a little bit of soy-free Tamari on top

For those of us with soy allergies and sensitivities, finding a soy-free miso paste that we can enjoy (and afford) isn't easy.  So I decided it was time to make my own.  I'm not certain what surprised me more, how affordable it was to make or how easy.

Miso paste and tamari
both made without soy


You can use any pulse, be it lentils, chickpeas, fava beans, black eye peas, anything, to make miso.  You don't need soybeans.  The only potentially difficult ingredient to get is Koji rice, but most asian grocery stores can order it in for you already cultured.  You can also make it at home with a bit of dedication.  It takes a couple of days, and you can get the koji spores from GEM Cultures.  The third ingredient is salt.

The method for making sweet miso is easy: get the koji rice ready the day before and soak the beans.  Next day, cook the beans, mash them (or not) and then mix them with the koji rice and salt, and maybe a bit of bean cooking liquid.  Pack it in a vessel with a inner lid and weight to press the miso down, then tie it up with a cloth and leave it on your kitchen counter for 2 to 8 weeks.

Red Miso, has the same method for making it, only different ratios of ingredients and it needs to ferment for at least a year.  It also requires different temperatures.  Since it's more fussy, I decided to start with the Sweet Miso recipe.  But I have everything I need, including confidence, to try one year miso later this winter.

For this first batch I cleaned out the back of my cupboard and used a mixture of forgotten dried beans (mostly Romano and Black Eye Peas).   But like I said before, you can use any bean to make miso paste.  Most people use chickpeas for their first soy free miso making experience.

I used an antique food chopper to mash up the beans
but you can use anything you like from stick and bowl
to cement mixer.


The references I used for this are The Book of Miso, especially this chapter, and Katz's two books, Wild Fermentation and The Art of Fermentation.  This is the recipe I used for the second batch of sweet miso as the first batch didn't have nearly enough saltiness to it and tasted a bit sour.

From what I've read, 1 gallon is about the smallest batch of miso you want to make at a time.  Something to do with the ratio of surface area to the volume of the something something.

Miso ready to dig out of the 1 gallon vat
you can see that some white mould has formed on top
that's normal.  Koji is a kind of mould, a delicious one.


So that's what this recipe makes, 1 gallon.  The ingredients cost me just under what one pound of soy-free miso paste is in the shop.  Since it made close to 10 pounds, I'm very happy with how affordable this is.  Next year I plan to grow my own beans which will cut the cost in half, and culture my own koji rice, which will take price of making this from $15 down to about $5 per gallon.


Soy Free Sweet Miso Recipe


1 kilo of dried beans
1 kilo (or just over) Koji Rice
140 grams sea salt (non iodized) plus extra
water
Kombu/kelp (optional)

Some other stuff you will need:
A container that fits more than 1 gallon (otherwise known as vat)
Something to mush the beans with
A plate or inner lid that fits inside your vat leaving as little room between the walls of the vat and the plate as possible.
A weight, could be a rock that has been purified with boiling water and scrubbed with salt
A cotton or linen, tightly woven cloth
...and other things.  This link covers it better.


  • Wash the beans well, and soak overnight.
  • Rinse the beans and boil with lots of water until they are mushy.  How long this takes depends on the kind of bean and how long they have been sitting in the back of your cupboard.  The older, the longer.  Usually for me it's about 2 hours, but some beans can take upto 14.  You can also use a pressure cooker for this step, but beware if yours is aluminium as sometimes that can contaminate your food.
  • While the beans are cooking, bring your koji rice to room temperature (if it's not already).  I'm going to assume at this point that you read the entire recipe before starting out and already have your koji rice ready to go.
  • Drain the beans, reserving the liquid.  Mash them up however you like.  It can be a paste, or it can be chunky, some miso recipes, like Natto Miso, keep the beans whole.  I do moderately chunky and puree or not as required when I use the finished miso.
  • If you are using kombu then keep in large pieces and soak in tepid water now.
  • Combine the salt with about 1/2 cup of bean cooking water, make certain it dissolves completely.  
  • When the beans are below 140F (aka, you can put your hand in them and they feel somewhat warm, but not hot), then add the salt water and koji rice.  Mix really well.
  • Add more bean cooking water as needed.  The goal here is to make a fairly moist, but not too moist mush.  To tell if the texture is correct, make a ball, like a snowball, from the bean mush.  Toss the ball firmly and assertively against a surface, like the bottom of your miso vat.  If the mush ball spatters everywhere, it's way too wet.  If it cracks upon impact, it needs more water.  And, if it just settles in, not cracking but not spreading out everywhere, then that's about right.  See the video in this post for an example of what you are aiming for.  
  • Make certain the inside of your vat is clean but don't use any antibacterial soap on it as this will damage the miso.  I often use a bit of sake or vodka to wipe inside the vat before the next step, but this is optional.
  • (Optional) Wet the inside of the vat and sprinkle lightly with salt.  Most people say this isn't necessary for sweet miso, but I find it makes a huge difference.  
  • Firmly press your bean mush into the vat, so that there are no air pockets.  I do a few snowball size bits of bean mush at a time, stop and massage them into the crevices, and repeat.
  • When the vat is almost full of bean mush, smooth off the top.  Evenly sprinkle at lest 1/2 a tsp of salt on top.  Cover the surface (directly on the surface) with clear wrap, or even better with kombu seaweed that you soaked earlier.  I go for a double layer, ripping the seaweed as needed to cover every last part of the surface of the bean mush.  
  • Place your plate or inner lid on top, and then your weight on top of that.
  • Cover with a tightly woven cloth and tie the cloth down so that no dust or insects get in.
  • Place the vat in a secluded part of the kitchen where it can stay at a fairly steady temperature, room temperature.  Check it after two weeks, but it will probably take a month.  There should be a layer of liquid on top (the Tamari, see below), maybe some white mould from the Koji Rice, and should smell like miso.
  • When you are ready to try some, drain off the liquid (keep it to one side for tamari, though if the miso is still immature, you may need to put it back in the vat again) and scrape off the mould.  Dig out half a cup from the center of the vat to try.  Press the bean mush back together to ensure there are not air pockets, smooth off the top, sprinkle salt on it, and wrap it up as before (kombu optional), replacing the tamari on top.  Try the miso you dug out.  If it's not ready yet, wait a week or two before trying it again.  If it is ready, then you can put all your miso in jars in the fridge, or you can use this same method to dig out miso you need for the week and let the rest continue to age.


You can see the coarsely mashed beans
and bits of koji rice in the miso
Sometimes I leave it as is, other times I puree it before use


Tamari (No Soy) Recipe

This is the liquid that forms on top of the miso paste while it's fermenting.  It tastes like super-strong-super-salty soy sauce.  Only if there are no soy beans in the miso, there won't be any soy in the tamari that forms on top.

Before you dig out your miso from the vat, drain off most or all of this liquid.  It's probably going to have some mould on top.  Remember, mold is one of the three main ingredients in miso (Koji Rice = special mouldy rice).  If the mould is white, yellow, or a bit blue-green, it should be fine.

Strain the tamari to remove the mould, sometimes this takes many strainings or even a bit of tightly woven cloth.  Bottle and store in the fridge.  Use as you would soy sauce, only use less of it, this will be much stronger.

Soy Free Tamari
Very salty taste, but delicious


Affordable:  Yep. I talked about this above

Vegan Friendly: Yep.

Healthy: Yep. There are some really fascinating studies out there about how daily consumption of miso has helped prevent radiation sickness, improve gut function, detoxify heavy metals from the body, and other good-for-you things.

Traditional:  Yep.  Until about 60 odd years ago, most families in Japan made their own miso paste, and each region (and family) had their own recipe.  Nowadays there are only a few dozen misos commonly available for sale in the shops.  Which is a shame.

Transitional:  YES!  With the consolidation of miso making to mid size and large companies, we have become very reliant on global trade and long distance shipping as a means of supplying our miso.  I think making our own miso paste can serve a role in transiting away from a lot of the problems we have with the current food system.  It's not just good for soups, but also for preserving pickles, marinades, condiments, and has huge health benefits.  Even those not use to eating miso could find this salty-savoury-sweet treat a beneficial addition to their daily diet.


There are a lot of different ways to make miso out there, this is just one of them.  The Book of Miso is currently the best English language book about miso, history, manufacturing, everything.  You can make miso from different pulses, grains, and even vegetables.  This experiment has opened up a whole new world, and I'm looking forward to exploring it all.

Friday, October 11, 2013

Troubleshooting Kombucha brewing and some unusual ideas for all those extra SCOBYs about to enter my life

I am completely in love with Kombucha, possibly to the point of mild obsession.  It's just so darn tasty!


I've made a few batches from the Kombucha mother I got from Wells of Health (who have been totally awesome about replacing the viili culture.  I'll definitely be buying more from them in the future), and the first thing I learned is that it doesn't always go right.  But that's okay, because every time you finish brewing one batch of Kombucha, you have what you need to make two more.  I can most definitely see the advantage of having more than one batch on the go at any time, even if it's just a small back up tucked away in some obscure spot of the house, that you change up every couple of months.

Here's an example of why a back up tea is a good idea:

These two 6 cup kombucha brews were started at the same time.


This first one used the original SCOBY, which is a bit over a quarter inch thick.  Only 11 days old, and it is growing a nice layer on top of the tea.  It smells great, but a bit sweet still, so I'll wait a while before harvesting it.


Started the same day, but using a smaller kombucha mother (another term for kombucha SCOBY), it doesn't seem to be doing anything.  The smell is still like sweet tea.  About three days ago, I added a tiny bit of SCOBY (that spontaneously formed in a bottle of Kombucha I was drinking at the time) and some more starter tea... only now it seems to be growing something, but what it is growing...I'm not too sure.

I declare this second batch a kitchen failure, thank goodness the first batch is so healthy.

Both of these made a total of 6 cups, I used 3 tsp of loose black tea, brewed till cold, just under 1/2 cup sugar, and 3/4 cup of starter.

Both made the same, yet they are so different!  So I did some reading.  This is my favourite site for troubleshooting kombucha, I suspect what happened is that I didn't let the second batch cool enough before adding the kombucha mother and starter tea.  Or maybe, the mother I used wasn't thick enough, or maybe, the brew I added as a starter wasn't acidic enough.  Could have been any number of things, but thankfully I have a back up on the go.


I'm having a great time brewing (and drinking) Kombucha, and it won't be long before I have more SCOBY than I know what to do with.  That's why I wanted to share with you this video:


It's about using kombucha mothers to create clothing and sculpture and other exciting possibilities.  When dried, it has a texture a bit like leather.  Only problem is, it's not rain proof...in fact it starts to decompose with body moisture.  But I like the idea of using this, and I have an idea brewing in the back of my mind that I want to try.


Like I said before, brewing your own kombucha is an affordable way to get some probiotics and other healthy things in your gut.  It's also vegan friendly.  Clothing made from it would also be vegan friendly, but I wonder if you would start smelling like tea or vinegar if you wore it too long... or if instead, kombucha clothing has beneficial side effects for your skin.

Thursday, October 10, 2013

Review: Organic Lives Chickpea Miso paste (soy free)

Organic Lives, a company out of Vancouver (although the miso is a product of the USA) makes a rather yummy sweet miso paste from chickpeas.  I'm always thrilled to find a soy-free alternative to my favourite Japanese foods, so I picked up a bottle from my local health food shop.


Although I am a die hard fan of South River Miso chickpea miso, it's not always easy to get here.  The shipping direct from the company is prohibitive, and I only know of one health food shop that gets it in (twice a year), so I have to be quick to snatch up my bottles.  The great thing about South River, is that the miso paste seems to last forever in the fridge and only tastes better the longer I leave it.  I found a jar of chickpea miso while cleaning the fridge the other day, it had been in there at least a year and tasted fantastic.

But like I said, the supply is inconsistent.  Organic Lives is filling a well needed gap in the market.

What I like best about the Organic Lives chickpea miso (aside from it being soy free) is the flavour.  It's a nice balance of sweet and salty.  It is a smooth paste and easy to blend into your broth (much easier to work with than the South River chickpea miso which is quite chunky).

You can see the texture difference between the two

I also really like that they used sprouted chickpeas.  As far as I can tell, this is unique to this company.  This is fascinating and I would love to learn more about this process and what effects it has on the nutritional value of the finished paste.   I understood that the fermentation process makes more nutrients available from the  beans, but if sprouting adds another degree of nutrition... well, it's very interesting to me.

Because this is a sweet miso, in other words it's aged in weeks instead of years, the rice in it is still a bit crunchy.

Which brings me to my next point... The bottle brags about being aged for 60 days!  Whereas South River chickpea miso is a 1 year miso.  Most customers are use to labels bragging about how many years old the miso paste is, not days.   What they do not realize is that there are different - yet traditional - methods for making miso.  Some miso methods are ready in as little as two weeks, others need at least four years.  They each have different flavours and unique benefits. Without educating the customers about this, bragging about only ageing the paste for 60 days is not necessary the best idea.


The one thing I really do not like about the Organic Lives chickpea miso paste is the way it's been put in the jar.  For starters, I think the jar is too large for the volume of paste, leaving lots of airspace at the top and a feeling when you open it that you are being short changed on your dollar.

Second, it isn't packed down firmly into the jar, leaving air pockets where mould can grow - sure it's not bad mould, miso after all is made from carefully cultured mouldy grain and beans.  Although it is safe to eat, the mould growing in air pocked can cause a musty flavour to the paste around the offending air bubble.

Can you see the white tinge of mould starting to develop
near the bottom of the jar?
This is probably Koji mould, and harmless, but preventable.

To me, this displays a level of amateur behaviour that I do not like to see in a company that prepares my food.  If I didn't already know about the mechanics of making miso paste, I would be freaked out to find mould in a jar fresh from the store.  And yes, being alive, miso will continue to ferment and produce gas after it is bottled, but there are steps to make to prevent these air pockets from forming and make it more customer friendly They have either skipped them or not bothered to do their research.

This makes me nervous.


However, I do like the flavour of Organic Lives miso paste, and there is nothing harmful to my health in their packaging mistake. It's not necessarily my first choice, but it makes a fair enough substitute for when I cannot find any better soy-free miso.


Cuppa miso soup, green onions, miso to taste,
 and water that boiled about five minutes ago.


Monday, September 23, 2013

Ginger Burdock Beer recipe - Brew your Gobob Ginger beer at home.

Warning:  This Ginger Burdock Beer does get very fizzy!  I just spent the night cleaning up exploding bottles (which were exploding while I was cleaning up the mess from the earlier explosions).  On top of following normal safety procedure, if you are not going to drink these up quickly, add less sugar and keep them in a closed box to limit the amount of shrapnel.


Here's a delicious experiment I did the other day, Ginger-Burdock beer.  It's a fizzy drink, brewed with wild yeast captured from the air.  It's a lot like ginger beer, but with a deep earthy undertone to it.  At first it tastes strange, sweet, but not sweet like sugar is, but also tangy.  It grows on you, and after the first sip, I found myself wanting more and more.

Burdock, also known as Gobo, is a vigorous weed in these parts.  It has these nasty seeds, that hitchhike by attaching themselves to clothing or hair or wool of any animal (people included) who happen to come just a little too close to it.  Though most people here consider it a nuisance, it has a long history of use in Europe and Asia.


Just like making a ginger beer, you need a bug to capture the yeast from the air.  You can use a simple ginger bug, or what I find works better is a burdock bug.

Burdock Bug


Burdock root
water
sugar


  • Fill a jar half full with water (if you are on city water, use water that has been boiled and cooled to room temperature).
  • Add 4 Tbs grated or finely chopped burdock root (washed but keep the skin on)
  • And 2 tsp of sugar.
  • Stir vigorously and cover with a cheesecloth.
  • Twice a day, add 2 tsp of sugar and give it a vigorous stir.  It's ready when it starts to have bubbles, or sometimes froth on top.  
  • If it's not active in 4 days, add another 2 tbs of burdock root.

Ginger Burdock Beer

Per 2 gallon of water you need...
1 burdock root
hand sized piece of ginger
2 cups sugar
water
Bug liquid

  • Chop the burdock and ginger and put in a large pot with the water.  If you are making a huge batch, then only use half the water for this and add the rest after you've made the tea.
  • Boil the ginger and burdock for 30 min.  Cool to room temperature.
  • Strain out the ginger, and add the sugar to the water.  Add the liquid from the bug.  Stir vigorously.
  • Cover with a towel and leave at room temperature for 1 to 3 days.  It should start to make small bubbles and then subside, but I don't always notice this happening, so I usually bottle when I get around to it instead of relying on the fermentation.  The longer you leave it at this stage, the more alcoholic it will be.  A normal ginger-burdock beer should be less than 1% alcohol.  Think more soda than beer.
  • Bottle in bottles that can handle pressure.  Burdock has a lot more sugar in it than you may think, and I find it carbonates quickly and with great enthusiasm.  Mine was ready for drinking 3 hours after I bottled it (opposed to the 3 or 4 days the ginger beer takes).
  • Be careful when you open it.  Best drunk outside.

When I strained the ginger burdock tea, I was impressed with the fluorescent green colour of the liquid.


Although it quickly oxidized into a more natural looking brown - green.


The finished drink clarified quite a bit.  I think that next time I make this, I may try cutting the sugar in half and see how that tastes.

Affordable cooking: yes, I think so.  I harvest the burdock from the garden, and ginger is affordable these days.

Vegan friendly: Yes.

Healthy: I think so.  Both burdock and ginger have healing properties in most traditional medicines.  Compared to commercially carbonated drinks, there is very little sugar in this.  Also, it's excellent for replenishing electrolytes on a hot day.

Monday, August 26, 2013

Medieval cooking: Poudre Douce and Poudre Fort recipes

Here's a couple of recipes I brought back from my trip to the 14th Century.  Poudre Fort and Poudre Douce (or strong powder and sweet powder).  You can use these two powders in just about anything.  The Fort or strong powder, I use for cooking meat, fish, veg, rice, soups, and anywhere else one might use pepper in modern cooking.  The Douce or sweet powder, I use for bread making, just about anything dessert, or even sprinkling on fresh fruit.


Poudre Fort


1 pinch powdered ginger
2 pinches of powdered cinnamon
about 4 to 8 Tbs peppercorns ground fine (at the medieval camp I did this by hand, it wasn't too time consuming)
1/4 tsp sugar (any sugar will do, so long as it's in granular/dry form)


  • Pulverize into powder anything that isn't already, and blend well.  Keep in an airtight jar on the counter so it's always on hand when you need it.
Feel free to alter the ratios or add other spices like nutmeg to taste.  This is just the recipe that was passed down to me by an expert medievalist (I'm thinking that's probably not the right word for it, but it will serve till I can think of a better one).


Poudre Douce


1 recipe of Poudre Fort (see above)
1/2 tsp cinnamon (yes, we are doing cinnamon twice)
maybe a pinch of nutmeg or allspice
More Sugar (any dry sugar, powdered, granular, date, palm, beet, &c.) - I tell you how much below.


  • Pulverize into powder anything that isn't already.  Mix together all but the (extra) sugar
  • Guess about how much spice you have here (by volume) - probably getting close to a 1/4 cup by now.  Add an equal amount of sugar to the other spices.  So, if you have roughly 1/4 cup of spices, then add 1/4 cup of sugar.  If you have 4 Tbs of spices, then add another 4 Tbs of sugar.
  • Mix everything together really well, keep in an airtight jar on the counter so you can use it always on hand.

With time and practice, you will develop your own ratios for these spices.  There are many other recipes for these that have developed over the centuries.  Some completely different than the ones shown here.  

However, these are so incredibly delicious, I'm really surprised they aren't more common.


A word of caution for allergies: Some modern spices have Soy and other oils/lecithins used in the processing.  Always check the ingredients on the spice packets if you are cooking for someone with allergies.


Tuesday, June 25, 2013

Harvest and making random things

Time time of year my focus is more on outside the house than inside the kitchen.  The garden needs constant attention, the animals and...well everything.  But I still get a bit of time to cook what we harvest.

Calendula and sage for the dehydrator.  The sage is for tea and cooking, whereas I hope to have enough flowers by fall to make a dye bath for some fabric.  


Also in the photo are garlic scapes.  I never brought these into the kitchen before, so I really had no idea what to do with them.


I decided to try (a slightly altered) version of these cucumber pickles.  The ingredients are almost the same, but I used a different method for fermenting them.  Although it's going to be difficult improving on this already fantastic recipe, I plan to spend much of the summer attempting variations.


With a proper cellar I could see this being a great way to preserve cucumbers and other veg.  It was magical as the taste of the cumber went from salty to sour in just a few days.


I've also been harvesting several wild plants (aka weeds, of which we have many this year) for eating and medicinal use.  This is chickweed:


I used it to make a hand salve for a friend with some rather impressive skin troubles.  Chickweed has worked in the past for him, so I'm curious if my standard salve preparation would do the trick as well.

And finally, what would summer be without a pot of Kimchi on the go?

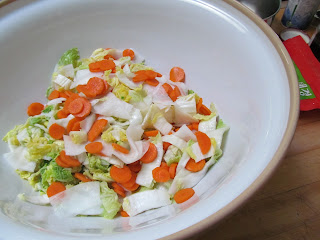
Daikon, carrots and su choi make up the bulk of this batch.  I chopped up some garlic scapes extra fine and tossed them in as well.  Very tasty.  Used the recipe from the book, Wild Fermentation - well more or less.