Showing posts with label Medieval. Show all posts

Wednesday, July 2, 2014

Medieval Goose - two ways over an open fire

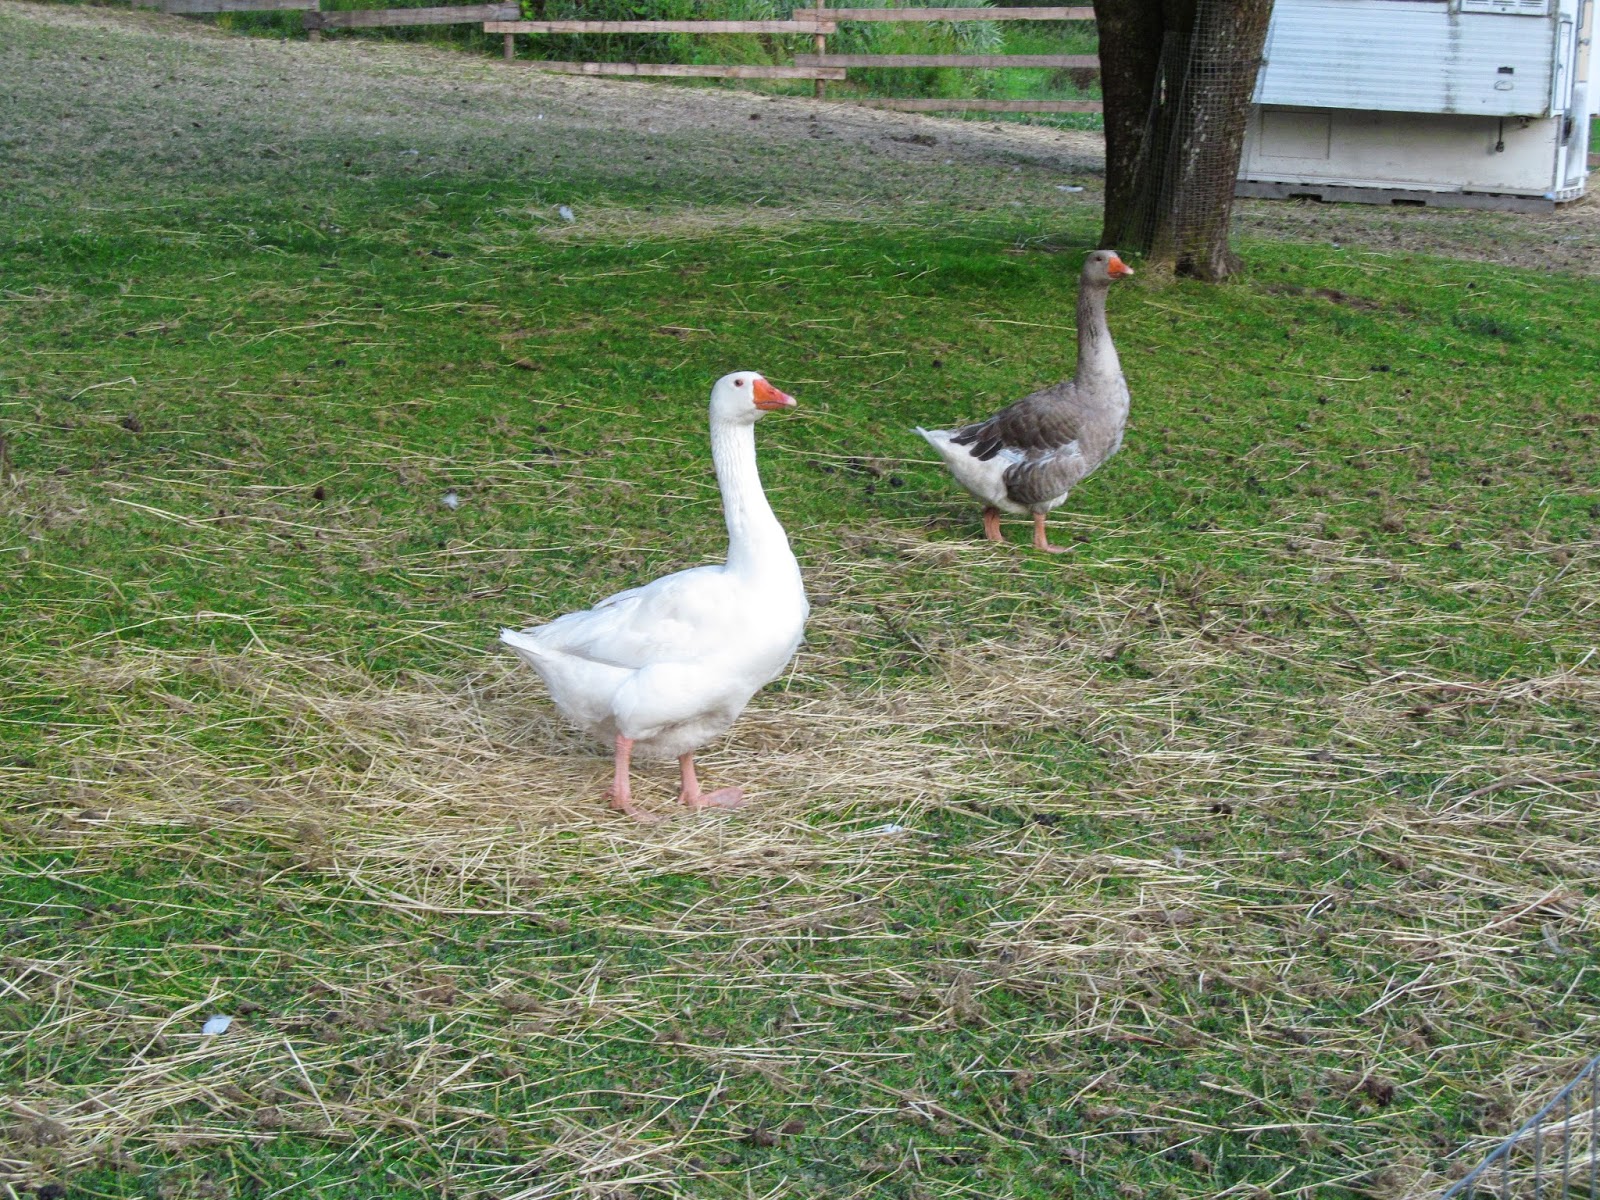
You remember Henry and William?  Two lovely geese I raised by hand from (not so) tiny eggs.

Maybe squeamish people should click away now, as this post involves processing and consuming my lovely boys.  But in a good way.  A very good and fulfilling way, with friends and free flowing mead.  It's been difficult gathering my feelings and thoughts to write about it, but I want to share the experience with you, if you'll let me.

Once a year I travel to the 14th Century for, what passes as a vacation.  A wonderful week or two among friends, dressed in funny clothes, eating medieval food, doing medieval things.  Living life just as they would in the year 1371, only we do it with potable water.

Things are never quite that simple, because while we are living a medieval life, we are also an interactive display for the public.  Visitors wander in and out of our camp while we cook, eat, spin yarn, weave, cast metals, practice combat... and all the regular day to day tasks correct for our period.  It's great fun interacting with them and showing off what we are doing.

A setting with good friends and a chance to educate random people about food and food choices - what  Pastafarian could pass up an opportunity like that?  So I brought my geese to the park, early one morning.  While The Captain and I hugged our feathered friends, they met their end.  I cried.  A lot.  But their end was just the beginning.

Plucking pheasants geese


As the day progressed a whole host of helpers plucked the larger of the two birds as we prepared him for roasting on the spit.  The smaller fella we skinned.  That took most of the morning, and some fun rhymes about pheasant pluckers and their sons.


With the smaller goose, we made a soup.  I carved off the meat and put to one side.  A broth was made from the bones, onions, carrot leaves and a few other tidbits that were kicking about.  After a few hours, we strained the broth, added it to some lightly fried veg, spices and the rest of the goose meat.  Delicious.


Goosefat


Not the most appetizing of photos, but very interesting for someone like me who hasn't worked with goose before.  First thing I noticed is how colourful the bird is under it's skin.  The yellow chunky bits are fat.

Fats of all kinds were highly prized in the middle ages, especially in Northern climes where there were very few sources of vegetable oils.  Fat was used to make soap, lotions, lighting, cooking, lubrication for wagon wheels, and many other things.  As we know now, fat is essential not just to make you feel full when eating, but also for brain development, skin, Vit D processing, and so many other things.  I had often read that goose fat was the most valued fat of all, but I never realized why before.

Unlike lard or tallow, when rendered, goose fat is liquid at room temperature.  It was quick and easy to render, especially because it's easy to see and trim the fat thanks to the natural colour coding inside the goose.  There is a lot of fat inside a goose!  It's also quite a mild taste, a lot like olive oil with a slight meaty undertone.  Very neutral flavour.


The roasted goose was much easier to process.  Just clean out the innards, trim some of the fat from the cavity, stick a stick in it and put it in front of the fire, turning from time to time.


"Is that a real goose?"


While we are working with the geese, the public flows in and out of the kitchen area and I talked with them about what we were cooking.  This probably the best part of the week for me.  I love hearing people's questions and listening to their stories.  Although, while working with the goose... things were a bit different.

The most common question of the day was, "Is that a real bird?"

The first few times I heard someone ask that, I wondered why we would be plucking an unreal bird?  What would an unreal bird look like?  How would it taste?

After a while, I decided (or at the very least hoped) they meant was, is it something that comes wrapped in plastic from a store or a bird we were in the process of transforming from live to dinner.  

Not surprisingly, many of the people were taken aback when they discovered what we were doing.  They had never seen anything like it before.  Even avid meat eaters didn't know what to make of it.

So I told them the story of the geese and how they came to be there.  I described how I hatched the eggs, raised the geese by hand, loved them and gave them a fulfilling life.  I shared how honoured I was that these geese would provide sustenance for us, and how we would honour them by making certain not a scrap would be wasted.  And most importantly, I talked about the difference between modern day methods of raising meat and the way it was done in the Middle Ages.  In the past meat was an infrequent luxury - and still is for most people who live on this planet today - so no part would go unused.  If we are going to eat meat, in our society today, we have the luxury of choice - we can choose to eat an animal who lived a miserable confined forcefed existence, or we can choose to eat fewer animals; ones who lived in a manner most true to their nature.  Why is it so many people proclaim they care about animals, but still buy miserable-meat?

I like to believe I got people thinking about what they eat when they eat meat.


Chowing Down (as in goose down... well, I tried)


Goose soup, goose livers and hearts fried in goose fat, and roast goose.  Add rice and a few veg to the mix and ring the dinner bell.


Everything was delicious.  We toasted the geese with homemade mead.

I don't know how to say this but while I ate, I was both incredibly sad and unbelievably joyful.  I was sad (and still am a little inside) because I'm always sad when one of my animals comes to an end - be it for food reasons or others.  These animals become my friends, even though I know that they will be food some day - I'm determined to give them the best life I know how.

But like I said, I was also joyful.  Amazingly so.  Enjoying the meal with my medieval friends was uplifting. I felt they honoured the lives of my animals - that it wasn't just meat to them.  It was sustenance, both of body and soul.

I'm losing the thread of what I was saying, but I doubt many people read to the end of a post this long.  Basically, what I am looking to say is: despite my conflicting emotional state, I am glad this happened.  I would do it all again  if it meant sharing a meal with these lovely people.  In fact, I already have a flock of replacement geese.  Between educating the public, learning new skills, and enjoying time with my friends, it was a very successful day.

Friday, June 13, 2014

Sourdough Nettle Rye Bread recipe - or let's get Medieval on Your Nettles

Yesterday I made an adaptation of an adaptation of a medieval recipe for Nettle Bread.  It's exceedingly delicious, with a sweet and moist rye bread crumb.  I like it sliced thin, lightly toasted and smothered in butter (homemade is best) and a few drops of honey on top.

Rustic nettle bread


We have the perfect growing place for stinging nettles, it's moist year round, it's acidic, it's downhill from the neighbour's manure pile so the soil is overloaded with nutrients.  There is not much else that will grow there, but the nettles thrive.  So I harvested a large basket full of just the leaves.  My nettles are getting a bit old and scraggly, but if you have young nettles, you can use the stem as well.

Although I made a huge batch of nettle bread this time, I'm going to scale down the recipe for you.  Those of you without constant access to nettles might have to wait till they are available in the shops in the spring... Far too expensive for something available free in the wild, but when that's all you have... well, you make do.  The bunches sold in the store are about a cup worth - but you can use more or less depending on what you have on hand.

blanching nettles
(in the water I used for brewing small ale later that day.
This should be interesting)


The recipe I used for inspiration comes from the beautiful book The Medieval Kitchen, a social history with recipes by Hannele Klemettila (the final 'a' in the name has those two little dots on top).  The author uses modern yeast and caraway seeds.  I hate caraway seeds, possibly more than I hate mushrooms.  They disgust me.

Last year I used Klemettila's recipe and it's quite nice (without the caraway seeds).  It's written in a way that assumes you are very comfortable baking bread and the recipe uses modern ingredients and methods that were not available in the middle ages.  Like most of the book, it is more an attempt to introduce the modern pallet to some of the medieval flavour combinations.  Combine that with the layout and gorgeous pictures, I think it's a good introduction to medieval food.

For me, it's not enough.  In the middle ages a person couldn't just drive down to the supermarket and pick up a packet of yeast.  They had to capture their own yeast, very much like we do with sourdough today.  In fact, in some parts of Europe, it was exactly like we do with sourdough today.  To keep the bread as medieval as possible, I used sourdough instead of modern yeast.

Because the nettles have so many natural sugars, I figured a heavy rye bread would do the trick.  And I was right.

This bread uses a sponge so start it the evening before you plan to bake.  It is also a bit different than many bread recipes in that I only rise it once.  It's a trick you can use for sourdough when you can't guarantee you'll be available to shape the loaves for the second rise.  This creates a more rustic texture, sometimes creating those big air pockets in the loaf.  I kind of like it.

Stinging Nettle Sourdough Rye Bread

About 1 cup of fresh nettles - or a lot more if you have it
1 tsp salt
Sourdough starter
Rye flour
Wheat flour
1/2 tsp Whole fennel seeds
1 tsp honey (optional - makes it no longer vegan)
water

The night before baking day, we make a sponge:

  • Put 2 Tbs sourdough starter (from the fridge or already active is fine), 1/2 cup water, and enough rye flour to make a thin batter.  Cover with a cotton or linen towel and leave on the counter overnight.  This is called the sponge.
  • Feed your starter as per normal - I'm assuming you are already slightly familiar with sourdough.
Now it's baking day, let's get's medieval on your nettles
  • Toast the fennel seeds in a dry fry pan until they smell amazing then put to one side to cool.  While it's toasting, you will want to shake or stir the seeds quite frequently to ensure nothing burns.  When cool enough to handle, coarsely grind it with a mortar and pestle or a spice mill.  
  • Bring a fairly large pot of water to the boil and dunk the nettles in the boiling water for about 3 minutes.  Take the nettles out and put them in a bowl, add about a cup of cold water to the nettles.  When the nettles are cool enough to touch comfortably, take them out of the cold water and strain them - keep the cold water, we're about to use it.  Let's call it nettle rinse water.
  • Combine the nettle rinse water, sponge, 1 tsp salt, toasted fennel seeds, a handful of flour, and a handful of rye flour.  If you are using honey, add it now too.  Mix it up well and put it to one side.  
  • Take the nettles that have drained, chop them up as finely or as coarsely as you like.  The cooking should have neutralized the sting.  Add this to the flour/sponge/fennel/water mix above.  Stir vigorously, almost whisking it in as this will help to activate the gluten in the flour and ensure the nettles are well incorporated into the dough.
  • Add another three or four handfuls of rye flour, or about 1/2 a cup, and mix well.
  • Add regular flour by the handfuls, mixing between each addition, until you have a shaggy mess.
  • Put the shaggy mess onto a well floured board or counter, kneed it until no longer shaggy, but instead a lovely smooth.  
  • Shape into one or two loaves, then put on a baking sheet.  Cover with a towel and leave it alone until double in size.  This may take an hour or it might take 8, depends on your yeast and many other factors... most of which are beyond your control.  A lot of people like to leave it somewhere warm, which is okay, but for me doesn't make as nice a texture or as long keeping loaf.  Just put it somewhere where it isn't in a draft.  
  • When it's double in size, preheat the oven to 400 F.
  • While the oven is heating up, use a very sharp knife to carefully cut some lines in the top of the bread.
  • Bake at 400 for 35 min for the small loaves, or 40 min for one large loaf.  Bread is done when it sounds hollow when you tap it on the bottom.
  • Take out of the oven, wrap the loaves in a cotton or linen towel and leave at least 12 hours to cool before storing in plastic.  Or if you are hungry now, wait at least 10 min before cutting into it.
So beautiful, ready to rise


Affordable: Yes, if you're harvesting your own nettles and not paying grocery store prices.  The nettles add a lot of nutrition and a little bit of bulk to the bread which is pretty awesome.  Nettles are very healthy - just google stinging nettles to find out all the good things they do.

If you omit the honey, this is a vegan friendly bread.

Tradition and transition?  It seems to have been quite common in medieval times, but the tradition has died out.  As a Transition bread, however, this is going to be a good recipe to keep around.  A dense nettle bread is very common during starvation times, like during World War 2 for example.  Usually wheat flour is one of the first things to be rationed, so breads were made with whatever grains were on hand, and often augmented with nettles and other nutritional weeds that are usually ignored in times of plenty.

We would be foolish to think that we won't ever have a starvation time again in The West, but for now, it's actually quite a yummy bread, the nettles adding  a little bit of tang, sweetness, and even help prevent the bread from going moldy.


nettle toast and honey, delicious.


Monday, September 30, 2013

Happy Mead Maker

Where I make mead; pear and rosemary mead; and quince and spice mead.


Mead is a magical elixir made from honey.  Among other things, it's know as the drink of the gods.  It's said to have the power to grant you insight into the unseen realm - which is surely true if you consume enough of any alcoholic drink.

Then again, the bees are said to travel between this world and the next, as messengers to the gods and the dead.  That's one of the reasons why the mythology of bees says we must tell the hive the household news each day.  Imbibing a drink made from the nectar of such supernatural messengers must grant some special powers, if only temporary.

I have read about mead from time to time, in poetry and literature, but always believed it was far too complex for me to try making.  Until recently, none of the local shops carried it, or if they did, it was beyond my price range.  But recently, I've grown more enamoured with the idea of mead.  I have found numerous mentions of mead through my research into medieval and iron age cooking.  Giving my new found courage (and decent level of success) with fermenting and increasing desire to keep bees, I have decided it is time to try mead.

I first tried some mead at a medieval event, it was berry mead and to my taste, it was very sweet.  But good, and surprisingly strong alcohol content.  But still a bit yeasty (I get flushed from yeast) so I imagine it would have been even better with another racking and 6 months more ageing.  Then I discovered some mead in a liquor store.  Two brands from Vancouver Island, actually - although it was all fruit and berry mead, with only one bottle of spiced mead, which was as close as I could get to unflavoured.  So I brought a bottle of spiced mead home and have an oz of it every now and again.  It helps settle my stomach if it's still upset at bedtime - an added benefit.

Deciding that yes, I like mead, it is now time to make some of my own.


Following the instructions from Wild Fermentation and The Art of Fermentation, I combined 1 part raw honey with 4 parts room temperature water, mixed very well and left in a wide mouth container, stirring at least three times a day, for about a week until it looks like there is yeast active (small bubbles, froth, taste and smell).  Then it goes in a jug with an air lock to bubble away.  Once it's finished bubbling, I'll taste it and rack it (move it into a different jug with an airlock to aerate the mead and re-activate the yeast).  I don't know how long I'm going to age the mead before bottling, there are some meads that age for years before bottling, others are drunk in a matter of weeks.  I think it will depend on what else is going on in my life and how it tastes to determine when I'm ready to bottle it.  For these first few stages, I have it upstairs at room temperature, but once I rack it, I think it will go downstairs where it is cooler.

The first batch looked good, so why not try some more?


I had a hand full of pears that missed being made into Parry this year, so I thought why not pear and rosemary?  It's a good pairing - ha ha - as I've used this combination as a sauce for pork.


The quince tree only had two quinces.  Quite frankly, I can't seem to like quince very much, it's kind of coy tasting and very strong smelling.  But I don't want to waste them, so I decided to try for a Quince Poudre Douce tasting mead.  Quince, pepper, ginger, cinnamon stick, and some anise (because they look so pretty).


pear and rosemary
 To make flavoured mead, at least according to Sandor Katz, is to slice up your fruit very fine and add them to the mead during the open vessel stage.  Proceed as per normal mead, and strain when you put it in the jug.
quince and spice

The fruit has natural yeast on it, so it will usually start to ferment faster than honey on it's own.  However, certain processing and herbicides in commercial fruit may have adverse effects if you are capturing wild yeast like I did, so please use organic or home grown fruit.


For the fruit mead, I used less honey as the fruit already has plenty of sugar.  I did 1 part honey for 5 parts water.

These are just small batches one gallon, or in the case of the first mead, half a gallon.  These tastes combinations may be completely horrid!  But from what I've read, if the mead tastes terrible, leave it for six months to four years, and it could improve... or else, you may have killed the offending taste buds in the interim.

During the open pot method while I was stirring three times a day, I was amazed with how the smell of the fruit mead changed.  At first the pear and rosemary smelt horridly medical, the rosemary was overpoweringly antiseptic. But after a couple of days, the smell of the herbs subsided and it started smelling strongly of pears left too long in the sun.  By the end of the week, it was quite pleasant smelling, a nice balance of herb and fruit, although it tasted overpoweringly of sweet and yeast at that time.  The quince and spice started out smelling of nothing at all, then after a day it started smelling of sickly sweet quince.  The quince smell grew sweeter and more pungent until it was rank, almost rotten, on the fifth day.   I almost tossed the batch, but instead on the 6th day it suddenly didn't smell revolting any more and started to smell like pepper with a hint of quince.  I didn't taste it when I put it in the jug, but I think it will be okay...

...eventually.


This process is simple, albeit fruit fly generating.  I can't believe I ever imagined it would be difficult.  It is a nice way to use up small amounts of fruit, berries, and other goodies laying around.  I'm looking forward to finding out how these little experiments taste in a few months time.


I think that making mead at home is an affordable way to make a nice sipping alcoholic drink.  Considering it costs about $25 for a 750ml bottle at the local liquor store, as opposed to the $12 starting price for a drinkable plonk (wine),  you don't need much honey to make a bottle of mead.  About 1/2 to 2/3rds of a cup aught to do it, which is about $1.30 per homebrew bottle of mead.  Would be less if you make mead from gleaned fruit and use less honey per water ratio.  Although making mead doesn't take much active time, it does require a lot of waiting, I'm told, to make a good mead.  So perhaps it is worth the extra twenty three dollars not having to take up space and carboy waiting for the mead to age.

Honey has many health benefits and mead also has a long tradition of healing qualities.  I only know some of the cultural mythologies that surround this elixir, but I suspect there are some scientific studies out there for those who care to look.  Of course, like all alcoholic drinks, moderation is key.  A little everyday is said to help your health, however, too much... well, you've all seen the government warnings I'm sure.

Allergies:  Homebrewing something like mead is nice because you can avoid a lot of allergies like sulphites (or was that sulphates?), extra ingredients, and can brew it long enough so that all the yeast is exhausted.  Keep in mind, some people have negative reactions to honey and alcohol.

Wednesday, September 11, 2013

Medieval Ginger Bread Recipe

It's funny.  When I imagine gingerbread, I think of a sweet, hard cake or cookie like substance, shaped as cute little people, houses, rounds, with icing and colourful candy.  The thing I don't think about when people say the word gingerbread, is... bread.

But that's exactly what gingerbread was in the middle ages: Ginger Bread.  That's two words, not one, to indicate that literally, there is ginger, there is bread and they get combined somehow.

Reading the book Pleyn Delite, by Constance Hieatt and Sharon Butler, I came across a delicious looking gingerbread recipe from the Middle Ages.  This book contains all sorts of recipes from historical sources, including a lot of the recipes in the original text, and the modern day translation.  What I love best about this book is that the authors actually cooked a lot of these recipes.  I suspect that this is not the norm when translating historic cooking techniques into modern methods.  But these two have done a really good job of it.

I've tasted a few dishes cooked from the Pleyn Delite (which I say in my head as Plain Delight) and loved most of them.  This gingerbread, I didn't love as much.  I found it too crunchy, but I'm in the minority on this one.  Everyone else has gobbled it down, making me fend them off with a fork and a cunning plan to have enough left over for the photograph.

I suspect their plan was to finish it off quickly so that I would be forced to make a second batch if I wanted to take any pictures for the blog.

Before I write the recipe for medieval gingerbread, I feel compelled to confess that not much is changed from the version in Pleyne Delite, except maybe the quantities of the spices and wording.  It's a difficult recipe to improve on.  I would change a bit of the method if given a second chance to make this - which I may just be strong armed into doing.

Medieval Ginger Bread

Bread crumbs - about a 1 lb loaf of bread dried and finely ground
a generous teaspoon of ginger powder
a generous pinch of cinnamon
a dash of ground pepper or a pinch of Poudre Forte
1/2 cup of honey


  • In a large pan, bring honey to boil, remove from heat.  Add the spices and stir well.
  • Add the bread to the honey a little at a time, return to medium low heat if needed, stirring well after each handful of breadcrumbs.  When the mixture is really thick and hard to stir, turn out onto a layer of parchment paper.  spread it out evenly as best you can, then put another layer of parchment paper on top.  Use your hands or rolling pin to smooth out the gingerbread to make it as even and as thin/thick as you like.  Thinner is better in my opinion. 
  • Leave covered to cool for about an hour, cut into shapes.  You want to do this today and not a few days from now, trust me.  It gets more difficult as it ages.


This keeps well at room temperature for several days and travels well in a bento box, just wrap with a bit of parchment paper and you are good to go.


Affordable cooking? - Very much so, provided you use bread that would have gone to the chickens/garbage otherwise.  Not so much if you are buying bread or bread crumbs just for this recipe.  

Cooking for your Vegan friends? - It can be made vegan friendly by replacing the honey with a different liquid sweetener.  


Cooking for Allergies - not many allergies here at first glance, but it's good to be careful about the ingredients of the bread crumbs (commercially made usually contain soy and other problems), spices (sometimes processed with oils or lecithin which can include soy).  Just remember that your ingredients these days, have ingredients lists of their own.  With that in mind, this is a very flexible recipe.  You can choose any kind of bread, be it gluten free, yeast free, whatever you  need.


Saturday, September 7, 2013

14th century cooking: Caudle of Almonds Recipe

Caudle of Almonds is a kind of medieval almond milk made with wine or ale.  According to Peter Brears book, Cooking and Dining in Medieval England, it was considered especially good for people with a dodgy tummy.

Cooking with and drinking almond milk was a frequent occurrence during the 14th Century.  Not only was it considered a healthy milk substitute, in the middle ages there were many days in the Christian calendar that forbid the consumption of dairy products.  Isn't it nice that almonds don't come from a cow?

I suspect almond milk may have become more popular as the populations in cities increased during the 13th and 14th century.  Suddenly you have all these people living in close quarters, with most of the dairy products being shipped in from the countryside or from cattle being raised in close quarters in town.  Cows living in small yards, with no access to fresh grass, can lead to some milk borne illnesses...unhealthy cow creates inferior milk.  So, if you can afford almonds, you make almond milk.

Now, quite frankly I strongly dislike almond milk.  It doesn't taste like almonds and it doesn't taste like milk... it tastes like powered over sweetened chalk in water.  But that's the almond milk out of a box from the supermarket... Since I'm doing a lot more medieval cooking these days, I decided it was time to try making my own almond milk.  Since I'm a coward at heart, I decided to try the more flashy version of almond milk:

Caudle of Almonds

Inspired heavily by Cooking and dining in Medieval England, by Peter Brears, with a few changes of my own.

A pint of white wine or wine and water mixed
a large handful of almonds  (I used raw)
Honey to taste (or for vegan version, a different liquid sweetener)
Poudre Forte or you could just use cinnamon and/or nutmeg mixed.


  • Bring the wine to a boil, take off the heat and add almonds, about half a teaspoon of honey, and a generous pinch of spice.  Leave to steep for an hour or so to cool.  
  • Take the almonds out (keep the liquid) and smash them good.  Mortar and pestle is fine, or use the blitzer.  The aim is a fine mush.  Add the liquid back to the almonds and pound or mash again - this is the tricky part for me.  apparently my blitzer does not fit a full pint of liquid and makes a huge mess all over the kitchen when I ask it to try just this once.  Also the blades aren't sharp enough to mash the almonds fine enough.  So I did about half way in the blitzer then transferred small batches to work in the mortar.  
  • Strain the milk through a fine sieve or cheesecloth. Flavour with more honey and spices if needed, and sprinkle a few spices on top.

I loved how this tasted!   I cannot tell you how different this Caudle of Almonds was to boxed almond milk without falling into a huge pit of cliches - It's not even the same planet, worlds apart!  And I don't think it's just that this was made with wine, wine is lovely and all, but it was the pure almond-ness quality, the almond milk qua almond, that made is delightful.  

The Caudle of almonds also helped settle my stomach.  I had a very stressful day and my stomach was acidic and full on reflux.  I drank it warm with some extra honey, but I don't think I boiled off the alcohol from the wine, as I was quite sloshed after drinking a pint of Caudle.  Very delicious and I can see making this again soon. Just need to find a better method for creaming the almonds.  Got an idea brewing for that though...

Vegan friendly? - you need to substitute the honey with your favourite sweetener for this to be vegan friendly.  It's easy enough to do, so I am going to give it a qualified yes.

Affordable? - um... depends.  If you are like me and do not trust the bulk food bin and have to special order almonds from a place that doesn't mix nuts, no it is not even a little bit affordable.  But as far as normal people go, it's probably okay on price.

Allergy issues - depending on your allergy it can be a friendly or feendish drink. 

See my affordable section above about mixed nut contamination which a lot of people who don't have nut allergies in the family aren't use to taking into account, and not suitable for people with allergies to almonds.  Some people may have reactions to the sulphates (assuming you are using a commercial wine) in the wine.

However, it makes a great substitute for milk and is excellent substitute for warm-milk-before-bed drinks like horlicks.  


Monday, August 26, 2013

Medieval cooking: Poudre Douce and Poudre Fort recipes

Here's a couple of recipes I brought back from my trip to the 14th Century.  Poudre Fort and Poudre Douce (or strong powder and sweet powder).  You can use these two powders in just about anything.  The Fort or strong powder, I use for cooking meat, fish, veg, rice, soups, and anywhere else one might use pepper in modern cooking.  The Douce or sweet powder, I use for bread making, just about anything dessert, or even sprinkling on fresh fruit.


Poudre Fort


1 pinch powdered ginger
2 pinches of powdered cinnamon
about 4 to 8 Tbs peppercorns ground fine (at the medieval camp I did this by hand, it wasn't too time consuming)
1/4 tsp sugar (any sugar will do, so long as it's in granular/dry form)


  • Pulverize into powder anything that isn't already, and blend well.  Keep in an airtight jar on the counter so it's always on hand when you need it.
Feel free to alter the ratios or add other spices like nutmeg to taste.  This is just the recipe that was passed down to me by an expert medievalist (I'm thinking that's probably not the right word for it, but it will serve till I can think of a better one).


Poudre Douce


1 recipe of Poudre Fort (see above)
1/2 tsp cinnamon (yes, we are doing cinnamon twice)
maybe a pinch of nutmeg or allspice
More Sugar (any dry sugar, powdered, granular, date, palm, beet, &c.) - I tell you how much below.


  • Pulverize into powder anything that isn't already.  Mix together all but the (extra) sugar
  • Guess about how much spice you have here (by volume) - probably getting close to a 1/4 cup by now.  Add an equal amount of sugar to the other spices.  So, if you have roughly 1/4 cup of spices, then add 1/4 cup of sugar.  If you have 4 Tbs of spices, then add another 4 Tbs of sugar.
  • Mix everything together really well, keep in an airtight jar on the counter so you can use it always on hand.

With time and practice, you will develop your own ratios for these spices.  There are many other recipes for these that have developed over the centuries.  Some completely different than the ones shown here.  

However, these are so incredibly delicious, I'm really surprised they aren't more common.


A word of caution for allergies: Some modern spices have Soy and other oils/lecithins used in the processing.  Always check the ingredients on the spice packets if you are cooking for someone with allergies.