Showing posts with label Kitchen Failure. Show all posts

Monday, December 29, 2014

Kitchen Failure - where I demonstrate what not to do when making miso paste

I hate to admit this, but sometimes I try something and it is a total disaster.  I suppose it's one of the side effects of being human, but alas, I wish it wasn't.

I also wish I was the kind of person who would quietly hide my failings somewhere dark and dank, where no one would think to look.  Bury failure under a damp pile of leaves, with only worms to whisper its nasty story too.  Maybe, if ignored, the horrible result would decompose into the soil, bettering the dirt so that new, and more successful things could thrive.

However, that's not what I want for this blog.  The goal here is to write about my culinary journey and share it with my four (or is that five now?) readers what I've learned.  Maybe some of it would be useful to someone some day.


This Kitchen Failure is especially embarrassing because I've recently been crowing about how easy and foolproof it is to make miso paste at home.

And it is easy to make miso at home, unless...

...unless you branch out and try some terribly outlandish thing and then it's a gamble.

Growing confidence with how incredibly yummy my standard chickpea miso recipe is getting, I decided to try a 'let's toss all this old stuff from the back of my cupboard miso' recipe.  I went directly against expert advice, but I had to do it.  I had to know if it would work or not.

It's not.


What did I do and what went wrong.


I used 1 pound of each adzuki and black beans (dried). Soaked and cooked them together.  MISTAKE: they cook at different rates, I should have treated them separately then mixed together when cool.  All of the adzuki beans were cooked to mush and some of the black beans were slightly raw inside.

To this I added 1/2 lb of pearly barley (dry weight), soaked and boiled until soft.  MISTAKE: using grain that hasn't been inoculated with koji spores.

The Koji rice and salt were as per usual.  MISTAKE: I didn't add extra salt to account for the additional volume of the barley.

Covered the miso with soaked kombu rather than plastic wrap.  Although this is different than my normal procedure, I don't think we can blame the kombu for this failure because some of the extra batch I fermented in a different jar also turned putrid. Besides, kombu was the pre-industrial clingfilm of Japan.

Fermented for three weeks.  Mistake: in small letters because I really should have waited for four weeks given how cold the house has been.

The results.


When I uncovered the miso a sour rotten smell like sour beer and compost assaulted me.  Miso should be sweet and salty, not sour and certainly not smelling of rotten barley.

Yep, rotten barley.  As in the pearl barley I added without inoculating it with koji first.  I'm feeling this is the main source of my failure, over confidence and ignoring a thousand generations worth of knowledge.  There is a step I could have taken to get the koji growing on the barley - without having to buy koji mold spores - but I was eager to get things done and didn't want to wait an extra day.

What did I learn?


I relearned that grain needs to be altered before fermenting, like malting or using koji, or even soaking in a sourdough sponge.  Without this alteration, the sugars in the grain aren't available and things go sour fast.

I learned that I really should try smaller batches when experimenting with outlandish miso mixes.

I also know that even though I'm down in the dumps about my current failure, I still plan on making miso this New Years.    In fact I'm very excited about it.


Wednesday, July 30, 2014

Mystery Squash Becomes Pumpkin Bread Recipe - aka, Mystery Squash Bread Recipe

What to do when one's garden has become invaded by squash?  Make squash bread of course.  

There are these three plants, began innocently enough, tiny tender things, needing coaxing and care to begin their life in the soil.  I created pots from old newspaper and filled them with finely sifted soil.  Placed one seed carefully inside each pot and watered it with dedication.  When the moment was right, I dug a hole in the garden, not too big, but not too small, and pressed the tender shoot, pot and all, into the soil.  Covered it with a cold frame made from old windows, and with some words of encouragement, left it to fend for itself.


Well, perhaps I gave it a little too much encouragement.  Each plant sent out, at first one long searching vine, then another and another, until each one had produced over a dozen vines, climbing over fence and pea plant with equal enthusiasm.  June was scary!  The vines would grow over a foot a day, each morning I had to hack my way past over-enthusiastic squash, just to get into the garden.  Finally the vine growth seems to have reached the limit at just shy of 25 feet, the bright yellow blossoms are gone, replaced with splendid orange squash.

you can get an idea of how large these squash are

week old gosling named Chesnut
I'm guessing they are pumpkins.

After bumming around the internet for a few hours, I finally came across a squash recipe I liked: Savory Pumpkin Rosemary Bread.  The flavours in this recipe look really good, so I thought it would translate nicely to sourdough.  I started roasting the squash at midnight - the only time of day when the kitchen is cool enough to cook - and made pumpkin mush the next morning.  

Disaster struck when I got my sourdough starter out of the fridge - BLACK MOLD.  

I'm not hugely squeamish with mold, but when black mold happens I won't touch it.  Even if it isn't real black mold, just black colour mold, it's just not worth the risk.  

So sadness, my sourdough starters are all dead.

I blame myself, because I know during the summer the water in the well kills starters.  Something from one of our neighbours uphill from us seeps into the water table and devastates my cultures.  I suspect it's the time of year when swimming pools are emptied and cleaned.  From June through August, I always try to boil my water before using it in any culture that relies on bacteria.  But this year, we had a new filtration system installed, so I thought I could be lazy... sniffle... oh well.

Good thing I know how to make more starter, but that takes time and doesn't help me with all this squash/pumpkin mush.  So commercial yeast it is.

The recipe linked above looks fantastic, but relies heavily on mechanical devices to mix the dough.  I changed an ingredient or two, the method, the order of adding, timing, and even some of the ratios, so I'm going to post my version of this recipe for those of you who don't have a standing mixer or who enjoy kneading by hand.
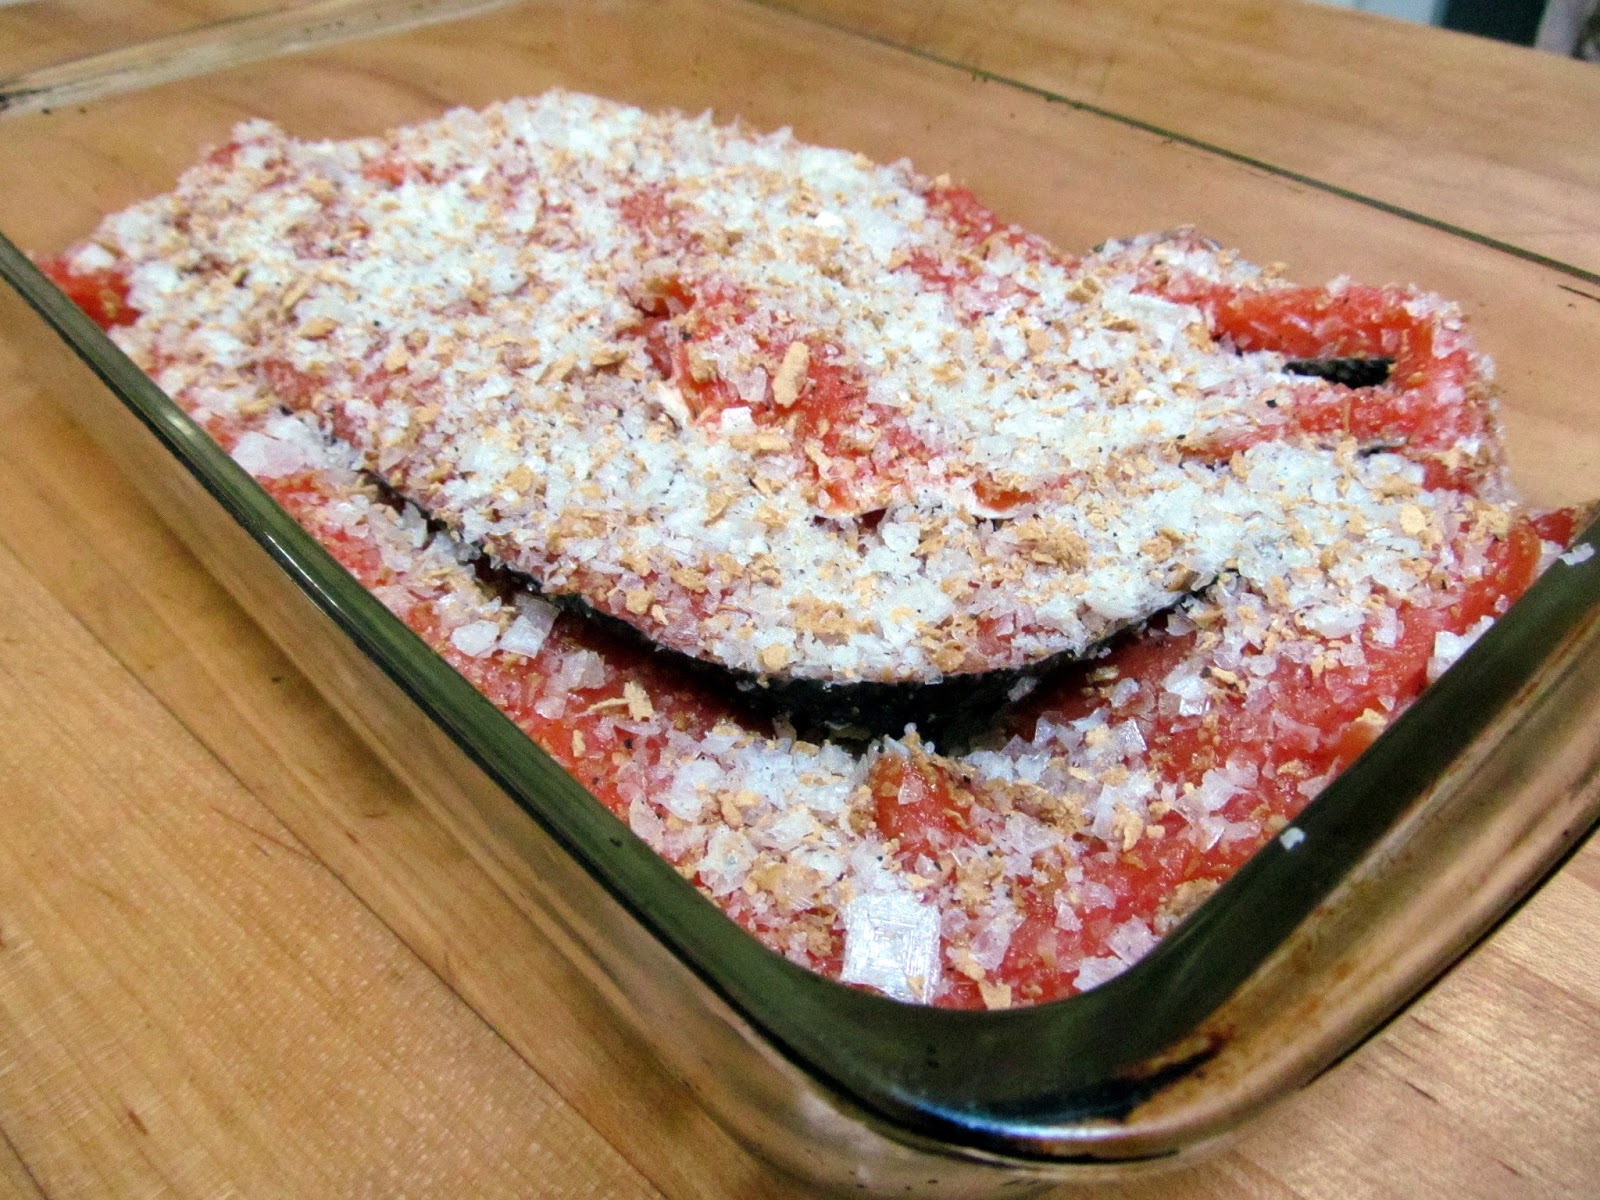
mmm, pumpkin bread
sorry about the lighting, late night photos are not my strong suit


Mystery Squash Bread


The night before

at least 1 lb squash or pumpkin (without seeds)
olive oil
flour, whole wheat if you have it
water
yeast

  • Cut up the squash into 3 inch chunks - about that size, don't be fussy unless you want to.  Rub with oil and place on a roasting tray in the oven.  350F for about 30 min, or until it's mushy.  Remove from oven, and cover with a clean towel.  Leave on the counter overnight or until cool enough to handle.
  • In a small dish, make a poolish or biga by combining 2 cups of flour with a pinch of yeast and enough water to make it into a thin batter.  Cover with a cloth and leave on the counter overnight.  

Baking day

The roasted squash (or 2 cups canned squash mush)
The poolish from the night before
1 cup warm water
2 Tbs instant yeast
small drizzle honey
1Tbs sea salt
flour (I used all purpose, but next time I'll use a mix of 1 cup whole grain and the rest all purpose)
about 1 tsp fresh rosemary finely chopped, or 1/2 tsp dry
olive oil

  • Get your big bread bowl out and in it, combine the honey, yeast and warm water.
  • Scrape the squash off it's skin directly into a blender or blitzer.  And blend/blits until mush.  Alternately you could just mush it up with a fork.  I don't think there are any rules as to how lumpy or smooth your squash mush is.  
  • The yeast should be starting to work by now.  If not, leave it 5 min before continuing.
  • Next add the squash mush, poolish, and salt to the yeast water.  Mix together well.  
  • Add about one cup of flour (the whole grain if you are using it) to the mix, and mix.
  • Mix in about 1 handful of flour at a time, until you get the traditional shaggy mess that bread recipes always talk about.
  • Put your shaggy mess on a well floured countertop and take the bowl immediately to the sink and wash it.  Some people think this is an optional step and we should just get another bowl out of the cupboard, but there are good reasons for putting the effort in.  One, it lets your dough rest.  Two, the bowl is easier to clean now than later.  And three, you don't have to hear the person who does the dishes complain about how they love your bread but hate the mess it makes.
  • Dry the bowl with a clean cotton or linen towel (keep the towel to one side for covering the dough later) and pour a generous glug of olive oil in the now dry bowl.
  • Go back to your shaggy mess and knead it till it's smooth and elastic - about 2 to 10 min.  Shape your dough into a ball like shape, put it upside down in the bowl and get the top good and oily.  flip it right way up, and cover it with your cloth.  Leave it to rise until it's about double in size.  Usually under an hour. 
    • If this was sourdough bread, I would shape the loaves immediately after kneading it to give it a more rustic texture with probable air pockets.  But since we are using commercial yeast, I feel the taste isn't very good with a single rise.  Best to do the double rise thing even if it makes a softer bread.
    • Also, a lot of people recommend a damp cloth - I don't quite understand why they think this is a good idea.  It's such a short rise time, and if you were generous with the oil, then the slight dampness left on the towel from drying the bow is plenty.  The dough isn't going to dry out in an hour.  Besides, as the dampness on the cloth evaporates, it cools the dough.  This isn't what you really want when working with commercial yeast.  Long rise sourdoughs on the other hand... they love a cooler clime.  
      • But you know, it's your bread, do what you like.  I'm not going to come to your house and yell at you if you don't do things the way I say.  
  • When it's risen, punch it down.  Divide into two and shape into loaves.  Whatever shape you like - round with a cross on top, loaf pan, braided, pumpkin shape... whatever floats your boat.  Score the top of the loaf (if you like) to make it rise more evenly.  Cover again with the cloth and leave till double in size (about 20 min).  I do round loaves traditionally, so if you are doing something different you may need to adjust your cooking time.
  • I cooked mine at 425F for 45 min.  Next time I'll cook at 400F for about an hour as I didn't like the crust at the higher temp.  It's ready if it sounds hollow when knocked.  
  • Eat anytime after 10 min, or leave to cool 12 hours before putting in plastic bag.

Affordable?  If you wait till squash season, people will almost pay you to take their excess squash off their hands.  I imagine you could use just about any winter squash - maybe even summer squash, but probably have to either grate it or roast it differently.  You can make loads of pumpkin mush and freeze it in 2 cup servings.  You can use more or less pumpkin according to your tastes.  I think it would be really good with leftover lentils or other pulses.  In fact, forget about roasting squash specifically for this bread, use leftover squash from a family feast.

There's a decent nutritional value to this - but I'm going to hesitate pricing out the ingredients as I understand there is yet another bad harvest year for wheat (what's that? 6 years in a row now?) so expect the price to go up again this winter.  8 years ago a huge bag of flour was regularly on sale for $2.40, now it's never lower than $14.  You know things are bad when locally grown organic wheat berries are now cheaper than commercial flour.  

At the time of writing, this recipe is affordable.. but who knows what tomorrow will bring.

Vegi or fruit, either way squash is probably a healthy thing.  This is a good way to trick yourself into eating your veg - something I have to do often - by making a slightly sweet flavour bread that goes amazingly well with hummus or goat cheese.

How to make this Vegan Friendly: Replace the honey with a pinch of sugar.

I think this qualifies as a Transitional Food, not just because I'm cutting down on my oil dependence by using locally grown wheat, but also because pumpkins and squashes in general are one of the easiest things to grow.  Get the timing right, give them lots of water, and even the brownest of thumbs can look like they know what they are doing.    When we get back to a stage in society where the Victory Garden replaces the lawn, you need to realize that there are going to be a lot of squash.  Better learn how to cook it.

Friday, October 11, 2013

Troubleshooting Kombucha brewing and some unusual ideas for all those extra SCOBYs about to enter my life

I am completely in love with Kombucha, possibly to the point of mild obsession.  It's just so darn tasty!


I've made a few batches from the Kombucha mother I got from Wells of Health (who have been totally awesome about replacing the viili culture.  I'll definitely be buying more from them in the future), and the first thing I learned is that it doesn't always go right.  But that's okay, because every time you finish brewing one batch of Kombucha, you have what you need to make two more.  I can most definitely see the advantage of having more than one batch on the go at any time, even if it's just a small back up tucked away in some obscure spot of the house, that you change up every couple of months.

Here's an example of why a back up tea is a good idea:

These two 6 cup kombucha brews were started at the same time.


This first one used the original SCOBY, which is a bit over a quarter inch thick.  Only 11 days old, and it is growing a nice layer on top of the tea.  It smells great, but a bit sweet still, so I'll wait a while before harvesting it.


Started the same day, but using a smaller kombucha mother (another term for kombucha SCOBY), it doesn't seem to be doing anything.  The smell is still like sweet tea.  About three days ago, I added a tiny bit of SCOBY (that spontaneously formed in a bottle of Kombucha I was drinking at the time) and some more starter tea... only now it seems to be growing something, but what it is growing...I'm not too sure.

I declare this second batch a kitchen failure, thank goodness the first batch is so healthy.

Both of these made a total of 6 cups, I used 3 tsp of loose black tea, brewed till cold, just under 1/2 cup sugar, and 3/4 cup of starter.

Both made the same, yet they are so different!  So I did some reading.  This is my favourite site for troubleshooting kombucha, I suspect what happened is that I didn't let the second batch cool enough before adding the kombucha mother and starter tea.  Or maybe, the mother I used wasn't thick enough, or maybe, the brew I added as a starter wasn't acidic enough.  Could have been any number of things, but thankfully I have a back up on the go.


I'm having a great time brewing (and drinking) Kombucha, and it won't be long before I have more SCOBY than I know what to do with.  That's why I wanted to share with you this video:


It's about using kombucha mothers to create clothing and sculpture and other exciting possibilities.  When dried, it has a texture a bit like leather.  Only problem is, it's not rain proof...in fact it starts to decompose with body moisture.  But I like the idea of using this, and I have an idea brewing in the back of my mind that I want to try.


Like I said before, brewing your own kombucha is an affordable way to get some probiotics and other healthy things in your gut.  It's also vegan friendly.  Clothing made from it would also be vegan friendly, but I wonder if you would start smelling like tea or vinegar if you wore it too long... or if instead, kombucha clothing has beneficial side effects for your skin.

Friday, September 6, 2013

Kitchen Failure - homebrew beer from a tin and a digression into a Pastafarian world view

Perhaps it is true what they say, alcohol leads to spiritual contemplation.  A failed attempt to brew beer at home, has lead to some...sigh, well...the blog title suggests there will be occasional jaunts into the more religious aspects of the kitchen... feel free to skip this one if you aren't in the mood for...um...this...

Here is where I dress myself in full pirate regalia, eyepatch included, for it was said that one shall not discuss the details of the religion of the Flying Spaghetti Monster unless one is dressed in the Holy Garb.

Pastafarian literature tells us that there is a heaven, and in heaven there is a beer volcano.  An unlimited supply of beer is all well and good, but an actual volcano?  Call me...um... call me someone who doesn't follow the dogma of a religion to it's extreme, but I don't imagine how a volcano that spews unlimited amounts of liquid brew into the eternal resting place of my soul, would be a good thing.  I know, I know, heaven isn't suppose to be logical, but wouldn't an unending flow of beer eventually fill up heaven?  I mean, how can we drink enough to prevent the constant deluge from becoming a flood, when we are dead?

The Whole Wheat approach to the subject of beer is a bit different.  We love the idea of drinking beer on Fridays, the holy day of those who follow the teachings of the Flying Spaghetti Monster.  Beer goes great with pasta and many other things.  But maybe, the volcano of beer is a metaphor for how to live our lives better in this world. 


The Whole Wheat Pastafarian looks at beer much the way we look at food, only with more importance.

  The Flying Spaghetti Monster created the world in which we live in, and being a deity that resembles food (or that we have a food that resembles the divine), the Whole Wheat Pastafarian believes that this is a sign from his divine noodliness that it is our duty in life to create the best foodstuff that we possibly can.  Be this cooking at home, or growing the best ingredients, whatever our path in life, the Whole Wheat Pastafarian holds sacred the creation of food, not just for today, but we also believe that it is our duty to keep the world as healthy as possible so that future generations can also enjoy the same, or better, dietary connection to the divine that we feel every day.  Some may say that it's not much different than the bread and wine that Christian followers believe.  In fact I've seen some of the more evangelical members of the Church of the Flying Spaghetti Monster may go much further than that, but they are, um, more extreme in their religious view.  The Whole Wheat Pastafarian would never go that far, as moderation is the key to keeping a healthy diet, healthy soil and healthy relationships with others.

To create healthy food, we need to create a healthy food source.  Good tasting food that nourishes the body and spirit, comes from healthy farming practices.  It is more complicated than I'm going to go into here, but basically it comes down to healthy soil.  Healthy soil means that we grow delicious food for ourselves and can continue to produce food to feed the world for generations to come.  The second most holy task the Whole Wheat Pastafarian can set themselves in this world is to grow food (especially grains that make yummy pasta) in a way that improves the soil over time so that whomever comes next, can have a better starting place than their predecessor.  This stands in stark contrast to those who have lost their ways, and the vast wastelands that now exist where before, was fertile soil only a generation ago.  

The Whole Wheat Pastafarian follows a different path, so that through successive generations, the ground grows stronger, produces better crops of grains and soil to grow more and more... and so on and so forth...putting an end to humanity caused desertification (instead focusing on dessertification - as in two s's - pass another slice of chocolate cake please)

But that's simply the second most holy of tasks a Pastafarian can seek in their life... 

Whole Wheat Pastafarians are very quiet on the internet, most of them are too busy growing food or cooking it to spend time chatting in the virtual world.  However, I suspect that those who feel the touch of His Noodly Appendage most strongly in this world, pursue the art of brewing beer.  Perhaps, and I speculate here, this is where the symbol of the Beer Volcano comes in -  a powerful brimming over of potential and spiritual intoxication.  I know I feel a compulsion to brew my own beer... but not only that, to grow my own barley, to malt it at home, to select the hops or other herbs to bitter the brew, to capture the miracle of wild yeast that lives invisibility in the air around us, to... to recapture that once true spiritual calling that accompanied brewing.  Be it the monasteries of the middle ages, the Bacchanalian cults of the ancient Greeks, be it the touch of His Noodly Appendage into my soul... I want to make beer, from scratch soil.

So I bought a tin.


That's probably where I went wrong.  Short cuts.  But I'm not yet ready to invest in a from-soil method of brewing.  The timing just isn't right.


I followed the instructions on the back of the tin.


I got something that smells like beer but tastes like old socks.  It's good enough to cook with, but not much else.

Maybe homebrew beer from a tin is not for me.  Maybe I should just stick to cooking and brewing apple cider... or maybe an opportunity will present itself in the future, encouraging me to try again.  Maybe I'll call it divine intervention, or perhaps I'll call it a happy circumstance.  


On a different note, I was asked recently is the Flying Spaghetti Monster made from whole wheat pasta or white pasta?  Although we cannot know the true nature of the divine, our minds being limited by our experiences in this world and lacking the necessary enlightenment to understand the composition of the divine, I can only say this: You cannot make white flour without starting from the whole grain.  So even white flour contains a kernel of the true nature of god.  (apologies for the excessive corniness.)

Saturday, March 2, 2013

Lamb Sausages - kitchen failure? Almost.

My friend said it would be easy to make sausages.  Um, well, um, it turns out that easy is a relative term.


But what the heck, why not give it a shot.

He lent us his sausage maker and gave us some spices, which we mixed up with some already ground lamb we had in the freezer.  We soaked the lamb casings in water, and rinsed them really well.  

Next came the hard part, putting them on the stuffer tube.  The stuffer tube is just slightly larger than the casing, and the casings don't stretch much at all.  So with much struggle we managed to get the casings on the tube - minus a few rips here and there.  But hey, it's my first time.

While one person was struggling with the lamb casings, another mixed the meat and spices together.  Today was lamb and Mediterranean style spice mix.

Because I don't have a grinder yet, I'm working with pre-ground lamb.


As you can see, we made sausage:


Well, um sort of.

Lots of little breaks in the casings, stuffed it too full for the twisty thing to work.  But we put it in the fridge and fried it up for dinner the next day.


All in all, I'm up for trying sausage making again.  It's um... an interesting experience.

What I didn't like most was putting the casing onto the stuffer tube (going to try hog casings next time).  That and the sausages were actually too meaty.  Never had this problem before, but I think I have a solution for this.  Maybe try adding 20% bread (by weight) crumbs next time.

The things I liked best was how fresh it tastes and that I didn't need to worry about the ingredients and my allergies.

I can most definitely see a meat grinder (or two) in my future.

Thursday, February 28, 2013

Making Hot Smoked semi-candied Salmon at home: First attempt.

Having no recipe to guide me, working only from my own experience and fables of how they make that amazing smoked salmon in the northern part of Vancouver Island (Hardy Boys is one example you may have heard of), I decided to dive in and make smoked salmon.

My smoker, a mister to calm the fire, and home made maple syrup to brush on top


The first job was to cut up the salmon into long strips.


Then I made a mixture of salt, maple sugar, and black pepper.  I dredged each piece of salmon in the mix and cured it for about 20 hours.

Before
after curing
At this stage the salmon feels very firm.  All that moisture came from the fish.

I should have rinsed the salmon at this point, but I forgot.  Because of this, it turned out to be excessively salty.

I dried the salmon using paper towel, and left it on a rack, uncovered, in the fridge for about 2 hours to dry extra well.  From what I have read, this stage is super-important if you want the smoke flavour to stick.


This is a charcoal BBQ/smoker so I started it up about half an hour before I was ready to get smoking.  The fire is in a separate box attached to the side of the grill.  You build up a fire with charcoal and then you put the chips (in a tinfoil bag with holes in it) or blocks of wood on the fire to make some smoke.

The problem I encountered with this is that it got too hot too soon.  The fish actually cooked instead of slowly gathering smoke.  But not a complete loss.  Each time I use this smoker, I learn something new.


In the end, I only smoked it for about 2 hours.  Next time I think I'll smoke it for at least 4, maybe 8 hours.

But it looks good, and if you can get past the over-salty-ness of the whole thing, it actually has a lot of potential.


I wonder if I should add the label 'kitchen failure' to this post or not.  I mean, we ate the fish, and I learned a heck of a lot about smoking salmon.  But to be completely honest with you, it wasn't exactly the best smoked salmon in the world.  In fact, I would be ashamed to serve this to someone, even a friend.

But then again, I tried something new, without a recipe, and had fun making it.  I discovered new information about my smoker that I never realized before.  And about fish, and about curing in general.

Eventually, I'll get it right and post the final recipe here.

Wednesday, January 9, 2013

Kitchen Failure - The fate of the mystery roast

The one thing I didn't anticipate when it comes to living on a farm, is how many people pay you in meat.  It's not just chickens for the doctor (although I'm guilty of that when I didn't have enough funds to pay for my medical treatment), but it's goat liver in exchange for leasing pasture, mystery roast for being a good neighbour, and no end of salmon, both smoked and fresh.

Pretty sure this mystery roast was moose, although I didn't have a chance to label it before it went in the freezer.  My hunter neighbour friend isn't very good at labelling, and when he does, it's usually in a Eastern European Language I don't read.  It's a very lean cut of very red meat, so I treated it the same as I do any lean roast.

In a Dutch oven, I brown it in some bacon fat, cover with bacon, chop up an onion for the pan and poor in some red wine.  Then in the oven it pops for about 2 hours at 300F.  This works great for a 2 to 3 lb roast, and usually goes over really well.

It does not, however, work for a 1lb roast.  The meat transformed into some sort of cross between a rock and petrified wood!  Complete Kitchen Failure!

after much effort,
managed to saw through the roast with a very sharp knife

But don't fear, there is a way to save this meat!  Just cool it to room temperature, then cover it and put it in the fridge till tomorrow.  I've got the perfect recipe to transform this from Kitchen Failure to Kitchen Savour.    But that post will have to wait for tomorrow.