Showing posts with label Preservation. Show all posts

Friday, January 1, 2016

New Years Day 2016, No-Soy Miso Club

The second annual meeting of The Victoria Miso Club went wonderfully well.


We began by opening last years Chickpea mugi (barley) miso.  It had an intense rich smell, and a robust miso taste.  The colour was much darker than I expected and we failed to get all the air pockets out, so there were a few spots of mold inside.  But otherwise a success.

This year is two batches of red miso.  We used the same recipe for both, only the beans were different.  For both, we used frozen koji rice from the local Japanese food store.

Adzuki Bean 1 year miso


  • 1 kilo dry adzuki beans
  • 500g koji rice
  • 200g sea salt (no iodine)

Chickpea 1 year miso


  • 1 kilo dry chickpeas (organic)
  • 500g koji rice
  • 200g sea salt (no iodine)


Method

  1. Examine beans and remove anything not a bean.  Wash.  Soak the beans overnight.  Rinse beans well.  Cook the beans in water until mushy.  The chickpeas I did in the pressure cooker in two batches, the adzuki on the stove in one big batch with just enough water to cover (add more water as needed).  The adzuki beans were ready about 2 hours before the chickpeas.
  2. Strain the beans - keep the cooking liquid - and mash the beans as much as you like.  We like chunky miso, so we just had a go with the back of the spoon.  You can make a smooth paste if you like.
  3. Combine some (about a cup) of the hot cooking liquid with the salt to dissolve the salt.  Mix this in with the koji rice when liquid is cool enough to put your hand in.
  4. Cool the beans so that they are cool enough to put your (clean) hand comfortably in.  Combine the beans, koji rice, salt, and enough water to make a paste.  If you remember (which we didn't) add a spoonful of last years miso,
  5. Put in vat, weigh down top, put in cold spot for 1 year.

As with last year, we relied heavily on Sandor Katz books, Wild Fermentation and The Art of Fermentation, for our miso recipe.  For a more in depth instruction on how to make miso, please see Katz. 

This year we are using plastic buckets to see how they work.


Affordable cooking:

Chickpeas were $7 this year, the rice about $6, and the salt, less than $1.  Let's say $14 for the gallon of miso.

Adzuki beans were about $4, the rice again $6, the salt less than $1.  About $11 for the gallon of adzuki bean miso.

To buy this miso in the store, it's about $16 a pound.  We made about 7 times that - to buy this much miso in the store would be around $100 - times two.

At a conservative estimate
Chickpea miso $100 - $14 = savings of $86
Adzuki miso $100 - $11 = savings of $89

That's not too shabby, especially when you consider we shared the expensive $25 between all the miso club members.  

Anyone who says you can't eat healthy on a budget hasn't made miso.


Saturday, November 29, 2014

A Fermented Holiday Season starts now

It's that time of year again, time to start thinking about Holiday presents.  This year I've decided that all the adults are getting homemade gifts, mostly food.

It all started with the most recent batch of chickpea miso - best batch so far! - and I thought, this is the type of miso I would be proud to serve my friends (as opposed to my learning batches of miso which were a little bit...um... taste like practice).  If the miso tastes this good, I wonder what other yummy treats I can make.

So here's a list (because these particular friends don't read this blog) of some of the delicious fermented foods I hope to have ready in time for Christmas.

Sweet Miso takes about one month to ferment, but it can be as fast as 3 weeks if I increase the ratio of koji rice to other ingredients.  I have one batch of Chunky Chickpea Miso ready, and plan to put up a batch of Black Turtle and Adzuke Bean with Barley Miso later today.


Kimchi!  Kimchi is awesome in so many ways.  For starters, it is by far the best way to clean out the crisper drawer in the fridge.  You can put (almost) anything in kimchi.  In this case, I used half a daikon, two su choi cabbages, chilis, excessive amounts of ginger sliced thin, Cauliflower, carrots, and anything else vegi related that needed eating up.  Kimchi takes about one week to ferment.


Cultured Butter is easy to make in advance and keeps for ages.  I'll probably start making this a week or two before the Holiday dinner.  Takes one day to culture the cream and the next day to churn it = two days.


With the leftover buttermilk from churning butter, I will bake some bread.  Sourdough Bread loves buttermilk.  With the added dairy sugars the bread will often rise to be lofty and soft, as opposed to the more dense country loaf I make for every-day purposes.  Takes two days to make a great loaf of sourdough, but can be done in one.

Speaking about dairy. my dream is to eventually make my own hard cheese.  Wouldn't it be lovely to give the gift of Cheese?  Even a soft farmhouse style cheese mixed with dry herbs dressed in a beautiful jar or clay pot would be a good addition to a gift basket.  Soft cheese takes a couple of hours, a hard cheese on the other hand can take years.


Of course, you could always spice up your relationship with some hot sauce.  Fermented hot sauce takes about one week, or this one which is ready in two days.


Last but not least, my personal all time holiday favourite:


Cranberry Mead!

The biggest advantages of fermented vs the baked gift, are that fermented gifts last longer, are generally more affordable to make and are a refreshing change from over-indulgence.  They are also an excellent way to use up the last of the harvest.

Wednesday, June 11, 2014

Cucumber, garlic scapes, and dill fermented pickles recipe


Here's a very delicious fermented pickle I've had the privilege to make.  The garlic scapes are from my garden, but the cucumbers and dill are from the store.  I plan to make this again later in the year with my own cucumbers and dill, but use whole garlic instead of the scapes.  It's tasty enough, but the scapes add a special something that is really yummy.


The other day I was lamenting the price of cucumbers in the store.  It was considerably higher than normal for some reason, but fresh fruits and veg are doing this more and more frequently these days.  But I found some cucumbers that had just come in at my friends shop, and bought the lot.  They are those lovely small cucumbers, tiny little seeds, so crunchy and tender.  

A good 20 plus pounds of cucumbers plus a garden full of scapes, and a few other vegs tossed in the pot for good measure, means that I made 6 gallons worth of pickles in an afternoon.  This recipe isn't for that much, but you can easily scale it up or down to your liking.  I'll do it per pound, so per each pound of veg you add...x this and that... very simple.

My recipe is inspired from this... okay, it's basically the same only modified for the open vat ferment style instead of the small jar ferment style.  Very good recipe, but far too small an amount for how good it tastes.  The ratio of dill, garlic and cucs is up to you entirely.  If you want pickled garlic with a hint of cucumbers, do that, if you like cucumbers best, do mostly those.  If dill drives you crazy with love and passion, go nuts.  But basically, I tend for 10 to 50 garlic scapes per pound of cucs, or one bulb of garlic for 2 pounds of cucs - I love garlic.


Cucumber and Garlic Scapes Dill Pickles


  • cucumbers
  • garlic or garlic scapes or both
  • fresh or dry dill.
  • salt
  • optional - chili pepper, other veg like carrots
  • water
  1. Weigh out the veg.  For every pound of veg put aside 2 tsp of salt.  Add one Tbs of salt to the pile (for the pot as they say).  
  2. Cut up the veg how you like.  The more surface area the faster they will ferment.
  3. Layer it in a clean crock (no antibacterial soap, this will kill the bacteria that we need to ferment the pickle), layer of veg, sprinkle herb, layer garlic, layer of salt, layer of veg... and so on.  Save a good Tbs of salt for the top.  When you run out of veg, sprinkle the rest of the salt on top.
  4. Put a plate or cut a piece of plastic or wood or whatever you have on top of the veg/salt layers.  It needs to be smaller than the opening so it can weigh down the pickles, but not too much smaller that the veg can get around the inner lid and float.  Weigh it down with a jar of water or clean rock, or the like.
  5. cover the whole thing with a cotton or linen cloth to keep the bugs out and stop the dust getting in.
  6. Place somewhere at cool room temp, between 10 and 20 C is ideal and ignore it for 12 to 24 hours.
  7. The veggies will make their own liquid, but probably not enough.  Add clear, clean water to the vat until the veggies are submerged.  Cover it back up and ignore it.  
  8. After three days to a week, open up the vat and take out a few cucumbers (with clean hands/tools) to taste.  If you like it, put the pickles in jars in the fridge.  If you would like it more sour, replace the inner lid and weight to make certain everything is submerged.  Cover again with cloth and ignore for another week.
There may be mold.  It happens but is seldom harmful.  If the mold is black or the vat smells rotten - toss it it the compost immediately!  Otherwise, trust your senses to tell you if it's okay to eat or not.  Mold isn't always bad for you.  In fact, a great number of molds are good - antibiotics come from mold, blue cheese, miso soup, sake rice wine... all contain friendly molds.  Most molds don't care about humans one way or the other, some are helpful and some are harmful.  But the point is, not all molds are bad.  If you feel uncomfortable with mold, then don't eat the vat.  If you don't mind it, and it's not black mold, then scrape off the mold, maybe sprinkle some more salt, and make certain everything is submerged below the water.

If you are making this in the heat of the summer, which is likely given the way cucumbers grow, and don't want to eat it right away, then feel free to add more salt.  In the summer, I usually put in 1Tbs salt per pound of veg.  In the winter, when it's cool, I'll add a lot less salt, maybe 1 tsp per pound of veg (this is my basic guide for all vegi ferments like kimchi or sauerkraut).  


You can make these pickles for the flavour, or to preserve the cucumbers or for the health benefits of probiotics.  I find this recipe very affordable, especially when my own cucumbers are in full production... although if you are buying the cucs, then maybe wait for them to be on sale.  

This is a traditional method to preserve cucumbers, and also one very good for transitioning away from dependence on big business and long range food transport.  Make this in the summer when you have cucumbers coming out your ears, then you will be able to enjoy pickles well into the winter, maybe even next spring.  For preservation, it's helpful to keep it in a cooler location.


Yes, this is vegan friendly.


Sunday, March 23, 2014

If you love bees...

 If you love bees... or eating food in general (without bees there would be almost nothing to eat, except maybe Soylent Green), then here's something you need to know about.

The bees are disappearing.  Even The Doctor knew it was important.  As weird as they are, bees aren't actually aliens (probably), but rather are a vital part of our ecosystem.  Not an ecosystem, but our as in the Human ecosystem that we depend on for survival.  Bees make the plants go happy (reproduce) which in turn participates to our breathing and eating abilities.  There are places in the world without bees, and they suffer.  It is unlikely that the amount of physical labour involved in living without bees could produce enough calories to sustain the population needed to produce that labour.

So basically, no bees quickly leads to no humans, or very few of us surviving, probably not you or me.  Even if we were only to loose the plants requiring direct bee intervention to stimulate their sexlife, then the other plants, the ones that don't need bees for all or any of their pollination would suffer.  Out of those plants we eat (or can eat) as humans, many of the ones that do not rely on bees, rely on human labour.  So reduction in food, leads to reduction in population, leads to a reduction of human labour... which will mean less food...  On top of that, the plants that don't require bees, do require plants that require bees for long term survival.  For example, bigger plants protect smaller ones from extreme weather and capture (and slow the release of) water, which limits the extremes the smaller plants need to endure.  Smaller plants die off quicker, creating better soil conditions, but they also have lovely root systems that are good for reducing erosion, protecting the soil from extreme temperature fluctuations... and so on ad infinitum.  No bees means a good chunk of that sustainable system is lost, which puts more stress on the rest of the system, which soon leads to less food for humans... It's more complex than many of these 'what if there weren't any bees' theories take into account.  We can extend the time humans survive through chemicals, however, it appears that this technique only works as a short term solution, and actually reduces the capacity of the land to support food growth over the long term... and, in theory, long term survival of our species should be important to us.

We need to do something about this.

Here's something:


http://www.indiegogo.com/projects/open-source-beehives


This is a beehive.  What's really neat about it, and why it captured my interest is that it combines really old and really new technology together to create something more accessible and functional than the modern or ancient technology can do on it's own.

It's called an Open Source Beehive and it's plan is to provide a make your own, printable top bar beehive.  You use this mighty router table printing thing and special, bee friendly plywood to make a flat-pack hive that fits together like a piece of Ikea furniture.

Now I've been wanting a beehive like this for years.  I've even started building (not one, but) two.  Only things came up and the wood I had ready got used for other things.  It takes many tens of hours to make one of these things if you don't have the skills or tools (or in my case, neither).  So being able to 'print' a beehive in about half an hour or so, is fantastic.  I just need to find a router printer thing big enough.

The other half of this project is to monitor the health of the hive using a sensor.  This part doesn't interest me as much, I don't have wifi and cell coverage is poor here.  But for those of you who are interested in this, it attaches to the beehive and tells your smart phone (something else I don't have) if there are any changes in air quality or hive temperature.  It's really useful if you aren't talking to your bees daily.


This open source beehive project is currently in the crowd funding stage.  Basically they ask people to donate money if you believe in this project and want to support it.  You can donate one dollar or one million... they probably accept euros and yen as well.  If you go to the link and look at the right, at different donation marks, you get a reward.  The theory behind crowd funding is a lot like knitting.  Every stitch counts towards a sweater, every dollar donated adds up and make the project happen.


My motive for sharing this isn't just to rant about the importance of bees.  There is a method to my madness:

First, the crowdfunding only has a few days left and they aren't quite at their goal yet.  Even if you don't donate, maybe you could mention it to your bee loving friends.

Second, I'm searching for people in the local area interested in working together to make some of these hives, with the theory that if we buy in bulk, it gets the price down and when the bees arrive, we can support each other with advice and stuff.


Friday, February 21, 2014

Homemade pepperoni - my first dried sausage adventure


For the holidays I received this wonderful book called In the Charcuterie by Taylor Boetticher and Toponia Miller.  It's full of beautiful photos and well worth a gander.  Most of the book is about working with fresh meat, how to create beautiful finished dishes like roasts and instruction on how to debone and create different cuts of meat from a carcass.

The section on curing sausages is short but empowering.  The authors give a general recipe on how it's done, including different casing sizes, drying environments and all the necessary and sufficient conditions to be a success.  For example, lamb casings or thin hog casings are more forgiving and don't need as specific an environment to ferment and dry in than great big fat bung casings.  Which means, that if I turn the heat off in my room for two weeks, in the middle of winter, I can cure and dry my own sausages.

I followed the recipe for pepperoni except that I used smaller hog casings and changed the drying time/conditions accordingly.  But this book is friendly towards that kind of change.  Basically they take the attitude that people have been curing sausage like this for a few thousand years, without refrigeration or fancy electrical curing chambers. What's more, they didn't have shops to buy specific fermenting cultures from, instead they used things like a splash of wine in the mix.  This stance is quite different from the usual 'you must do this specifically and buy all this fancy stuff, or everyone dies' approach to curing meat.

Feeling empowered by the book, I gathered together my spices, curing salt, and garlic.  I used 7 lb of old goat, 1 lb of pork and 2 pounds of pork fat.


Mixed it in with the cubes of meat and stuck in the fridge overnight.  


Laundry rack transformed
into sausage hanger
I have this antique meat grinder that I found at a yard sale, so I thought I would give it a try.  It works marvelously well, just like the books say they should.  When I tried my modern grinder that I bought from BigBoxMart (I'm not proud of that), I could see that all the problem's I've had making sausages in the past were not me, it was the tool being completely useless.  This made me giddy with joy to have a meat grinder that works effortlessly, although, it was a bit small and can only process 1 tablespoon at a time - I am going to keep an eye out this year for a much larger one.


After stuffing the sausages, making sure all the air is removed (both of which I need more practice with as I'll show you later), then it's time to hang them to dry.  Ideally the temperature will be between 65 and 70F, and be constant for the two weeks.  I choose 68 degrees because, well it's cold enough thank you.  Each room has a thermostat so it was easy to keep my room a steady temp.  As the humidity was dry that week, I lightly misted the sausages with fresh water a few times a day for the first three days.

I was a bit disappointed because none of the friendly white mould formed on the outside of the sausages.  This mould is suppose to help keep things safe and prevent bad microbes from settling in.  Next time I think I'll pick up a piece of sausage from the local Salumeria and put it in the same room as my hanging sausage, the mould should migrate just fine.

After a week, we started testing them, yummy, but still a bit raw texture in the middle.  Left them another week, and much better.


Look how beautiful and red that meat is.  This tastes amazing!

But wait, not all of them look like that.  Some of them look like this:


Sort of yellow/brown inside.  Not appetizing at all.  Though they smell okay, I'm not happy with them, so they get tossed out.  I don't know why they look like this, but I have suspicions.  Maybe, I didn't get all the air out of the casings - I admit, I did have problems with this - or stuff them full enough.  Or possibly the outside casings dried too quickly leaving the moisture inside to rot the meat instead of fermenting and drying it.  I don't think this second one is what happened because I would expect a bad meat smell, where there is no real change in smell from lovely red insides and ugly brown ones.  Only about a quarter of them turned ugly, so three quarters good, that's great for a first attempt.

What I've learned from ugly brown insides is that I need more practice making cured sausage.  How exciting.  I wonder what flavour to make next.

Cooking with Allergies:  There is a lot of room to adjust for allergies when making your own sausage.  If you have problems with meat and mould, this is probably not the recipe for you.  However, spices, wine and other allergies issues can easily be accommodated.  In the book there is a recipe for your basic cured sausage with specifies the ratios of meat, salt, curing salt and fat.  Page 232 gives you everything you need to know about this, and you can play with your spices and herbs from there.

The recipes in this book do not include commercial starter or filler which can be a source of allergies.  HOWEVER, it does include nitrates (curing salt #2).  Some people are sensitive to this.  There isn't any mention on not using curing salts (nitrates/nitrites).  From the research I've done, omitting nitrates/nitrites from whole muscle cured meats like bacon is possible, just increases the risk of spoilage. However, omitting it from dried sausages is not a good idea for a person with a Western immune system.  If you want to omit the curing salt #2 from your dried and cured sausages, do your research first!  And know that in the West our bodies are no longer trained to handle a strong bacterial load (both good and bad).

Affordable?  Pork cost about $3 a pound, pork fat $1, the goat roughly $4 a pound.  The goat was old and angry, so the meat isn't much good for roasting or much else.  This used all the little scraps of meat that would often go to waste in butchery.  That's about 7 percent of hanging weight that would usually be lost.  So do we count the cost of the goat since it's salvaged material?  I think I will because it makes a fair comparison for later on when I run out of angry goat.

Meat was $33, but it was (mostly) grown on the farm and raised organically.  Spices, garlic, wine, casings, let's round it up to $2.  Take into account that although I started with 10 lbs of sausages, they lose about 30% of their weight so I ended with 7lbs.

$35 for 7 lbs of artisan cured sausage that I know exactly what went into it, is $5 a pound.  I don't think that's bad at all, though I can't remember off the top of my head what the going rate is in the shops, but I wouldn't be surprised to pay between 2 to 4 dollars an oz for artisan sausage.

Then again, I do need to knock off a quarter of the finished amount for my learning mistakes.  So really, this batch was almost $7 a pound.  But I expect to get better at this and have less waste in future.

Healthy?  Yes.  In small amounts.  There are some medical studies kicking about these days that say you should have less than 1 oz of cured meats a day.  I suppose if you are on a fully Western diet full of wonderfully creative preservatives and manufactured salts like MSG, adding cured meats to your diet would increase the stress that salt puts on your body.

However, that said, people have been eating this sort of sausage for several thousand years, and up until the last 120 years or so, the amount of salt used, and nitrate/nitrites used were considerably higher.  This kind of food was a staple in the diet, and the diseases attributed to cured meats only started appearing in the last hundred years.   My interpretation of this is that perhaps cured meats is simply a scape goat for a greater problem in the Western diet.

But even still, the flavour of this is so intense, it makes a better condiment than main dish.  I know everything that went into my sausage, so compared to big factory made peperoni, I feel this is healthier.

Safety?  Since I have no artificial colours or aesthetic ingredients added to the meat, I can tell right away if there is something wrong with the appearance or smell.  Because they are made in small batches, it is easy to do quality control.  Though large scale, factory production of cured meats don't fulfill these conditions, they are usually safe.  But when they go wrong, they go wrong on a big scale.  There has been a few issues with cured meat production in Canada over the last few years, with deaths.  I feel safer doing things at home, however, I arm myself with the knowledge needed to create safe food.

Monday, December 9, 2013

It may work, don't know, let's find out.

I had some daikon in the back of the fridge that needed eating up, so I decided to make some fermented pickles.  Sliced it thin, mixed it with one chili pepper, also sliced thin, and added one generous teaspoon of sea salt per pound of veg.  Weighed it down and added water to make certain everything was submerged.


It's only been fermenting for three days now, but it is quite tasty.  I'm going to leave it a week or two, tasting it probably again in a week.  I really want the chilies to mellow and the daikon to spice up.  But who knows what will happen... it's all up to the invisible beasties now.

Affordable (they were all leftovers from the back of the fridge that were going to be tossed), healthy, vegan friendly and all that jaz.

Tuesday, November 26, 2013

Soy Free Sweet Miso Paste Recipe, with just a little bit of soy-free Tamari on top

For those of us with soy allergies and sensitivities, finding a soy-free miso paste that we can enjoy (and afford) isn't easy.  So I decided it was time to make my own.  I'm not certain what surprised me more, how affordable it was to make or how easy.

Miso paste and tamari
both made without soy


You can use any pulse, be it lentils, chickpeas, fava beans, black eye peas, anything, to make miso.  You don't need soybeans.  The only potentially difficult ingredient to get is Koji rice, but most asian grocery stores can order it in for you already cultured.  You can also make it at home with a bit of dedication.  It takes a couple of days, and you can get the koji spores from GEM Cultures.  The third ingredient is salt.

The method for making sweet miso is easy: get the koji rice ready the day before and soak the beans.  Next day, cook the beans, mash them (or not) and then mix them with the koji rice and salt, and maybe a bit of bean cooking liquid.  Pack it in a vessel with a inner lid and weight to press the miso down, then tie it up with a cloth and leave it on your kitchen counter for 2 to 8 weeks.

Red Miso, has the same method for making it, only different ratios of ingredients and it needs to ferment for at least a year.  It also requires different temperatures.  Since it's more fussy, I decided to start with the Sweet Miso recipe.  But I have everything I need, including confidence, to try one year miso later this winter.

For this first batch I cleaned out the back of my cupboard and used a mixture of forgotten dried beans (mostly Romano and Black Eye Peas).   But like I said before, you can use any bean to make miso paste.  Most people use chickpeas for their first soy free miso making experience.

I used an antique food chopper to mash up the beans
but you can use anything you like from stick and bowl
to cement mixer.


The references I used for this are The Book of Miso, especially this chapter, and Katz's two books, Wild Fermentation and The Art of Fermentation.  This is the recipe I used for the second batch of sweet miso as the first batch didn't have nearly enough saltiness to it and tasted a bit sour.

From what I've read, 1 gallon is about the smallest batch of miso you want to make at a time.  Something to do with the ratio of surface area to the volume of the something something.

Miso ready to dig out of the 1 gallon vat
you can see that some white mould has formed on top
that's normal.  Koji is a kind of mould, a delicious one.


So that's what this recipe makes, 1 gallon.  The ingredients cost me just under what one pound of soy-free miso paste is in the shop.  Since it made close to 10 pounds, I'm very happy with how affordable this is.  Next year I plan to grow my own beans which will cut the cost in half, and culture my own koji rice, which will take price of making this from $15 down to about $5 per gallon.


Soy Free Sweet Miso Recipe


1 kilo of dried beans
1 kilo (or just over) Koji Rice
140 grams sea salt (non iodized) plus extra
water
Kombu/kelp (optional)

Some other stuff you will need:
A container that fits more than 1 gallon (otherwise known as vat)
Something to mush the beans with
A plate or inner lid that fits inside your vat leaving as little room between the walls of the vat and the plate as possible.
A weight, could be a rock that has been purified with boiling water and scrubbed with salt
A cotton or linen, tightly woven cloth
...and other things.  This link covers it better.


  • Wash the beans well, and soak overnight.
  • Rinse the beans and boil with lots of water until they are mushy.  How long this takes depends on the kind of bean and how long they have been sitting in the back of your cupboard.  The older, the longer.  Usually for me it's about 2 hours, but some beans can take upto 14.  You can also use a pressure cooker for this step, but beware if yours is aluminium as sometimes that can contaminate your food.
  • While the beans are cooking, bring your koji rice to room temperature (if it's not already).  I'm going to assume at this point that you read the entire recipe before starting out and already have your koji rice ready to go.
  • Drain the beans, reserving the liquid.  Mash them up however you like.  It can be a paste, or it can be chunky, some miso recipes, like Natto Miso, keep the beans whole.  I do moderately chunky and puree or not as required when I use the finished miso.
  • If you are using kombu then keep in large pieces and soak in tepid water now.
  • Combine the salt with about 1/2 cup of bean cooking water, make certain it dissolves completely.  
  • When the beans are below 140F (aka, you can put your hand in them and they feel somewhat warm, but not hot), then add the salt water and koji rice.  Mix really well.
  • Add more bean cooking water as needed.  The goal here is to make a fairly moist, but not too moist mush.  To tell if the texture is correct, make a ball, like a snowball, from the bean mush.  Toss the ball firmly and assertively against a surface, like the bottom of your miso vat.  If the mush ball spatters everywhere, it's way too wet.  If it cracks upon impact, it needs more water.  And, if it just settles in, not cracking but not spreading out everywhere, then that's about right.  See the video in this post for an example of what you are aiming for.  
  • Make certain the inside of your vat is clean but don't use any antibacterial soap on it as this will damage the miso.  I often use a bit of sake or vodka to wipe inside the vat before the next step, but this is optional.
  • (Optional) Wet the inside of the vat and sprinkle lightly with salt.  Most people say this isn't necessary for sweet miso, but I find it makes a huge difference.  
  • Firmly press your bean mush into the vat, so that there are no air pockets.  I do a few snowball size bits of bean mush at a time, stop and massage them into the crevices, and repeat.
  • When the vat is almost full of bean mush, smooth off the top.  Evenly sprinkle at lest 1/2 a tsp of salt on top.  Cover the surface (directly on the surface) with clear wrap, or even better with kombu seaweed that you soaked earlier.  I go for a double layer, ripping the seaweed as needed to cover every last part of the surface of the bean mush.  
  • Place your plate or inner lid on top, and then your weight on top of that.
  • Cover with a tightly woven cloth and tie the cloth down so that no dust or insects get in.
  • Place the vat in a secluded part of the kitchen where it can stay at a fairly steady temperature, room temperature.  Check it after two weeks, but it will probably take a month.  There should be a layer of liquid on top (the Tamari, see below), maybe some white mould from the Koji Rice, and should smell like miso.
  • When you are ready to try some, drain off the liquid (keep it to one side for tamari, though if the miso is still immature, you may need to put it back in the vat again) and scrape off the mould.  Dig out half a cup from the center of the vat to try.  Press the bean mush back together to ensure there are not air pockets, smooth off the top, sprinkle salt on it, and wrap it up as before (kombu optional), replacing the tamari on top.  Try the miso you dug out.  If it's not ready yet, wait a week or two before trying it again.  If it is ready, then you can put all your miso in jars in the fridge, or you can use this same method to dig out miso you need for the week and let the rest continue to age.


You can see the coarsely mashed beans
and bits of koji rice in the miso
Sometimes I leave it as is, other times I puree it before use


Tamari (No Soy) Recipe

This is the liquid that forms on top of the miso paste while it's fermenting.  It tastes like super-strong-super-salty soy sauce.  Only if there are no soy beans in the miso, there won't be any soy in the tamari that forms on top.

Before you dig out your miso from the vat, drain off most or all of this liquid.  It's probably going to have some mould on top.  Remember, mold is one of the three main ingredients in miso (Koji Rice = special mouldy rice).  If the mould is white, yellow, or a bit blue-green, it should be fine.

Strain the tamari to remove the mould, sometimes this takes many strainings or even a bit of tightly woven cloth.  Bottle and store in the fridge.  Use as you would soy sauce, only use less of it, this will be much stronger.

Soy Free Tamari
Very salty taste, but delicious


Affordable:  Yep. I talked about this above

Vegan Friendly: Yep.

Healthy: Yep. There are some really fascinating studies out there about how daily consumption of miso has helped prevent radiation sickness, improve gut function, detoxify heavy metals from the body, and other good-for-you things.

Traditional:  Yep.  Until about 60 odd years ago, most families in Japan made their own miso paste, and each region (and family) had their own recipe.  Nowadays there are only a few dozen misos commonly available for sale in the shops.  Which is a shame.

Transitional:  YES!  With the consolidation of miso making to mid size and large companies, we have become very reliant on global trade and long distance shipping as a means of supplying our miso.  I think making our own miso paste can serve a role in transiting away from a lot of the problems we have with the current food system.  It's not just good for soups, but also for preserving pickles, marinades, condiments, and has huge health benefits.  Even those not use to eating miso could find this salty-savoury-sweet treat a beneficial addition to their daily diet.


There are a lot of different ways to make miso out there, this is just one of them.  The Book of Miso is currently the best English language book about miso, history, manufacturing, everything.  You can make miso from different pulses, grains, and even vegetables.  This experiment has opened up a whole new world, and I'm looking forward to exploring it all.

Monday, November 18, 2013

Some amazing things you can make with Fil Mjolk, Viili and other room temperature yoghurts.

After my previous adventures with Viili the shop sent me a replacement culture.  Since they were so helpful, and I know other people who have had good success with their cultures in the past, I decided to order some Fil Mjolk (also spelled Filmjolk) starter at the same time.  I'm so glad I did.

Viili and Fil Mjolk are considered room temperature yoghurt cultures.  In that you do not need a yoghurt maker or insulator to make them, rather you can culture them at room temperature.  Very awesome.  They probably aren't actually yoghurt in the true sense of the word, but English does not seem to have a word for this and it beats calling them 'cultured milk products' every time.  The taste and texture is also like yoghurt, so we call them that on the basis that they share the same qualities.

The Viili is yummy and tastes a lot like The Captain remembers real yoghurt tasting like, but it's tricky to culture.  It takes a lot longer than Fil Mjolk, is fussy about temperature, and it requires you monitor it frequently and not miss the point where it sets - that's a bit more bother than I like in a fermented food.

What I demand from a fermented food (and just about every food) is that it be flexible.  That it is quick to prepare and can be put on hold if something happens.  That it can grow in just about any temperature range, with the understanding that there may be an alteration in flavour and timing.  That it can be used to make several different things, and that if I'm suddenly called away and miss the deadline, it will happily wait for me.  Fil Mjolk does all this for me.

I'm going to keep going with the Viili, but more as a snacking yoghurt than anything else.  The Viili is flexible in that I can use it to make a drink, yoghurt, and two different cheese (with whey left over for other uses).  I can do all this with the Fil Mjolk as well as making butter, buttermilk and buttermilk cheese.  But the taste between the two is very different.  Each has it's unique charm.

Here are some of the amazing things I've made with my Fil Mjolk (and sometimes Viili).

Yoghurt drink (Viili and Fil Mjolk)


I haven't tried this yet, not on purpose anyway, but by culturing a low fat milk, or not letting the culture work long enough, I ended up with a thick liquid.  Soon, I want to try blending this with fresh fruit for a yoghurt drink.

Yoghurt (Viili and Fil Mjolk)


This is pretty easy, you start with one Tbs of the old batch per cup of milk in the new batch.  Mix well, cover with a cloth, and leave at room temperature for 12 to 24 hours till set.  Put in fridge for 6 hours before removing starter for next batch and enjoying the rest.  At least that's what the instructions say, and it works well for the Viili.

For the Fil Mjolk, I find I only really need 1 teaspoon of starter (old batch) per cup of milk.  Adding less, takes longer to go firm, but it has two advantages:  It's less sensitive to timing, and it makes a lovely sour taste.

For a thicker yoghurt, use cream, for a thinner yoghurt, use milk.

Yoghurt cheese (left out method) with live culture whey (Viili and Fil Mjolk)

This is easy, and I discovered it by mistake.  I forgot that I had some yoghurt culturing, and when I found it two days later, it had distinct curds and whey (it had clabbered, what a great word, clabber).  I used some cheesecloth to strain the curds four about 12 hours, then I mixed a pinch of salt (per 2 cups of yoghurt used) in with the curds.  It made an almost creamy cheese, with a bit of sour taste like cottage cheese.

The whey from this is fantastic.  It has live culture in it, which can be used to add probiotics to your food.


Yoghurt cheese (cooked method) with cooked whey (Viili and Fil Mjolk)


To make this cheese, I heat up the yoghurt in a pan, stirring frequently.  Forget the thermometer.  If it boils, it's too hot, if you see the yoghurt curdle, then it's hot enough.   I strained this for 18 hours, or for a night and a morning, then mixed a pinch of salt (per two cups of yoghurt used) in with the curds.  It made a fantastic cream cheese that would be great savoury or sweet.  I think I might make a cheese cake for christmas using this.

The whey from this is cooked, not live culture, but it's still jam packed full of nutrients.  Use it in soups, bread, and anywhere else to substitute some or all of the water in a recipe.

Cultured Butter and Buttermilk (Fil Mjolk)


I've posted the instructions for regular and cultured butter here.  I'm surprised how easy it is to make, and I adore how it tastes.  I wait for the cream to be on sale at $1.99 per litre, then I buy them out.  The milk usually expires in one or two days, so culturing it helps the butter last longer.

Per litre of cream I get one pound of butter and half a litre of buttermilk, which can be used to make cheese and whey, or used as is in baking and cooking and drinking.

So far I've only tried it with Fil Mjolk.  I don't know if it would work with Viili, or if it did, if the taste would be good.  One day I'll give it a try.

Buttermilk Cheese and resulting whey (Fil Mjolk)

Made the same way as Yoghurt Cheese (cooked method) above, but use the leftover buttermilk from making butter.  Can be made with buttermilk made with uncultured butter, but you may want to leave this buttermilk at room temperature for about 24 hours before hand to sour it.

Update: Tried this yesterday.  It didn't make as much cheese as I would like, but I don't think I heated it up enough.  Taste is good and now I have some whey for bread baking tomorrow.


Did you notice how I avoided using quantities to tell you how it's made?  You don't need it, just the ratios.  So many recipes require gallons of milk and to be frank, most people don't want to make that large a batch.  You can make butter with half a cup of cream, or with 18 gallons, the method and ratios are the same.  Same with the yoghurt cheese.  If you have one cup of yoghurt that's been in the fridge too long, then use that, if you have more, then use that.  Salt to taste, but use at least one pinch per cup of finished cheese for preservation.  Or eat it faster and leave out the salt all together.

These are recipes for everyone.  They don't need fancy equipment or knowhow.  The only knowhow you need is to tell thick from thin, how to stir, and for the cheese to tell when milk curdles (it gets lumps in it). They are very forgiving if you get the measurements wrong, and the Fil Mjolk is kind enough to work in a wide range of temperature (65 F to 75F).


So is this affordable?  Oh yes!  It's a great way to take advantage of about-to-expire-therefore-on-sale milk and cream.  When I do this, it ends up costing about 1/4 the price of buying the already made products in the store.  And I know exactly what goes in making this, so know how healthy it is.

Allergies:  Well, you always have milk allergies to think about, however let me share something with you.  I've always been sensitive to milk, since I was a couple of months old, especially cow's milk.  And yet, on occasion, in some parts of the world, and only specific brands of milk, I can enjoy milk products with no negative effect whatsoever.  I don't know if it's something they feed (or don't feed) their cows, but I suspect it's something in the pasteurization process.  The organic milk from Avalon Dairy is one of those milks I can have no problem.  Their non-organic products have some effect, but when cultured with Fil Mjolk or Viili, they don't bother my gut either.

I suspect, that it may be possible, that some people with milk sensitivities will be able to enjoy milk products made with traditional milk cultures.  Maybe they can eat cultured butter but not regular butter.  But each person is different and if you do give it try, let me know how it turns out.

Transitional: So basically, these are easy to make, more affordable than the commercially made products, less wasteful than said products, and more variety than said products.  On top of that, you have the probiotics from the yoghurt cultures.  This is an excellent way to transition from dependence on big buisness.


Tuesday, June 25, 2013

Harvest and making random things

Time time of year my focus is more on outside the house than inside the kitchen.  The garden needs constant attention, the animals and...well everything.  But I still get a bit of time to cook what we harvest.

Calendula and sage for the dehydrator.  The sage is for tea and cooking, whereas I hope to have enough flowers by fall to make a dye bath for some fabric.  


Also in the photo are garlic scapes.  I never brought these into the kitchen before, so I really had no idea what to do with them.


I decided to try (a slightly altered) version of these cucumber pickles.  The ingredients are almost the same, but I used a different method for fermenting them.  Although it's going to be difficult improving on this already fantastic recipe, I plan to spend much of the summer attempting variations.


With a proper cellar I could see this being a great way to preserve cucumbers and other veg.  It was magical as the taste of the cumber went from salty to sour in just a few days.


I've also been harvesting several wild plants (aka weeds, of which we have many this year) for eating and medicinal use.  This is chickweed:


I used it to make a hand salve for a friend with some rather impressive skin troubles.  Chickweed has worked in the past for him, so I'm curious if my standard salve preparation would do the trick as well.

And finally, what would summer be without a pot of Kimchi on the go?

Daikon, carrots and su choi make up the bulk of this batch.  I chopped up some garlic scapes extra fine and tossed them in as well.  Very tasty.  Used the recipe from the book, Wild Fermentation - well more or less.

Wednesday, April 24, 2013

First Herbs of the Year - woot!

First proper herb harvest of the year.  Things are starting to grow, and I thought why not pick some to dry.


In the basket are oregano  sage, and thyme.  I wish I could share with you just how good this smells.

I barely ever used herbs before I started growing a herb garden.  Funny how that happens.

Friday, March 29, 2013

Making Pastirma at home - plus recipe

I'm intrigued by stories of food from the Old Country.  Traditional recipes that combine preservation and deliciousness are always up my alley.

A friend of mine from Lebanon was telling me about this cured meat he knew as a youth.  Back in the old country, it was made from goat or mutton, coated with a spicy paste, and dried for ages before enjoying as a breakfast meat of all things.  In North America it's easier to get beef, so when I saw an Eye of Round Roast on sale, I picked it up and set to work.

Pastirma has several different names depending on the region, and different variation on the spice mix.  But what they do all seem to share in common are that the meat is pressed and the spice mix includes fenugreek and garlic.  Legend has it that in past days nomadic tribes would press the meat between the thy and the horse as they road along.  The salt from horse and rider sweat would help cure the meat, then it would be coated in spice and hung from the saddle as they road from place to place - how much of this is true, I don't know (I wasn't there).

Pastirma is also the ancestor of several different cured meats.  You can see how it travels West across Europe   There is Bresaola, and even Pastrami and Corned Beef are very similar to this style.  Interesting how more sedentary cultures use a brine cure, where as more mobile cultures use a dry cure.  If I was still an anthropology student, I would write a paper on this.

The modern method does not require a horse.  After much questioning of my friend and research (both in books online) I found two recipes for pastirma that I liked best: Middle East and Africa Cooking & Baking recipe for Basturma and TheArmenianKitchen.com Homemade Basterma.  I ended up combining Folklore with these two recipes.

I adore how this turned out and can easily see why it is so popular in the middle east.  I just want to gobble it all down, but it's so rich that only a few shaved slices is enough for me.  I can also see why it's so expensive to buy in the shops; it took over 5 weeks to make.  If I had a better set up for curing my meat, I think I could have done a better job, but even with my limited resources  it makes a very friendly start to dry curing meat.  It's also very forgiving about timing, humidity, temperature, &c.... which in my opinion are the best qualities of any long-term, farmhouse, homemade, foodstuff.


You can use any lean cut of red meat: lamb, goat, horse (if you are into that kind of thing), moose, dear, antelope, beef, or well, just about anything.  My understanding is that the better quality the meat, the better the finished product, so for my next go at this recipe I'll be using some goat that was raised on this farm.  Then again, it turned out this good with some commercial feed lot beef, so I can't imagine how good it will be with some real meat!

My Pastrima Experience

About 4lb meat (I used eye of round cut in half lengthwise)  no more than two inches thick.
eye of round
less than 1 cup kosher salt


  • Trim as much fat and silverskin as you can from the meat, slice it in half longwise if it's more than 2 inches thick, and rub the salt into the meat.  Put into a ziplock bag, remove the air from the bag the best you can, and leave in the fridge for 4 to 6 days.  It will be firm to the touch when it's ready.
  • Rinse off and soak in cool water for 1 to 3 hours.  Rinse and dry before moving onto the next step.
  • Wrap the meat in cheesecloth and press.  I used an old crock and some boards and rocks (bleached with H2O2, both before and after).  Press in the fridge for about 2 days.


getting ready to press the meat
meat wrapped in cheese cloth and a board for pressing.

pressing the meat in the fridge

  • Take some kitchen or butcher twine and place in boiling water to sterilize.  A darning needle too.
  • Thread the string through the narrow end of the meat, tie in a loop so you can hang the meat by this.
  • Unwrap the meat, and wrap again in clean cheesecloth. Hang for 10 days for 2 weeks (I hung in the fridge, but anything below about 10 degrees C should be fine if you salted it enough in the first step.


hanging in the fridge
meat after hanging in the fridge
    spices ready to mix
  • Prepare the spice mix.  I used:
1/3 cup Paprika
1/4 cup Fenugreek
1 Tbs Alspice
1 Tbs Black Pepper Corns
1 Tbs Cumin Seeds
1 tsp Cayanne
1 Bud (not clove, the entire bud) of Garlic
1 Tbs salt
about 1/2 to 1 cup cool water

  • I ground any spices that needed grinding, then mixed in the cool water a little at a time to make a thick paste.
  • I unwrapped the meat and carefully coated it with the spice mix.  It smelled amazing!  I was very careful to get every bit of surface area covered, it took a while.
  • at first I hung it near the hearth,
    then I remembered fire makes heat,
    so I moved it to the cupboard
  • Hang to dry somewhere out of the way.  Ideal would be about 60 degrees F, and moderately humid.  Ours was decidedly less humid and warmer (but don't tell the experts, it still turned out amazing).
freshly sauced meat


  • The spices are mega bug repellents so don't worry about that.  But you probably want to avoid somewhere with drastic changes of temperature or too much sunlight.  After the outer coating started to dry, my final hanging place was in the bottom of the pantry, next to the sauerkraut.
  • Hang for 2 weeks.
  • If there is black or fuzzy mould, worry.  Or if it smells rotten, then you worry. Otherwise, so long as you didn't skimp in the salt on the first step, then there shouldn't be any reason to worry.
  • When the time is up, grab a beer, have a party, and enjoy your Pastirma (ps, beer intensifies the spicy flavour, not calms it like with a curry).


Lunch!
If you get that far, you can see why it's traditionally shaved off with a hatchet.  It's very firm and the knife needs to be very sharp and strong to slice into it.

Shave thinly as you intend to eat it.  Don't cut up too much before hand because it won't keep as long.  You can store at room temperature in a pinch, but it will continue to dry out, so best to wrap in some butcher paper and put in the fridge.

I'm very impressed how delicious this is.  I'm going back for seconds now, and I might try putting some in a pasta dish tonight for dinner.

Affordable Cooking: It cost me $15 for the meat, another $3 for the spices and salt (probably less) so that's $18 for 2.5lb.  A brief look at the internet says that it runs about $20 a pound to buy ready made Pastirma (plus shipping), but I haven't found any sellers that will ship to Canada, so I think you would have to find a speciality shop for that.  I think there's one fellow in Vancouver that makes it on a large scale, but you have to be a friend to buy it off him.  So to buy this much Pastirma retail, it would be at least $45 plus shipping.... I'm happy with how little it cost me and (provided I can get the meat for a good price) will make this again.


Cooking with Allergies:  This is pretty good.  You can choose the meat and to some extent modify the spices (just be sure to keep the salt, fenugreek and garlic the same) and it does not contain nitrites/nitrates which can cause a reaction in some people.  However, it does have a high salt content.  It needs it to kill off the evil bacteria, so if you are on a low salt diet, only have one or two slices.  The current recommendation is that you have no more than one ounce of cured meat a day, so it's a good aim to um,. well to aim for.


Tuesday, March 5, 2013

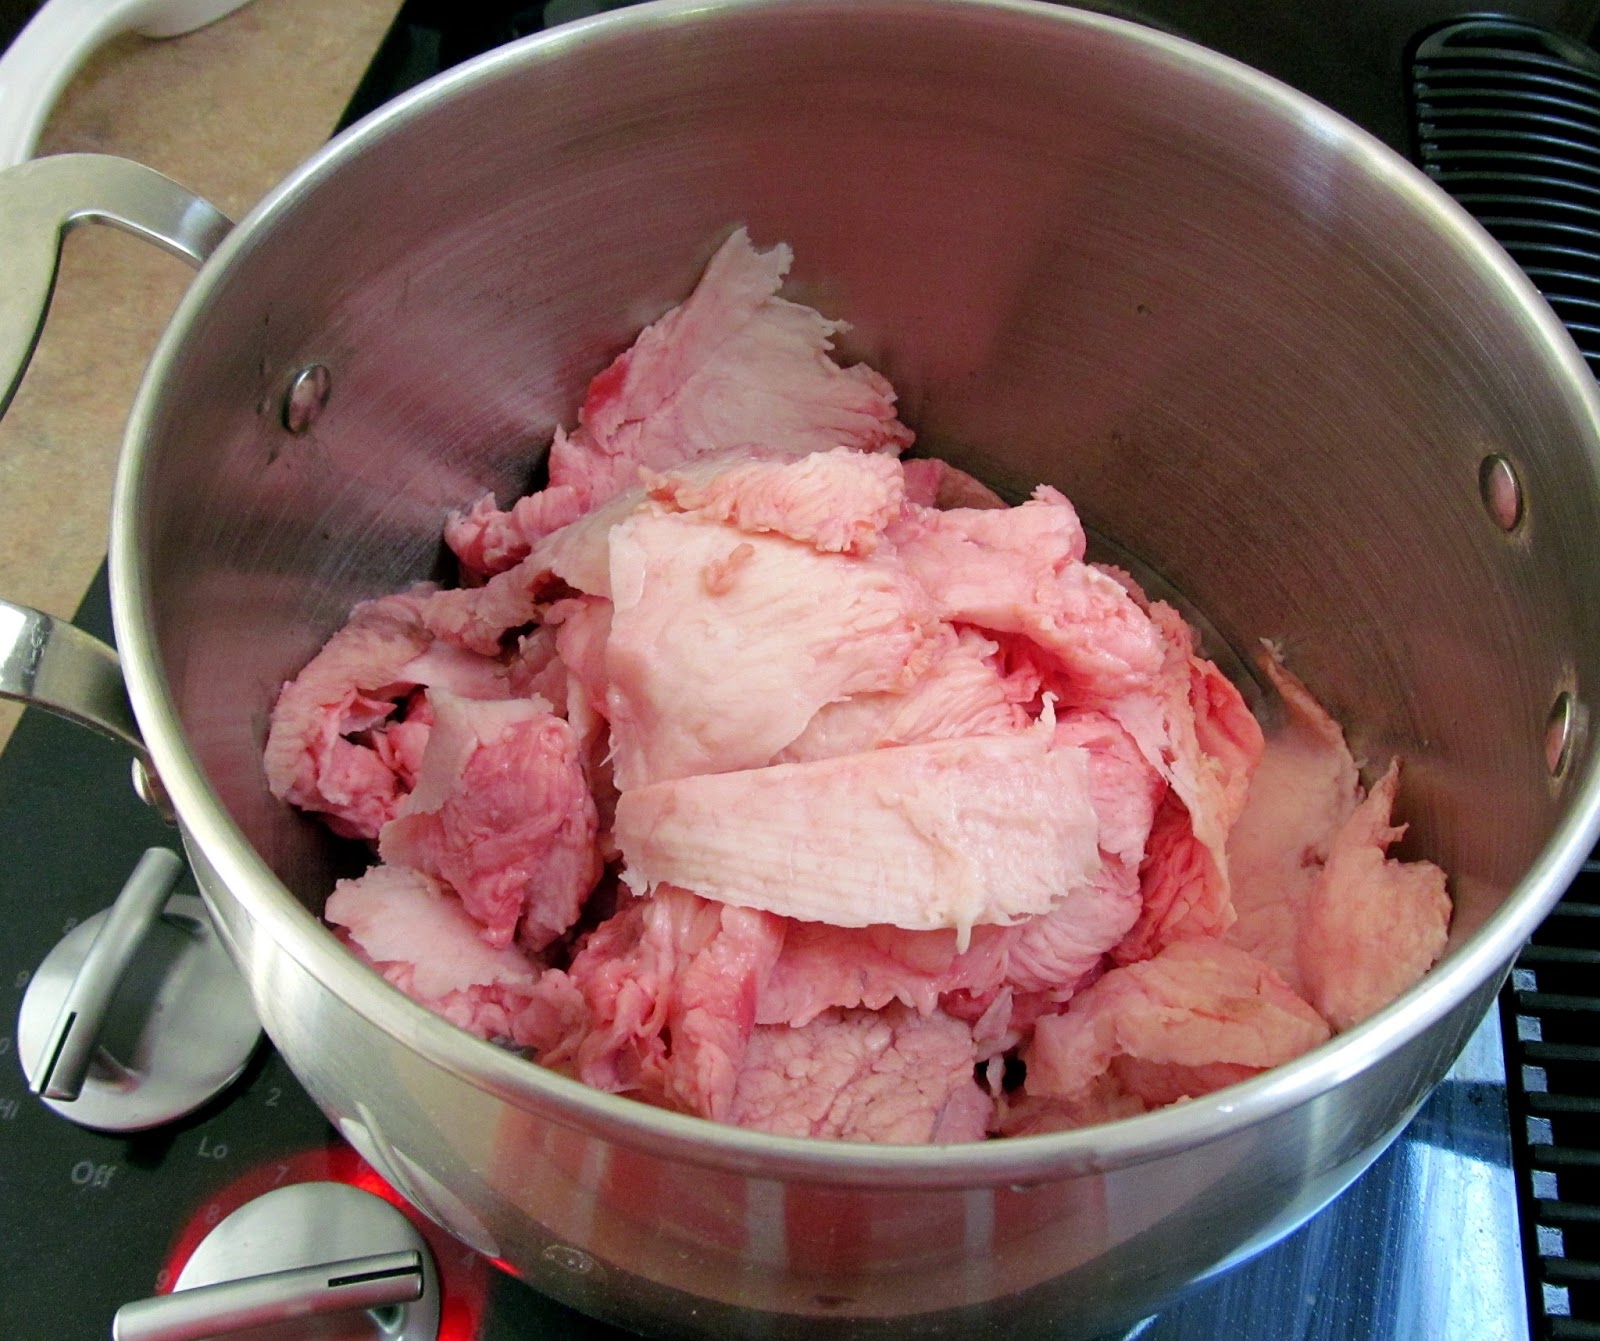
How to Render Fat

Until recent years, fat was one of the most sought after and difficult to acquire foods (unless you lived in the Arctic  but that's a story for another day).  Fat isn't just a high source of energy, it can be used to improve the tasted of breads, create the texture that we know and love in pie crusts, flavour stews and cooked grains, as well as preserving foods for long periods of time.  People also made soaps, lotions, and boot polish from it.

When you think about what the Western World use to be like pre-1950s, fat was an important ingredient to life.

Quite often, when engaging in historical cooking pursuits, be it reproducing recipes from the Middle Ages, American Civil War, or even war time cookery, you will find recipes calling for rendered fat.  Here is a real simple way to render beef fat, albeit, it takes a very long time.


HOW TO RENDER ANIMAL FAT


For every pound of raw fat, place half a cup of water in the sauce pan (don't use your best sauce pan for this, it's a real bugger to clean).  Place the pan on low, and lightly simmer with the lid off for many hours.  Don't cook it too high or the fat will scorch and impart an unpleasant taste to whatever you cook with it.  If the fat turns brown or smells scorched, toss the whole batch and do better next time.

When all the fat is melted, strain through a cheese cloth and leave the fat to cool before putting the lid on and storing it someplace cool (like the fridge).

I try to use this within 6 months.  It will eventually go rancid  sometimes after just a few months, sometimes it takes more than a year.  You can smell it when it does, it's very distinctive.


I'm using beef fat that would have normally gone in the trash.  After reading some WWII household manuals, I decided it would be nice to waste less.  So instead of tossing out the fat and buying lard, I decided to render it down and use it to make meat pie crusts later this month.  I don't normally have this much fat in one go, but I figure from now on, I can keep the little bits of raw fat I trim off roasts in a bag in the freezer, then when I have enough, I can render it.

I'm still not very good at trimming the fat off the meat, so there are a lot of bits of beef left over.  Aim to do it better than I did, but if you are as rubbish at trimming raw meat as I am, don't stress over it.

I'm thinking of taking these left over bits of beef, trimming them up and putting them in a curry or possibly doing what my Great Grandmother would have done, toast them in a hot oven till crispy.


In Victorian days, they would have done this on a warm, but not too hot, part of the cook stove, for sometimes several days until the fat has completely rendered out.  The stove is already being heated for other purposes, so it's not taking up a dedicated burner like me.  I did mine on the electric stove, which wasn't the most economical method.  I suspect a slow cooker would have been better, so I'll try that next time.


Thursday, February 28, 2013

Making Hot Smoked semi-candied Salmon at home: First attempt.

Having no recipe to guide me, working only from my own experience and fables of how they make that amazing smoked salmon in the northern part of Vancouver Island (Hardy Boys is one example you may have heard of), I decided to dive in and make smoked salmon.

My smoker, a mister to calm the fire, and home made maple syrup to brush on top


The first job was to cut up the salmon into long strips.


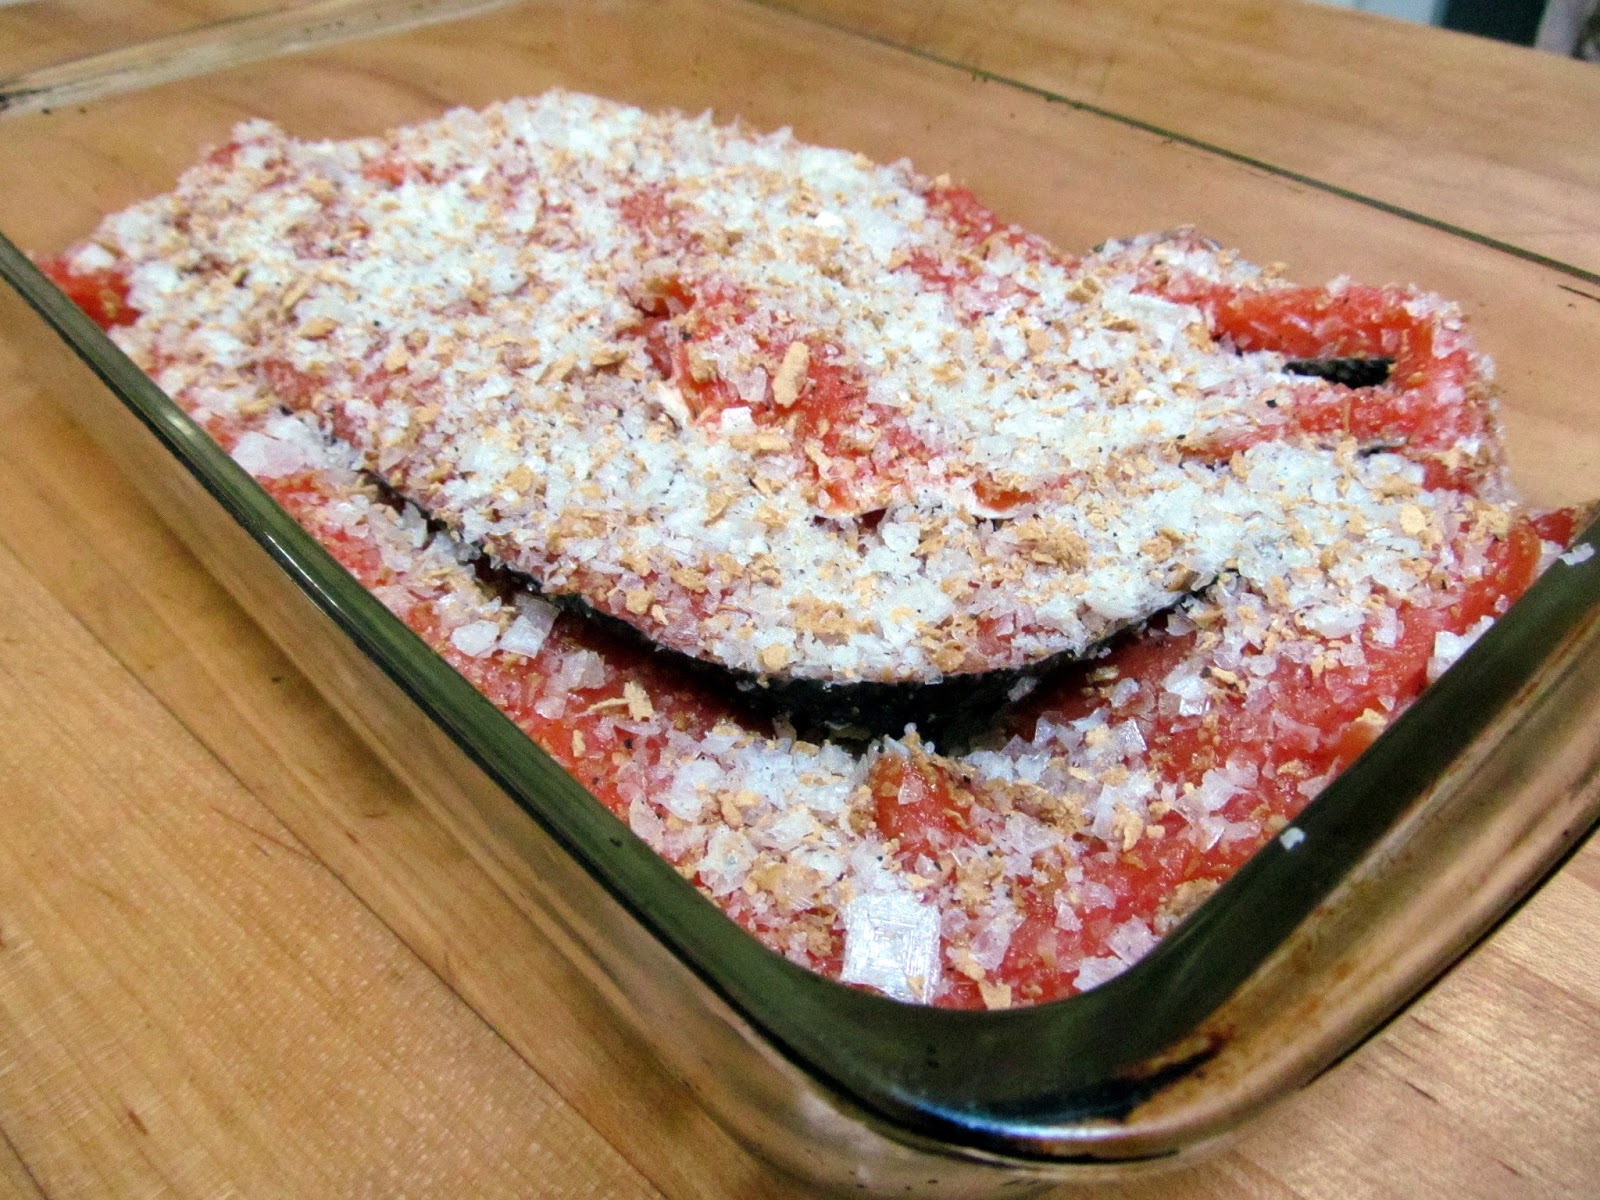
Then I made a mixture of salt, maple sugar, and black pepper.  I dredged each piece of salmon in the mix and cured it for about 20 hours.

Before
after curing
At this stage the salmon feels very firm.  All that moisture came from the fish.

I should have rinsed the salmon at this point, but I forgot.  Because of this, it turned out to be excessively salty.

I dried the salmon using paper towel, and left it on a rack, uncovered, in the fridge for about 2 hours to dry extra well.  From what I have read, this stage is super-important if you want the smoke flavour to stick.


This is a charcoal BBQ/smoker so I started it up about half an hour before I was ready to get smoking.  The fire is in a separate box attached to the side of the grill.  You build up a fire with charcoal and then you put the chips (in a tinfoil bag with holes in it) or blocks of wood on the fire to make some smoke.

The problem I encountered with this is that it got too hot too soon.  The fish actually cooked instead of slowly gathering smoke.  But not a complete loss.  Each time I use this smoker, I learn something new.


In the end, I only smoked it for about 2 hours.  Next time I think I'll smoke it for at least 4, maybe 8 hours.

But it looks good, and if you can get past the over-salty-ness of the whole thing, it actually has a lot of potential.


I wonder if I should add the label 'kitchen failure' to this post or not.  I mean, we ate the fish, and I learned a heck of a lot about smoking salmon.  But to be completely honest with you, it wasn't exactly the best smoked salmon in the world.  In fact, I would be ashamed to serve this to someone, even a friend.

But then again, I tried something new, without a recipe, and had fun making it.  I discovered new information about my smoker that I never realized before.  And about fish, and about curing in general.

Eventually, I'll get it right and post the final recipe here.