Showing posts with label Charcuterie. Show all posts

Tuesday, July 29, 2014

Headcheese - it's the weirdest cheese of them all, and possibly the hardest to make

Headcheese tops my list of weirdest foodstuff ever.  It's basically a hog's head, boiled, the meat removed, then the broth boiled down to make a thick jelly.  That's it.  That's headcheese.  Weird!


If I'm so grossed out by headcheese, why did I decide to make it?  Not sure really, perhaps because I've never done it before.  Though the more I think about it, the more I realize I made headcheese because I couldn't stand the idea of waste.  More and more I feel it necessary to honour the animals we eat by using every part of them.  

A couple of weeks ago, my friends butchered their oinkers, and I went to help.  Lovingly raised, these little piggies had it good: A warm cooked breakfast every morning, massages, and I suspect even songs.  It's a real privilege to give thanks to such well cared for animals before they met their end.


Next comes the most disgusting thing I've ever done - so far.


I brought home the head.

For the next 6 hours, myself and The Captain experimented with different ways to remove the bristles from the skin.  We tried scalding, skinning, plucking, shaving, and in the end we settled for a small blow torch and scraping.  Wish we had started with that to begin with, as it would probably have taken only about an hour.

Next came the part where we saw the head in half so we can scoop out the brain.  We can probably leave the brain in there, though I suspect it would make the final cheese cloudy.  Also, I'm not brave enough to eat brain yet, so I felt we needed to get it out.  A hack saw with a blade designed to cut metal was the best tool we found.  But if you ever have a chance to buy your own hogshead, get the butcher to cut the skull in half for you -  parts of the skull were nearly 4 inches thick.

There are a lot of recipes out there for Head Cheese, some simple, some beyond complicated.  I opted for one in the middle.  The recipe is from In The Charcuterie bye Taylor Boetticher and Toponia Miller.  I'm not going to copy the recipe here as most libraries have this book.  Besides, if you are interested enough in working with meat to read this post, you really need your own copy.

One change I did make is to make the brine using only a small amount of boiling water, than top it up with cold water once the head was ready to go in the vat.  Then in the fridge it goes overnight.

After that, the head comes out of the brine and into the largest pot in the kitchen.  A word of advice for any other crazy people who want to try this - make certain you have a large enough pot before you start.

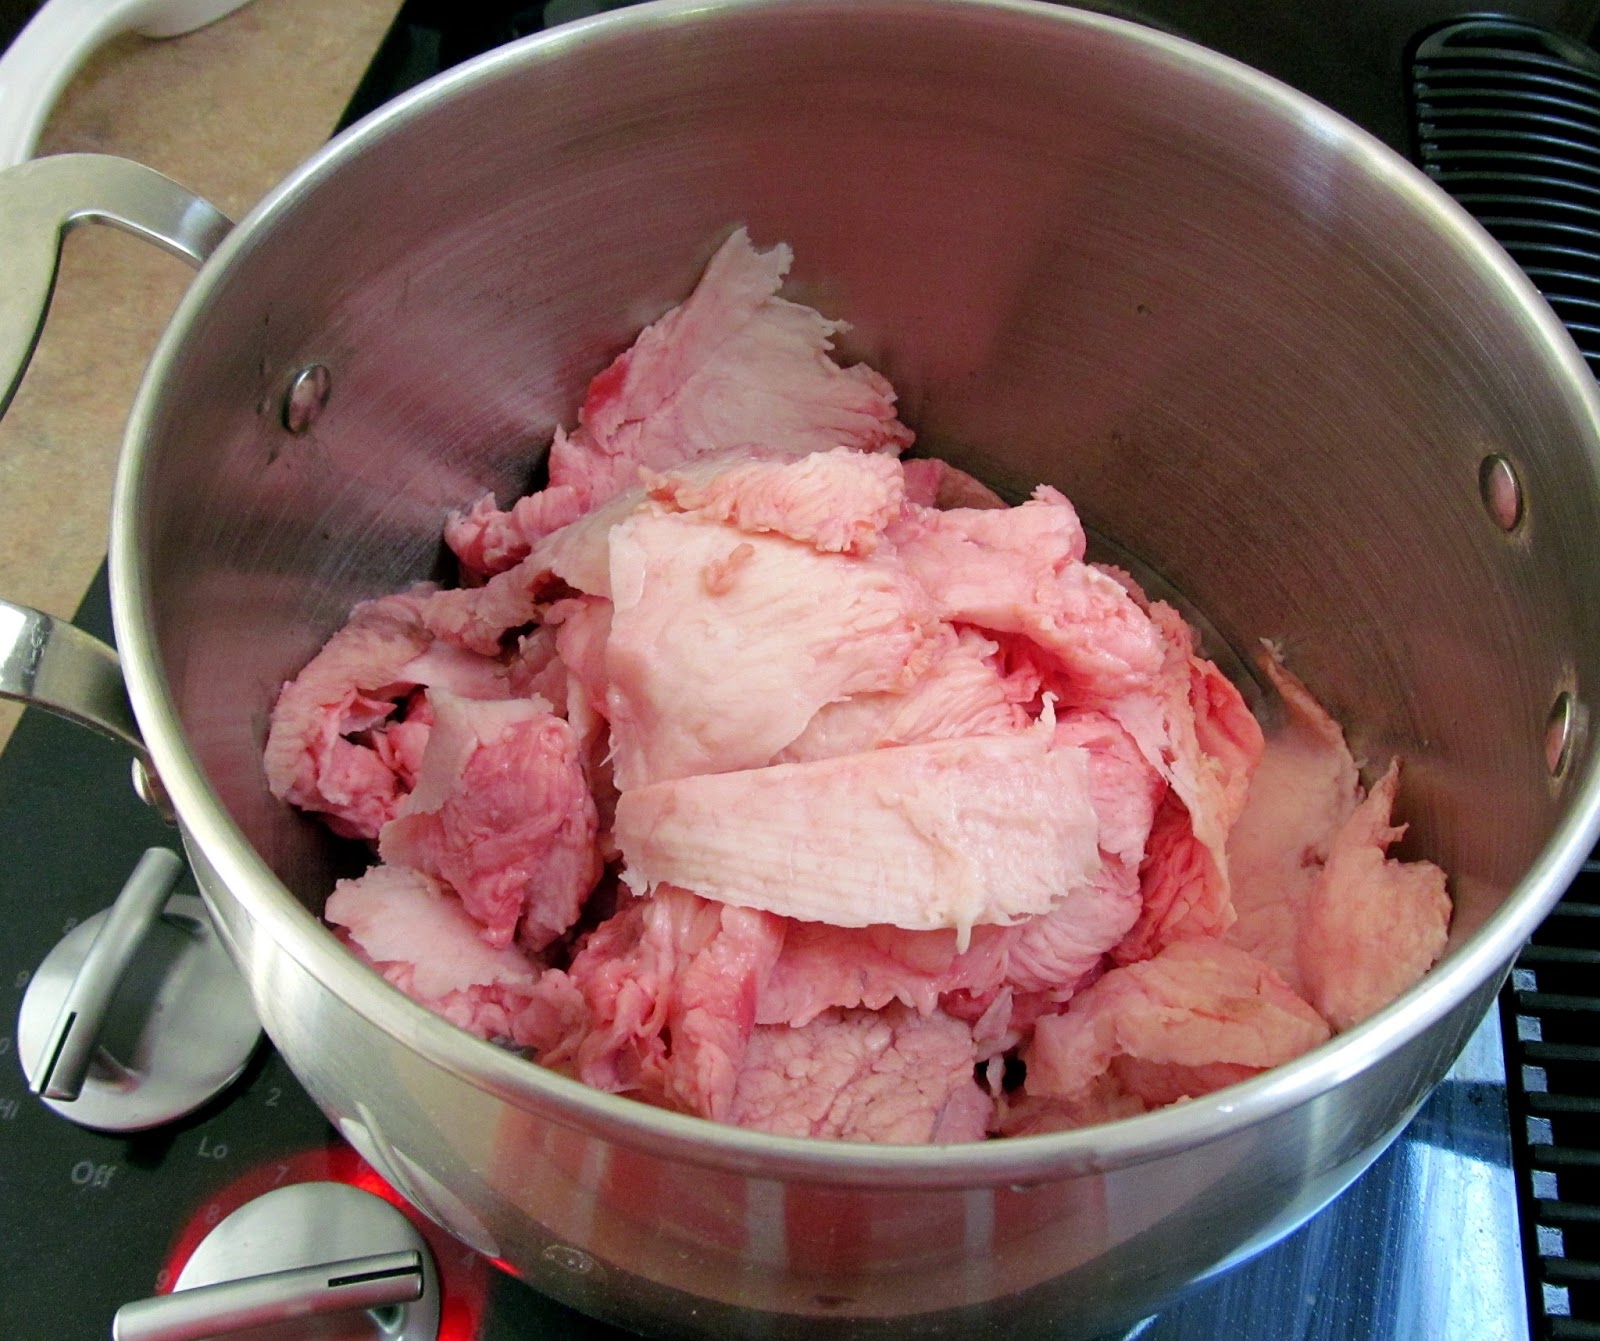
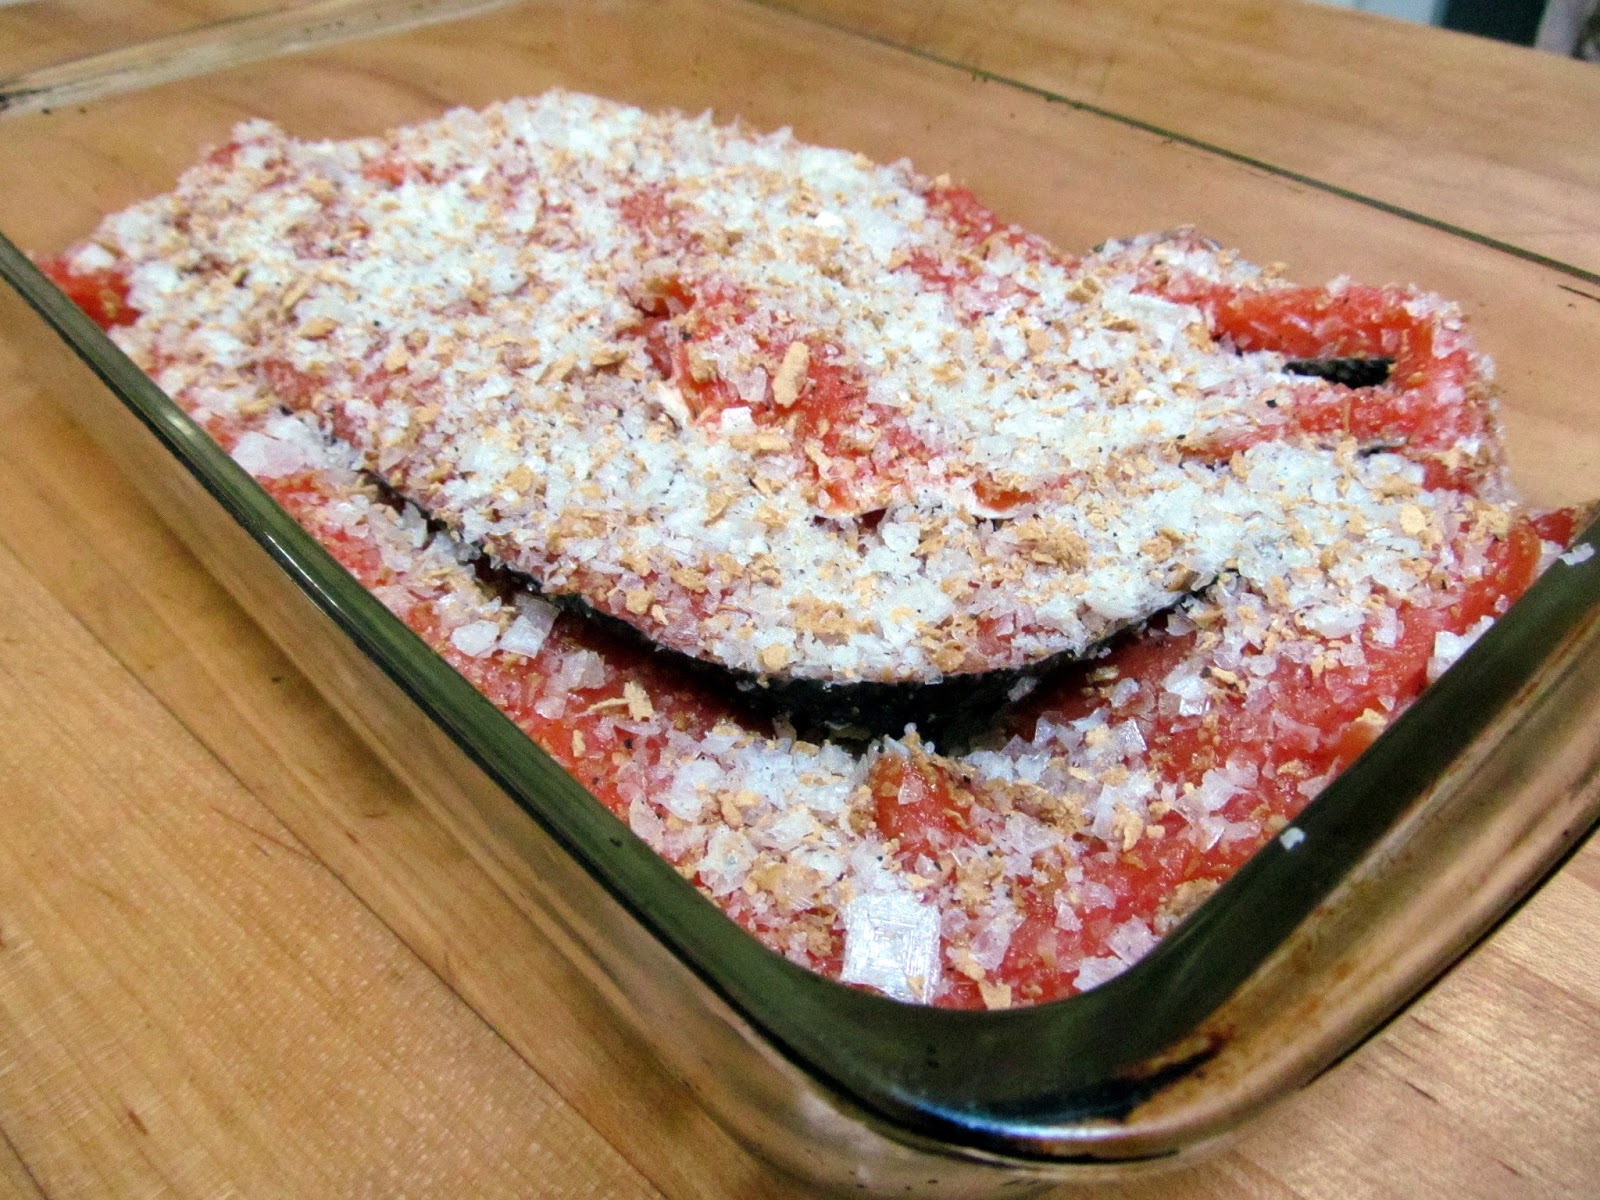
Boiled with some vegetables for a few hours, until the meat falls from the bones.  Meat is removed, broth is kept and simmered down to make a jelly.  Add some extra spice to the meat, and eventually meat and jelly are combined in a loaf tin to make... drum roll please... head cheese.

Best tool for removing the meat - fingers
just make certain it's cool enough first
Leave it in the fridge overnight to set.  Keeps most of a week in the fridge.


If, by some miracle I ever make this again, there will be changes.  First off, never again will I do this in the heat of the summer.  It takes up far too much space in the fridge, and waiting till almost midnight for the kitchen to be cool enough to work in, makes for a grumpy me.

The second change I would make is to change the ratio of meat to jelly.  I would use almost equal parts of both so that the head cheese holds together better.  For this attempt, I used about 80% meat and only 20% jelly.

The third change is to save the excess jelly in small frozen servings so I can add it to pasta water, soups, and just about anything that could do with a boost of flavour and nutrition.  There is a lot of books that claim meat jelly can do wonders for osteoarthritis, so I jump at any excuse to add bone broth or jelly to the diet.


Affordable?  The head was free, in fact, I only used about half the meat on it.  The jowls I froze for winter curing.  Spices, salts, &c. comes in at roughly $3.  The electrical bill on the other hand was up about $20, and we have cheap rates here.  This could easily have made double or triple the amount of headcheese if I had been brave enough to add more jelly.  Since this is so flavourful and a tiny bit of head cheese goes such a long way, I'm going to say yes, it's worth it.  If you have a woodstove, or some other way of cooking then yes, it can be quite affordable.

Healthy?  There is a lot of salt in this, but it is balanced out by not eating much at one time.  On the other hand, there are often great poetical treatise on how good bone jelly is for a person, so I'm going to say, yes, it's healthy in moderation.

I'm also going to add this under the label Transitional.  As in it is a good food skill to cultivate for that time in the future when oil is sparse and we are forced to rely on local resources.  It's a way of using every last part of the animal and what's more, it makes a little bit go a long way.


Friday, February 21, 2014

Homemade pepperoni - my first dried sausage adventure


For the holidays I received this wonderful book called In the Charcuterie by Taylor Boetticher and Toponia Miller.  It's full of beautiful photos and well worth a gander.  Most of the book is about working with fresh meat, how to create beautiful finished dishes like roasts and instruction on how to debone and create different cuts of meat from a carcass.

The section on curing sausages is short but empowering.  The authors give a general recipe on how it's done, including different casing sizes, drying environments and all the necessary and sufficient conditions to be a success.  For example, lamb casings or thin hog casings are more forgiving and don't need as specific an environment to ferment and dry in than great big fat bung casings.  Which means, that if I turn the heat off in my room for two weeks, in the middle of winter, I can cure and dry my own sausages.

I followed the recipe for pepperoni except that I used smaller hog casings and changed the drying time/conditions accordingly.  But this book is friendly towards that kind of change.  Basically they take the attitude that people have been curing sausage like this for a few thousand years, without refrigeration or fancy electrical curing chambers. What's more, they didn't have shops to buy specific fermenting cultures from, instead they used things like a splash of wine in the mix.  This stance is quite different from the usual 'you must do this specifically and buy all this fancy stuff, or everyone dies' approach to curing meat.

Feeling empowered by the book, I gathered together my spices, curing salt, and garlic.  I used 7 lb of old goat, 1 lb of pork and 2 pounds of pork fat.


Mixed it in with the cubes of meat and stuck in the fridge overnight.  


Laundry rack transformed
into sausage hanger
I have this antique meat grinder that I found at a yard sale, so I thought I would give it a try.  It works marvelously well, just like the books say they should.  When I tried my modern grinder that I bought from BigBoxMart (I'm not proud of that), I could see that all the problem's I've had making sausages in the past were not me, it was the tool being completely useless.  This made me giddy with joy to have a meat grinder that works effortlessly, although, it was a bit small and can only process 1 tablespoon at a time - I am going to keep an eye out this year for a much larger one.


After stuffing the sausages, making sure all the air is removed (both of which I need more practice with as I'll show you later), then it's time to hang them to dry.  Ideally the temperature will be between 65 and 70F, and be constant for the two weeks.  I choose 68 degrees because, well it's cold enough thank you.  Each room has a thermostat so it was easy to keep my room a steady temp.  As the humidity was dry that week, I lightly misted the sausages with fresh water a few times a day for the first three days.

I was a bit disappointed because none of the friendly white mould formed on the outside of the sausages.  This mould is suppose to help keep things safe and prevent bad microbes from settling in.  Next time I think I'll pick up a piece of sausage from the local Salumeria and put it in the same room as my hanging sausage, the mould should migrate just fine.

After a week, we started testing them, yummy, but still a bit raw texture in the middle.  Left them another week, and much better.


Look how beautiful and red that meat is.  This tastes amazing!

But wait, not all of them look like that.  Some of them look like this:


Sort of yellow/brown inside.  Not appetizing at all.  Though they smell okay, I'm not happy with them, so they get tossed out.  I don't know why they look like this, but I have suspicions.  Maybe, I didn't get all the air out of the casings - I admit, I did have problems with this - or stuff them full enough.  Or possibly the outside casings dried too quickly leaving the moisture inside to rot the meat instead of fermenting and drying it.  I don't think this second one is what happened because I would expect a bad meat smell, where there is no real change in smell from lovely red insides and ugly brown ones.  Only about a quarter of them turned ugly, so three quarters good, that's great for a first attempt.

What I've learned from ugly brown insides is that I need more practice making cured sausage.  How exciting.  I wonder what flavour to make next.

Cooking with Allergies:  There is a lot of room to adjust for allergies when making your own sausage.  If you have problems with meat and mould, this is probably not the recipe for you.  However, spices, wine and other allergies issues can easily be accommodated.  In the book there is a recipe for your basic cured sausage with specifies the ratios of meat, salt, curing salt and fat.  Page 232 gives you everything you need to know about this, and you can play with your spices and herbs from there.

The recipes in this book do not include commercial starter or filler which can be a source of allergies.  HOWEVER, it does include nitrates (curing salt #2).  Some people are sensitive to this.  There isn't any mention on not using curing salts (nitrates/nitrites).  From the research I've done, omitting nitrates/nitrites from whole muscle cured meats like bacon is possible, just increases the risk of spoilage. However, omitting it from dried sausages is not a good idea for a person with a Western immune system.  If you want to omit the curing salt #2 from your dried and cured sausages, do your research first!  And know that in the West our bodies are no longer trained to handle a strong bacterial load (both good and bad).

Affordable?  Pork cost about $3 a pound, pork fat $1, the goat roughly $4 a pound.  The goat was old and angry, so the meat isn't much good for roasting or much else.  This used all the little scraps of meat that would often go to waste in butchery.  That's about 7 percent of hanging weight that would usually be lost.  So do we count the cost of the goat since it's salvaged material?  I think I will because it makes a fair comparison for later on when I run out of angry goat.

Meat was $33, but it was (mostly) grown on the farm and raised organically.  Spices, garlic, wine, casings, let's round it up to $2.  Take into account that although I started with 10 lbs of sausages, they lose about 30% of their weight so I ended with 7lbs.

$35 for 7 lbs of artisan cured sausage that I know exactly what went into it, is $5 a pound.  I don't think that's bad at all, though I can't remember off the top of my head what the going rate is in the shops, but I wouldn't be surprised to pay between 2 to 4 dollars an oz for artisan sausage.

Then again, I do need to knock off a quarter of the finished amount for my learning mistakes.  So really, this batch was almost $7 a pound.  But I expect to get better at this and have less waste in future.

Healthy?  Yes.  In small amounts.  There are some medical studies kicking about these days that say you should have less than 1 oz of cured meats a day.  I suppose if you are on a fully Western diet full of wonderfully creative preservatives and manufactured salts like MSG, adding cured meats to your diet would increase the stress that salt puts on your body.

However, that said, people have been eating this sort of sausage for several thousand years, and up until the last 120 years or so, the amount of salt used, and nitrate/nitrites used were considerably higher.  This kind of food was a staple in the diet, and the diseases attributed to cured meats only started appearing in the last hundred years.   My interpretation of this is that perhaps cured meats is simply a scape goat for a greater problem in the Western diet.

But even still, the flavour of this is so intense, it makes a better condiment than main dish.  I know everything that went into my sausage, so compared to big factory made peperoni, I feel this is healthier.

Safety?  Since I have no artificial colours or aesthetic ingredients added to the meat, I can tell right away if there is something wrong with the appearance or smell.  Because they are made in small batches, it is easy to do quality control.  Though large scale, factory production of cured meats don't fulfill these conditions, they are usually safe.  But when they go wrong, they go wrong on a big scale.  There has been a few issues with cured meat production in Canada over the last few years, with deaths.  I feel safer doing things at home, however, I arm myself with the knowledge needed to create safe food.

Tuesday, April 30, 2013

Mutton Bacon: that's right, you heard me, I made bacon from a sheep - here's the recipe

I don't know if it can be rightly called bacon in the purest use of the word.  Bacon is made from pork.  But this cured and smoked mutton belly is to me far more tasty than any bacon I've ever consumed.

Even though I've been working with wool for a long time now, it's only recently I started thinking of sheep as a sources of food.  Locally, lamb is a very expensive meat, and very limited. There are lamb legs, lam ribs and lamb chops... and nothing else.  One would imagine there is more to a lamb than two legs and some chops.  Mutton is unheard of here, not even considered fit for pet food.  This is a shame.

Traditionally, sheep have been a major meat source in Europe  the Middle East, and North Africa.  England especially has a long history of wool and mutton.  The more I read about history, the more I want to cook what I read about.  I wanted to experience mutton.  And when I finally did, I found I liked it.  I like it a lot.  When prepared right (and by prepared I don't just refer to how it's cooked, how the animal is butchered and slaughtered have a large effect on taste and tenderness) it is exceptionally tasty.

As I mentioned, I butchered a ram not long ago.  There is a lot of meat on an adult sheep, and many cuts I don't know what to do with.  The belly had layers of meat and fat, and I didn't want it to go to waste.  Why not make bacon from mutton?  So that's what I did.

I used the Basic Dry Cure mix from the book Charcuterie: The Craft of Salting, Smoking, and Curing as a base for my mutton bacon.  It's been reproduced so many other places that I'm feeling okay to post it here as well.  You need to know that this book is a fantastic source of information and a great starting place for curing your own meat.

Basic dry cure

1lb kosher salt
8oz sugar
2oz pink salt (cure #1)

Mixed all together really well, label, and store away from children and foolish people who might eat it accidentally.


Mutton Bacon

For this recipe, I'm assuming you have some basic curing experiences   If not, try making regular bacon first.  If at any point the meat smells rotten, has fuzzy or black mould on it, then toss it out and start again.  if it gets a white mould on it, it's okay, but if the white mould is fuzzy then that's bad.

1 kilo mutton belly
1/4 cup basic dry cure
2 bay leaves (ground)
1 tsp each rosemary, thyme, juniper berries, pepper (dry and ground)
1/4 cup salt (on later reflection, I would leave this out next time)


  • Mix the cure together with the spices and extra salt.  Coat the mutton in the cure, and place in a ziplock bag with any remaining salt-mix.  Keep in fridge for about 7 days, massage the spices into the meat through the plastic daily.  Should feel firm.
  • Rinse the salt off and leave the meat to dry for at least an hour, uncovered in the fridge.
  • At this stage you can hang to dry in a cool place for 1 to 3 weeks, or you can smoke it.  I hot smoked mine with pear wood for 4 hours, then increased the temperature to make certain the internal temp of the meat was 140F or higher.   You can store the smoked meat in the fridge for a few weeks, or freeze it.
  • Which ever you choose, it tastes better for resting a day or two before slicing and frying or using the bacon in recipes.  If it's too salty, then boil the bacon for about 30 seconds before frying.  This is not an eat raw meat.
After the curing and drying, I divided my mutton bacon in three parts.  1 part I hung to dry in my curing chamber, the other two parts I smoked.  After smoking, half went in the freezer for later, and half went in the curing chamber to dry.  


I fried up a bit the day I smoked it and it's exceptionally yummy.  I'm very curious what the dried bacon will be like, as I've never tried this technique before.

The extra 1/4 cup of salt I used in this recipe may be optional.  I just felt more comfortable using more salt because I intended to hang it.  If you are just sticking it in the fridge after smoking, then you may not want to add this extra salt.  but then again, the flavour wasn't anywhere near as salty as I expected, so I leave it up to you.


Update:  Of the three methods I used to make this - hung cured, cured and smoked then hung, and cured and smoked and put directly in the fridge when cool - I liked the third best.  The first method of just cured and hung to dry developed some rather dodgy mold after a few days, so I tossed it.  The one that was smoked, then hung to dry was okay, but I suspect the temperature wasn't even enough during the drying.  If I had better temperature control, I think this would be my favourite method.

Affordable cooking? - can be, especially if you are butchering your own side or whole mutton.  Mutton use to be a very economical meat, but these days it's hard to come by.  This is a cut that is usually discarded, or sold for making lard.  Finding mutton belly, or whatever they call it these days can be very difficult and therefore expensive if you go to the wrong place.

Allergy friendly?  I think so.  You can adjust what spices you use, and it can be made without the Pink Salt (but you need to be more careful with meat safety and it won't have that rosy colour, but it can be done)

Friday, March 29, 2013

Making Pastirma at home - plus recipe

I'm intrigued by stories of food from the Old Country.  Traditional recipes that combine preservation and deliciousness are always up my alley.

A friend of mine from Lebanon was telling me about this cured meat he knew as a youth.  Back in the old country, it was made from goat or mutton, coated with a spicy paste, and dried for ages before enjoying as a breakfast meat of all things.  In North America it's easier to get beef, so when I saw an Eye of Round Roast on sale, I picked it up and set to work.

Pastirma has several different names depending on the region, and different variation on the spice mix.  But what they do all seem to share in common are that the meat is pressed and the spice mix includes fenugreek and garlic.  Legend has it that in past days nomadic tribes would press the meat between the thy and the horse as they road along.  The salt from horse and rider sweat would help cure the meat, then it would be coated in spice and hung from the saddle as they road from place to place - how much of this is true, I don't know (I wasn't there).

Pastirma is also the ancestor of several different cured meats.  You can see how it travels West across Europe   There is Bresaola, and even Pastrami and Corned Beef are very similar to this style.  Interesting how more sedentary cultures use a brine cure, where as more mobile cultures use a dry cure.  If I was still an anthropology student, I would write a paper on this.

The modern method does not require a horse.  After much questioning of my friend and research (both in books online) I found two recipes for pastirma that I liked best: Middle East and Africa Cooking & Baking recipe for Basturma and TheArmenianKitchen.com Homemade Basterma.  I ended up combining Folklore with these two recipes.

I adore how this turned out and can easily see why it is so popular in the middle east.  I just want to gobble it all down, but it's so rich that only a few shaved slices is enough for me.  I can also see why it's so expensive to buy in the shops; it took over 5 weeks to make.  If I had a better set up for curing my meat, I think I could have done a better job, but even with my limited resources  it makes a very friendly start to dry curing meat.  It's also very forgiving about timing, humidity, temperature, &c.... which in my opinion are the best qualities of any long-term, farmhouse, homemade, foodstuff.


You can use any lean cut of red meat: lamb, goat, horse (if you are into that kind of thing), moose, dear, antelope, beef, or well, just about anything.  My understanding is that the better quality the meat, the better the finished product, so for my next go at this recipe I'll be using some goat that was raised on this farm.  Then again, it turned out this good with some commercial feed lot beef, so I can't imagine how good it will be with some real meat!

My Pastrima Experience

About 4lb meat (I used eye of round cut in half lengthwise)  no more than two inches thick.
eye of round
less than 1 cup kosher salt


  • Trim as much fat and silverskin as you can from the meat, slice it in half longwise if it's more than 2 inches thick, and rub the salt into the meat.  Put into a ziplock bag, remove the air from the bag the best you can, and leave in the fridge for 4 to 6 days.  It will be firm to the touch when it's ready.
  • Rinse off and soak in cool water for 1 to 3 hours.  Rinse and dry before moving onto the next step.
  • Wrap the meat in cheesecloth and press.  I used an old crock and some boards and rocks (bleached with H2O2, both before and after).  Press in the fridge for about 2 days.


getting ready to press the meat
meat wrapped in cheese cloth and a board for pressing.

pressing the meat in the fridge

  • Take some kitchen or butcher twine and place in boiling water to sterilize.  A darning needle too.
  • Thread the string through the narrow end of the meat, tie in a loop so you can hang the meat by this.
  • Unwrap the meat, and wrap again in clean cheesecloth. Hang for 10 days for 2 weeks (I hung in the fridge, but anything below about 10 degrees C should be fine if you salted it enough in the first step.


hanging in the fridge
meat after hanging in the fridge
    spices ready to mix
  • Prepare the spice mix.  I used:
1/3 cup Paprika
1/4 cup Fenugreek
1 Tbs Alspice
1 Tbs Black Pepper Corns
1 Tbs Cumin Seeds
1 tsp Cayanne
1 Bud (not clove, the entire bud) of Garlic
1 Tbs salt
about 1/2 to 1 cup cool water

  • I ground any spices that needed grinding, then mixed in the cool water a little at a time to make a thick paste.
  • I unwrapped the meat and carefully coated it with the spice mix.  It smelled amazing!  I was very careful to get every bit of surface area covered, it took a while.
  • at first I hung it near the hearth,
    then I remembered fire makes heat,
    so I moved it to the cupboard
  • Hang to dry somewhere out of the way.  Ideal would be about 60 degrees F, and moderately humid.  Ours was decidedly less humid and warmer (but don't tell the experts, it still turned out amazing).
freshly sauced meat


  • The spices are mega bug repellents so don't worry about that.  But you probably want to avoid somewhere with drastic changes of temperature or too much sunlight.  After the outer coating started to dry, my final hanging place was in the bottom of the pantry, next to the sauerkraut.
  • Hang for 2 weeks.
  • If there is black or fuzzy mould, worry.  Or if it smells rotten, then you worry. Otherwise, so long as you didn't skimp in the salt on the first step, then there shouldn't be any reason to worry.
  • When the time is up, grab a beer, have a party, and enjoy your Pastirma (ps, beer intensifies the spicy flavour, not calms it like with a curry).


Lunch!
If you get that far, you can see why it's traditionally shaved off with a hatchet.  It's very firm and the knife needs to be very sharp and strong to slice into it.

Shave thinly as you intend to eat it.  Don't cut up too much before hand because it won't keep as long.  You can store at room temperature in a pinch, but it will continue to dry out, so best to wrap in some butcher paper and put in the fridge.

I'm very impressed how delicious this is.  I'm going back for seconds now, and I might try putting some in a pasta dish tonight for dinner.

Affordable Cooking: It cost me $15 for the meat, another $3 for the spices and salt (probably less) so that's $18 for 2.5lb.  A brief look at the internet says that it runs about $20 a pound to buy ready made Pastirma (plus shipping), but I haven't found any sellers that will ship to Canada, so I think you would have to find a speciality shop for that.  I think there's one fellow in Vancouver that makes it on a large scale, but you have to be a friend to buy it off him.  So to buy this much Pastirma retail, it would be at least $45 plus shipping.... I'm happy with how little it cost me and (provided I can get the meat for a good price) will make this again.


Cooking with Allergies:  This is pretty good.  You can choose the meat and to some extent modify the spices (just be sure to keep the salt, fenugreek and garlic the same) and it does not contain nitrites/nitrates which can cause a reaction in some people.  However, it does have a high salt content.  It needs it to kill off the evil bacteria, so if you are on a low salt diet, only have one or two slices.  The current recommendation is that you have no more than one ounce of cured meat a day, so it's a good aim to um,. well to aim for.


Saturday, March 23, 2013

Sausage making marathon

 I just spent the last two days learning to make sausages.  Well, I say learning when in fact it's more like floundering.  But we did it.  One small 25lb leg of pork is now sausages.

I'm exhausted.

And elated.

But in the end I learned a lot about meat, equipment, sausage making and myself.  I also learned that no matter how sexual or sensual food is, there is nothing quite so pornographic as stuffing your own sausage. And because I want this to be an all ages friendly blog, I'm not describing that part any further.  *shudders*.

One thing I learned about myself is that I don't enjoy a meaty sausage (stop snickering, I'm serious).  I like there to be a little bit of filler (okay, I'll join you in a snicker) in the sausage, like bread crumbs.  So I experimented with 5lb batches until I got something that I really enjoyed.  I also played around with what order we add the spices, how much liquid, what ingredients that sort of thing.

Being a pork leg, it was rather lean, so I ran out of fat really quickly.  But I had some beef suet in the freezer that I made do.

I also learned that the hand grinder and sausage stuffer I picked up at (brace yourself) Walmart completely sucks!  It is not properly cast, the threading on the ring is a different TPI than the body of the machine.... and well, I wrote rather a scathing review over on their site, so I'm not going to complain too much here.

What I did ending up doing was using my Universal Food Chopper (which according to most people cannot handle raw meat at all, never, ever, ever!

oh, yah, you can see how much trouble it's having.
I said that last bit sarcastically by the way

This is on the coarse setting for the first pass
My favourite way to make sausage was to chop the fat up by hand, fairly fine (1/2 inch pieces) add to the meat (roughly 2" pieces), mix with the spices, herbs and whatnots.  Freeze for half an hour, chop (technically this machine isn't grinding) on coarse  mix in the bread crumbs, freeze another half an hour, chop on fine, and then mix in the wine.  Freeze 30 min and then stuff away.  It's a lot of work, but the end result this way is in my opinion the most tasty.

sausage resting, waiting to be made into links
looks pretty discussing at this stage.

Still getting the hang of stuffing the sausage and making links, but I was pleasantly surprised when I saw this:


They actually look like sausages when you fry them up.  Isn't that nice?

A bit of mustard, a crust of sourdough and some home made sauerkraut and I'm happy as Larry at Lunchtime. 


I'll post my variation on a garlic sausage recipe later, I want to have a few more taste tests to make sure I got it right before I commit anything to the internet.  


Affordable Cooking: Oh yes!  Pork was 98 cent a pound, bread crumbs were made with dried bits crust that would have otherwise gone to the chickens or compost.  Spices (most of which were already in the garden) were next to nothing.  The only real cost would be the 1.5 cups of Plonk (red wine) I used in the garlic sausage.  But if you live outside of Canada or make your own, red wine for cooking is far more affordable.  Casings can be bought at Stuffers and are good quality and affordable.  If you are a home sausage maker like me, go for the discount scrag ends casings.

I'm going to say it cost me $1.25 per pound of finished sausage.  I don't remember how much sausages cost in the shops, but chances are they aren't made to your specific dietary needs and desires.  

Cooking with Allergies:  A major yes for this one.  Sausages are infinitely variable.  you can even go the vegan rout and get artificial casings and fill them with spiced up lentil mush.  

By making my own sausage I can eat sausages for the first time in my life without getting a stomach ache. 

Healthy? Mostly yes since you are choosing your own ingredients and salt content.  Sausages need quite a bit of fat (20 to 40%) to have the right texture, so this may pose a problem for some people.  However, I don't eat many sausages (one a meal is plenty for me) and always match it with something like sauerkraut to aid in digestion. 

With my basic understanding of healthy eating, I would say yes, these sausages are good for you when taken internally and in moderation.

Tuesday, March 5, 2013

How to Render Fat

Until recent years, fat was one of the most sought after and difficult to acquire foods (unless you lived in the Arctic  but that's a story for another day).  Fat isn't just a high source of energy, it can be used to improve the tasted of breads, create the texture that we know and love in pie crusts, flavour stews and cooked grains, as well as preserving foods for long periods of time.  People also made soaps, lotions, and boot polish from it.

When you think about what the Western World use to be like pre-1950s, fat was an important ingredient to life.

Quite often, when engaging in historical cooking pursuits, be it reproducing recipes from the Middle Ages, American Civil War, or even war time cookery, you will find recipes calling for rendered fat.  Here is a real simple way to render beef fat, albeit, it takes a very long time.


HOW TO RENDER ANIMAL FAT


For every pound of raw fat, place half a cup of water in the sauce pan (don't use your best sauce pan for this, it's a real bugger to clean).  Place the pan on low, and lightly simmer with the lid off for many hours.  Don't cook it too high or the fat will scorch and impart an unpleasant taste to whatever you cook with it.  If the fat turns brown or smells scorched, toss the whole batch and do better next time.

When all the fat is melted, strain through a cheese cloth and leave the fat to cool before putting the lid on and storing it someplace cool (like the fridge).

I try to use this within 6 months.  It will eventually go rancid  sometimes after just a few months, sometimes it takes more than a year.  You can smell it when it does, it's very distinctive.


I'm using beef fat that would have normally gone in the trash.  After reading some WWII household manuals, I decided it would be nice to waste less.  So instead of tossing out the fat and buying lard, I decided to render it down and use it to make meat pie crusts later this month.  I don't normally have this much fat in one go, but I figure from now on, I can keep the little bits of raw fat I trim off roasts in a bag in the freezer, then when I have enough, I can render it.

I'm still not very good at trimming the fat off the meat, so there are a lot of bits of beef left over.  Aim to do it better than I did, but if you are as rubbish at trimming raw meat as I am, don't stress over it.

I'm thinking of taking these left over bits of beef, trimming them up and putting them in a curry or possibly doing what my Great Grandmother would have done, toast them in a hot oven till crispy.


In Victorian days, they would have done this on a warm, but not too hot, part of the cook stove, for sometimes several days until the fat has completely rendered out.  The stove is already being heated for other purposes, so it's not taking up a dedicated burner like me.  I did mine on the electric stove, which wasn't the most economical method.  I suspect a slow cooker would have been better, so I'll try that next time.


Thursday, February 28, 2013

Making Hot Smoked semi-candied Salmon at home: First attempt.

Having no recipe to guide me, working only from my own experience and fables of how they make that amazing smoked salmon in the northern part of Vancouver Island (Hardy Boys is one example you may have heard of), I decided to dive in and make smoked salmon.

My smoker, a mister to calm the fire, and home made maple syrup to brush on top


The first job was to cut up the salmon into long strips.


Then I made a mixture of salt, maple sugar, and black pepper.  I dredged each piece of salmon in the mix and cured it for about 20 hours.

Before
after curing
At this stage the salmon feels very firm.  All that moisture came from the fish.

I should have rinsed the salmon at this point, but I forgot.  Because of this, it turned out to be excessively salty.

I dried the salmon using paper towel, and left it on a rack, uncovered, in the fridge for about 2 hours to dry extra well.  From what I have read, this stage is super-important if you want the smoke flavour to stick.


This is a charcoal BBQ/smoker so I started it up about half an hour before I was ready to get smoking.  The fire is in a separate box attached to the side of the grill.  You build up a fire with charcoal and then you put the chips (in a tinfoil bag with holes in it) or blocks of wood on the fire to make some smoke.

The problem I encountered with this is that it got too hot too soon.  The fish actually cooked instead of slowly gathering smoke.  But not a complete loss.  Each time I use this smoker, I learn something new.


In the end, I only smoked it for about 2 hours.  Next time I think I'll smoke it for at least 4, maybe 8 hours.

But it looks good, and if you can get past the over-salty-ness of the whole thing, it actually has a lot of potential.


I wonder if I should add the label 'kitchen failure' to this post or not.  I mean, we ate the fish, and I learned a heck of a lot about smoking salmon.  But to be completely honest with you, it wasn't exactly the best smoked salmon in the world.  In fact, I would be ashamed to serve this to someone, even a friend.

But then again, I tried something new, without a recipe, and had fun making it.  I discovered new information about my smoker that I never realized before.  And about fish, and about curing in general.

Eventually, I'll get it right and post the final recipe here.

Wednesday, February 27, 2013

A special meal for a special day

I'm not big on holidays, unless they create a good excuse to cook up something special.  Today\s not an official holiday, but it is a special day for me.

I even made myself a present:


Okay, so it's not the most visually appealing meal in the world, but it sure is yummy!  I could have, and probably should have added some greens.

Duck Confit, apples stewed with rosemary in cider, and a quick and simple fettuccine with ham.  Of course a pint of cider goes really nice with the duck and the pasta.


It was extra delicious and a perfect treat for myself.

Tuesday, February 19, 2013

The Quest for Bacon - Making Bacon at Home, Charcuterie Style.

My first attempt at making bacon at home turned out rather tasty.  It may not be the perfect rasher, but it is most certainly bacon.

Mmmmm, bacon.


I used the recipe from Charcuterie by Ruhlman and Polcyn for basic bacon.  I tried three different flavours, regular, pepper and maple.

You mix up a basic curing salt (sugar, salt, and pink salt) and coat the pork belly with the mix.  If you want a flavoured bacon, it's a good time to add the pepper or maple sugar.  Put the meat in a ziplock bag and keep it in the fridge for about a week.  Massage the juices that come out of the meat around the outside of the meat every day.  And that is how you cure the bacon.


cured bacon, read for smoking

Next you rinse it off, and if possible dry it for a few hours uncovered in the fridge.  Then pop it in the smoker.


I really wanted to use this smoker, an electric one that takes hardly any wood chips to make the smoke, but it's not working at the moment.  so, I got out the old BBQ smoker.


After about 3 hours, I still couldn't get the internal temp of the bacon to what the book said.  So I finished it off in the oven.


On the whole, I'm impressed with the fact that I made bacon.  It' tastes, um bacony.  It's over smoked and I cured it too long, so a bit salty.  But it is enough of a success to try again and soon.  

Price wise, it's a bit less than the normal bacon I buy from the speciality butcher, but more than commercial bacon (which I never buy).  The problem is I didn't get the pork belly on sale or at the right time of year.  So that's something I need to work on.  

The thing I like best about this is that I know exactly what went into making it.  Now, when the world comes to an end with the zombies or whatnots, I know I can survive, because I can make my own bacon.

I'm not going to write the recipe I used here because I followed almost to a T what's written in Charcuterie by Ruhlman and Polcyn .  But I plan to make more, and play around with some other recipes.  When I come up with one that's truly mine, then I'll be sure to share it with you.