Showing posts with label Traditional. Show all posts

Saturday, December 25, 2021

Ginger TARDIS - Happy Holidays!


 I've been playing with youtube lately, learning the ins and outs.  It's a lot of fun and making videos is a lot like learning any craft - it takes a lot of practice.  

So does making good gingerbread sculptures, apparently.  I need a lot more practice.

Here is a great website that reviews many gingerbread building recipes.  I picked one and, as usual, made a few changes.  And then a few more changes, and then the spices were all off, so I changed that too.  Lucky for me I went shopping the day before the deluge and what followed on the Left Coast.  

This is by no means the "right" way to do it, but as you can see, it sort of worked.

Happy Holidays everyone!


**Gingerbread (my wonky recipe)**

1/2 cup firmly packed brown sugar

1/2 cup lard

1 cup molasses

4 cups all-purpose flour

2 tablespoons ground ginger

1 tablespoon ground cinnamon

1/2 teaspoon salt

a few drops of warm water if needed


1.  preheat oven 350F

2. Put sugar, lard, and molasses in a pot on medium.  Stir until melted and blended.

3. Mix remaining dry ingredients (not the water) in a large bowl

4. Pour wet stuff into dry stuff and stir really really really well until your wrist feels like falling off.

5. If still crumbly, add a few drops of warm water and keep on stirring.

6. Roll out 1/4" thick (or desired thickness) and cut into shape.

7. Bake on trays for 10-15 min (12 was the perfect time for mine)

8. Take trays out of the oven.  Let gingerbread cool and harden completely before moving.  

9. Assemble in your favourite way (I use Royal Icing - see below)


**Royal Icing**

3 egg whites

3/4 teaspoon cream of tartar

1 pound icing sugar


1. Put in a bowl and with an electric mixer (if you don't mind your wrist falling off you *can* do this by hand), beat slowly at first.

2. Once everything is mixed together, beat on high for 8-12 min.  You cannot overbeat - I've tried.  If you need the icing to be structural, beat as long as possible.  If not, then 8 min is enough.  You want the peaks to hold up when you lift the beater out of the icing.

3. Add colour if needed - I apparently suck at this and can give you no useful advice on the right way to add colour.  A whole bottle of food dye and I can only get baby blue.  Maybe next year I'll figure it out.

4. Put the icing into a plastic bag or piping bag.  I keep mine in a plastic bag and only cut the tip just before using it.  To store, keep at room temperature.  Use within a few days.

Sunday, January 24, 2016

My first Falafel - success!

Inspired by this recipe, I decided to try making my own falafels.


I made a few changes, as usual.  On the whole, a resounding success.


1 cup of dry chickpeas
1 cup fava beans (lightly crushed and skins winnowed)


  • Soak at least 24 hours with several changes of water.


1 leek
1 small onion
3 cloves garlic
2 teaspoons salt
2 Tbs flour
1 tsp cayenne pepper
pinch cardamom

Toasted whole then ground spices
3 pepper corns
2 tsp cumin
1 tsp coriander


  • Drain the beans, mash them up with all the other ingredients
  • form into falafel shapes (which happens to be the same shape as a large spoon) and deep fry medium heat


Affordable?  Yep.  I can buy three falafels for a dollar in the shop, or I can make this huge pile of falafels for the same amount.

Friday, January 1, 2016

New Years Day 2016, No-Soy Miso Club

The second annual meeting of The Victoria Miso Club went wonderfully well.


We began by opening last years Chickpea mugi (barley) miso.  It had an intense rich smell, and a robust miso taste.  The colour was much darker than I expected and we failed to get all the air pockets out, so there were a few spots of mold inside.  But otherwise a success.

This year is two batches of red miso.  We used the same recipe for both, only the beans were different.  For both, we used frozen koji rice from the local Japanese food store.

Adzuki Bean 1 year miso


  • 1 kilo dry adzuki beans
  • 500g koji rice
  • 200g sea salt (no iodine)

Chickpea 1 year miso


  • 1 kilo dry chickpeas (organic)
  • 500g koji rice
  • 200g sea salt (no iodine)


Method

  1. Examine beans and remove anything not a bean.  Wash.  Soak the beans overnight.  Rinse beans well.  Cook the beans in water until mushy.  The chickpeas I did in the pressure cooker in two batches, the adzuki on the stove in one big batch with just enough water to cover (add more water as needed).  The adzuki beans were ready about 2 hours before the chickpeas.
  2. Strain the beans - keep the cooking liquid - and mash the beans as much as you like.  We like chunky miso, so we just had a go with the back of the spoon.  You can make a smooth paste if you like.
  3. Combine some (about a cup) of the hot cooking liquid with the salt to dissolve the salt.  Mix this in with the koji rice when liquid is cool enough to put your hand in.
  4. Cool the beans so that they are cool enough to put your (clean) hand comfortably in.  Combine the beans, koji rice, salt, and enough water to make a paste.  If you remember (which we didn't) add a spoonful of last years miso,
  5. Put in vat, weigh down top, put in cold spot for 1 year.

As with last year, we relied heavily on Sandor Katz books, Wild Fermentation and The Art of Fermentation, for our miso recipe.  For a more in depth instruction on how to make miso, please see Katz. 

This year we are using plastic buckets to see how they work.


Affordable cooking:

Chickpeas were $7 this year, the rice about $6, and the salt, less than $1.  Let's say $14 for the gallon of miso.

Adzuki beans were about $4, the rice again $6, the salt less than $1.  About $11 for the gallon of adzuki bean miso.

To buy this miso in the store, it's about $16 a pound.  We made about 7 times that - to buy this much miso in the store would be around $100 - times two.

At a conservative estimate
Chickpea miso $100 - $14 = savings of $86
Adzuki miso $100 - $11 = savings of $89

That's not too shabby, especially when you consider we shared the expensive $25 between all the miso club members.  

Anyone who says you can't eat healthy on a budget hasn't made miso.


Wednesday, August 5, 2015

An excellent sweet 'mango' chutney - sans mangos

No photos today, just a quick recipe before I forget how to make this amazing condiment.

A couple of weeks ago, a branch from an apple tree broke because the apples on it were too heavy.  Unfortunately, the apples weren't ripe yet.  Then I remembered about this Victorian recipe I read for mango chutney, only it didn't have a single mango in it.  Instead, it had unripe apples.  Perfect!

Based loosely on recipe 392 of Mrs Beeton's Book of Household Management, I had to make a few changes.  I have a tender place in my heart for anyone who applies garlic by the quarter pound, I must admit that some of the other ingredient quantities were a bit unusual to the modern taste.  So changes were made to method and quantities but without Mrs B's little book, I wouldn't have thought to make such a scrummy chutney.

Here's a little note that Mrs Beeton gives regarding her version of the recipe:

This recipe was given by a native to an English Lady, who had long been a resident in India, and who, since her return to her native country, has become quite celebrated amongst her friends for the excellence of this Eastern relish.

Sweet "Mango" Chutney

All ingredients are approximate

3 large onions
drizzle olive oil
2 Tbs mustard seed
1 Tbs powdered ginger
4 dry chilies lightly crushed (seeds included)
a large handful of garlic
At least 6 unripe apples, peeled, cored and cut into chunks less than 1 inch cubed.
1 cup raisins
2 cups apple cider vinegar or equivalent
1 to 2 cups of sugar
boiling water
2 Tbs salt


  • Chop the onions into about 1/2 inch chunks, in a large heavy bottom pot, fry onions on medium-low with olive oil until transparent
  • add mustard seed, ginger, chili and garlic to the onions, stir well, cook about one min
  • add apples, raisons and vinegar to the onion mix, bring to boil and then turn off heat
  • Mix 1 cup of sugar with 1 cup of boiling water to make a syrup.  Mix until sugar is dissolved
  • Add syrup and salt to the apples.  Mix well and bring back to a boil.  Taste and add more sugar as necessary.  Boil on high for about 5 to 15 min or until enough liquid has evaporated.  Mixture will thicken as it cools.
  • Place into washed (and if you like, sterilized) jars, seal with lid as per normal.  Because of the spices, salt and sugar, I didn't heat process these jars.  Mrs B never did, she just tightly wrapped the mouth of the jars with sheep bladders.  But as sheep bladders are hard to come by these days, so it's up to you to know how to safely can your food.  If you have any doubt, keep it in the fridge.

Affordable: Apples would have gone to waste as they fell off the tree far too early to ripen on their own.  Onions are from the garden.  That leaves the spices, raisins and sugar - so... totally guessing, let's pretend it's about $2 for this.  It made 6 and a half 8 oz jars full, which makes it 30 cents per jar.  This tastes almost identical to an English apple chutney I bought from the store once upon a time, which cost $8 for the same size.  That's a savings of $7.70 cents.  NICE!

To make it Vegan Friendly, you need to replace the sugar with a vegan friendly sweetener, and to be careful not to harm any worms that are probably living in your apples, thus causing them to fall before they were fully ripe.  


Sunday, January 4, 2015

New Years Day, No-Soy Miso Club

The inaugural meeting of The Victoria New Years Day Miso Club didn't go exactly as expected, but it was a great deal of fun.


Two types of Soy Free Miso were made:

One gallon batch of One Year Chickpea Mugi Miso

  • 1 kilo dry chickpeas cooked with kombu
  • 500g Mugi (barley) koji cultured with spores from GEM cultures
  • 200g Salt
  • 1 Tbs South River Chickpea Miso
Stored in a cool place, my garage, protected from temperature extremes.  To be opened Jan 1st 2016.


Mashing chickpeas


About 1.5 ltrs, 2 month Lentil Mugi Miso
Stored in my pantry at room temperature.  To be opened last week of February.

For both misos, I used the instructions in The Art of Fermentation by Katz.
.

I'm a bit nervous about these, not just because it's my first time making a year long miso.  But because the koji grew on the barley with surprisingly enthusiasm.  Instead of stopping when the barley was white, I let it grow olive in colour, which means the koji mold was getting ready to produce spores.  Some people seem to think it should be great when used, others seem to believe it will impart an unpleasant flavour to the miso.  We shall see.

The other thing I did differently was to line the miso vat with a huge, food safe plastic bag.  Now I strongly dislike using plastic with my food, but this time I decided to try it because I was curious to learn if it actually makes the miso better.  We put the miso in the plastic lined vat as per usual, then press it down well to remove any extra air, then tie the bag tightly before weighing it down.  Like they do in this video.


The other reason I did this is because I don't know if there is any lead in the glaze of the crock I'm using, and I didn't feel comfortable having the food touch it for a whole year.


On re-watching the video, I realized I also made my miso a wetter than they did.  Hmm,  I'll make dryer miso next time.


Affordable (a very rough estimate):

Chickpea Mugi Miso
$7 for the chickpeas
$3 for the barley koji
$1 for salt, kombu, &c.
Total $11 for one gallon

Lentil Mugi Miso
$1.25 for the lentils 
$1 for the barley koji
$0.75 for the salt, &c.
Total: $4 for about one quarter gallon

Of course, it doesn't need to be this expensive, there are more affordable sources of beans and barley.  Mine was this much because I bought many of my ingredients locally, or when imported, from small, family run grocery stores.  

Traditional and Transitional, these two go hand in hand.  Both rely on locally sourced materials and skills you can practice in your own home.

As for allergies, these recipes are flexible.  You can use any bean you like, almost any grain you like, and there is even miso made without beans, and miso made without rice.  Most of the recipes are in The Book of Miso.

Wednesday, December 31, 2014

Getting ready for Miso Club

The first rule of Miso Club, we talk about Miso
The second rule of Miso Club, we love making miso

Tomorrow will be the inaugural meeting of Miso Club.  I've invited a very good friend over for what I hope will be the start of a long and happy ritual, New Years Day Miso Club.  The idea is that since red miso takes about one year to make, or longer, then we would get together every New Years day and make miso, then when finished, dig out the miso we made the year before and enjoy it.

Also, winter is the best time to make red miso.  Sweet miso like I've made before can be any time of year, but red miso, that's made in winter.

To prepare for miso making, I've been making koji barley.  This is barley grain that has been blessed with koji mold.  Yes, mold.  Mold is awesome.  What it does is it transforms the starches in the grain into sugars which can then be fermented into miso paste.

It takes three days to make the koji barley.

Day one, soak and steam the barley, then incubate it at about 90F for about 24 hours.

barley getting ready to steam

steamed barley is like a giant rubbery lump
and must be separated out before adding koji spores

wrapping up the barley to keep it warm while the mold grows


What I learned is that after 12 hours, the koji grain begins to produce it's own heat and the challenge quickly changes from keeping it warm to keeping it cool enough without getting too cold.  Thankfully koji is a loving teacher and can survive well outside the 'ideal' range.

Day two of koji growing, mixing the grain up every couple of hours, separating any clumps that form, then spreading the grain to abut 1 inch thick (the instructions said two inches, but this was far too hot) then wrapping it up again.


day two, spreading the barley out into an even layer


I should have stopped at the end of day two when the grains were mostly white with mold and a few yellow patches.  But I kept going because the instructions said to.  The morning to day three, all the grains were yellow and starting to spore - which is okay apparently, but not as sweet smelling as day two.  Next time, I'l stop when the grain says to, not when the instructions tell me.

Now I lay the grain out in a thin layer to dry and cool a bit before storing in the fridge.

The barley I'm working with is pot barley, the koji spores came from GEM cultures in the US.  I have tos ay, the koji spores worked like a charm,  I followed the recipe included with the spores.


The next step in preparing for tomorrows miso making is to soak the beans we will cook up tomorrow. Instead of soy beans, we will use chickpeas, sweet delicious chickpeas.  I toyed with the idea of making a lentil miso with local red lentils, but after this week's kitchen failure, I decided to use a bean I know and trust.


Some books about making your own miso at home
The Book of Miso by Shurtleff and Aoyagi
Wild Fermentation by Katz
The Art of Fermentation by Katz
The Miso Book by Belleme


Affordable:
2 gallons of miso will cost me
$14 for the chickpeas
$6 for the barley and koji spores
$2 for the salt
unknown for the electric bill, let's guess $3

Total of about $25 for two gallons of artisan made red chickpea barley miso.  This is totally awesome since the same miso sells for $36 for roughly 1/8th of a gallon in the stores (if I did my math right, that's $576 if I were to buy 2 gallons in the shop).

Next year it is my great hope to grow some if not all of the ingredients for New Year Miso Club, or at the very least, source as many ingredients locally as possible.  Maybe even some local sea salt.

Transitional and Traditional - funny how these two go hand in hand - miso can be made from locally sourced materials, excepting possibly the koji spores.  The Art of Fermentation by Katz has instructions on how to capture your own wild koji and to create koji starter when you already have koji growing.

Soy-Sub:  I'm making a soy free version of red miso.  Any bean can be substituted for some or all of the soy in miso making.  By making miso at home you can have complete control of every single ingredient


Monday, December 29, 2014

Kitchen Failure - where I demonstrate what not to do when making miso paste

I hate to admit this, but sometimes I try something and it is a total disaster.  I suppose it's one of the side effects of being human, but alas, I wish it wasn't.

I also wish I was the kind of person who would quietly hide my failings somewhere dark and dank, where no one would think to look.  Bury failure under a damp pile of leaves, with only worms to whisper its nasty story too.  Maybe, if ignored, the horrible result would decompose into the soil, bettering the dirt so that new, and more successful things could thrive.

However, that's not what I want for this blog.  The goal here is to write about my culinary journey and share it with my four (or is that five now?) readers what I've learned.  Maybe some of it would be useful to someone some day.


This Kitchen Failure is especially embarrassing because I've recently been crowing about how easy and foolproof it is to make miso paste at home.

And it is easy to make miso at home, unless...

...unless you branch out and try some terribly outlandish thing and then it's a gamble.

Growing confidence with how incredibly yummy my standard chickpea miso recipe is getting, I decided to try a 'let's toss all this old stuff from the back of my cupboard miso' recipe.  I went directly against expert advice, but I had to do it.  I had to know if it would work or not.

It's not.


What did I do and what went wrong.


I used 1 pound of each adzuki and black beans (dried). Soaked and cooked them together.  MISTAKE: they cook at different rates, I should have treated them separately then mixed together when cool.  All of the adzuki beans were cooked to mush and some of the black beans were slightly raw inside.

To this I added 1/2 lb of pearly barley (dry weight), soaked and boiled until soft.  MISTAKE: using grain that hasn't been inoculated with koji spores.

The Koji rice and salt were as per usual.  MISTAKE: I didn't add extra salt to account for the additional volume of the barley.

Covered the miso with soaked kombu rather than plastic wrap.  Although this is different than my normal procedure, I don't think we can blame the kombu for this failure because some of the extra batch I fermented in a different jar also turned putrid. Besides, kombu was the pre-industrial clingfilm of Japan.

Fermented for three weeks.  Mistake: in small letters because I really should have waited for four weeks given how cold the house has been.

The results.


When I uncovered the miso a sour rotten smell like sour beer and compost assaulted me.  Miso should be sweet and salty, not sour and certainly not smelling of rotten barley.

Yep, rotten barley.  As in the pearl barley I added without inoculating it with koji first.  I'm feeling this is the main source of my failure, over confidence and ignoring a thousand generations worth of knowledge.  There is a step I could have taken to get the koji growing on the barley - without having to buy koji mold spores - but I was eager to get things done and didn't want to wait an extra day.

What did I learn?


I relearned that grain needs to be altered before fermenting, like malting or using koji, or even soaking in a sourdough sponge.  Without this alteration, the sugars in the grain aren't available and things go sour fast.

I learned that I really should try smaller batches when experimenting with outlandish miso mixes.

I also know that even though I'm down in the dumps about my current failure, I still plan on making miso this New Years.    In fact I'm very excited about it.


Thursday, December 4, 2014

Travel Mug

Where I talk about coffee to go and the alternatives to plastic travel mugs.


As I read about Plastic, the dangers and how to avoid it in one's life, I see people writing about the alternatives: Stainless steel and glass.

To me stainless steel, though wonderful for cooking, is not the most ecologically friendly alternative.  It lasts a good long time, hard to break, makes excellent cooking pots... however, it has it's draw backs.  Food tastes weird when stored in it, it takes a lot of energy to produce/recycle, and it originally draws from an nonrenewable resources.  Even if we recycle every last scrap of stainless steal, from thumbtack to tractor, there are still is a limited amount of it on the planet, and each time we recycle a pot or a pin, a little bit of the metal would have been lost in the wear and tear.  On top of that, if you use a metal implement in a stainless steal cooking pot, it scratches the surface and removes the virtually non-stick quality a new stainless steel pot has.

More importantly, stainless steel is aesthetically non-pleasing.  Sure, a stainless steel bowl will bounce not break when tossed aside by an angry child, but it is missing that certain something that encourages an arthritic hand to carefully comfort a mug of hot broth to both warm the hands, and sooth the soul.

I have a few stainless steel travel mugs that have been given to me over the years.  Plastic top, but otherwise lovely.  They keep the coffee molten hot for literally hours.  The vacuum insulation makes it so that I can put my piping hot cuppa in the mug in the morning, and it will be almost cool enough to drink that evening.  None of that pesky heat transfer to warm my frozen digits, or that earthy texture that I associate with coffee.

Stainless steel has it's uses, 'though I adore it most for cooking pots and tiffins, not travel mugs.


Glass is the other material the plastic-free communities crow about with great gusto.  They call it less energy intensive alternative to stainless steel.  Which it may be.  Glass has been around for a few thousand years or so, and can be stunning when made by artizan hands.  That's seldom done anymore, but when it is - amazing.

The biggest disadvantage with glass is it breaks.  More than that it shatters into dangerous splinters, or it can unless special (do I hear energy intensive) processes are applied to the manufacturing process.  This takes the art of making glass and transforms it into an industrial science.  But don't get me wrong, I wouldn't be without it!

I adore glass, be it mason jars or milk jugs.  Glass makes the best storage sense and (except for special no-break glass that my local recycling centre won't touch) can be infinitely recycled.

But for a travel mug?  There's the breakable issue, which is fine.  Everything breaks eventually.  Glass travel mugs last a darn sight longer than plastic ones.  Besides, beautiful glass cozies made of cork or knitting gladden the eyes.

The biggest problem with glass is that it transfers the heat too quickly.  Pour the coffee into the glass cup, put my coat on, the travel cup is already too hot to hold comfortably.  By the time I can hold it again, the contents are cold!  There is no inbetween period where I can nurse my brew, cradle it in my hands....


Thankfully there is another plastic free alternative.  One that...

a) is from natural materials
b)  is from local materials (just about anywhere in the world)
c) is traditional
d) is renewable (and to a small degree recyclable)
and
e) is at it's best when created by artisans!

This plastic free material is called clay!  I'm talking pottery.

Right now I am in love with pottery beyond all shadow of a doubt.  If pottery was a bloke, and had enough money to scrounge together a small gold ring and some land, I would jump the broom with it (that's old fashioned talk for marry it).  As it is, a lifelong common law partnership with pottery is not unlikely.

Pottery, ceramics, clay, earthenware, what have you.  It's all just heated mud and mud can be found almost anywhere.  Pottery has this extreme comforting quality that glass and metal can't imagine.  And that's what I love most about it.

A potter chooses which mud to use, shapes it to their will or whim, drys it, bakes it, lavishes lovely colours upon it, bakes it again... amazing!

Sure, pottery also has the potential to break when wielded by angry children, but it doesn't shatter into dangerous shards like glass can.  When the pottery finally looses it's battle with gravity, it has nearly a hundred uses on the farm for growing food.  It can sometimes be recycled into some other kinds of future clay.  It's amazing.

Like glass and metal, cooking with pottery is easy when you know how.  It's actually quite nurturing and is my go to pot for comfort food.

When it comes to travel mugs, I think this it makes the most beautiful alternative.


This mug is created by Ann Coleman at Yunomi Studio, an artizan with great skill and infinite patients for the clay curious individuals who flock to her studio (aka, she doesn't get annoyed when I constantly pester her with questions).

The coffee is poured into the centre hole which is then plugged with a plastic-free stopper (a cork).  You then drink the coffee through the vampire-bite holes on either side.  It comes out just the right speed, thanks to the holes on the opposite side stops a vacuum from forming inside the mug which prevents the coffee from coming out at a consistent rate (like my stainless steel mugs).  Cleaning is a bit tricky, but a quick rinse after each use keeps it happy.  A bottle brush can be employed for more stubborn mess.

I tried to get Ann to write a few words about what inspired her to create such gorgeous functionality, but all she said was "I don't like drinking from plastic".

The beauty of this mug goes far beyond it's function and elegant appearance.  It's in the texture, the balance and heft of it when filled with liquid, What's more, it keeps the coffee warm for just the right amount of  time, the heat slowly oozing out into the clay and to the hands that embrace it.


Clay makes the perfect Transition material because it is everywhere.  In an over simplified point of view, all you need is mud, fire and the will to transform the world.


Saturday, November 29, 2014

A Fermented Holiday Season starts now

It's that time of year again, time to start thinking about Holiday presents.  This year I've decided that all the adults are getting homemade gifts, mostly food.

It all started with the most recent batch of chickpea miso - best batch so far! - and I thought, this is the type of miso I would be proud to serve my friends (as opposed to my learning batches of miso which were a little bit...um... taste like practice).  If the miso tastes this good, I wonder what other yummy treats I can make.

So here's a list (because these particular friends don't read this blog) of some of the delicious fermented foods I hope to have ready in time for Christmas.

Sweet Miso takes about one month to ferment, but it can be as fast as 3 weeks if I increase the ratio of koji rice to other ingredients.  I have one batch of Chunky Chickpea Miso ready, and plan to put up a batch of Black Turtle and Adzuke Bean with Barley Miso later today.


Kimchi!  Kimchi is awesome in so many ways.  For starters, it is by far the best way to clean out the crisper drawer in the fridge.  You can put (almost) anything in kimchi.  In this case, I used half a daikon, two su choi cabbages, chilis, excessive amounts of ginger sliced thin, Cauliflower, carrots, and anything else vegi related that needed eating up.  Kimchi takes about one week to ferment.


Cultured Butter is easy to make in advance and keeps for ages.  I'll probably start making this a week or two before the Holiday dinner.  Takes one day to culture the cream and the next day to churn it = two days.


With the leftover buttermilk from churning butter, I will bake some bread.  Sourdough Bread loves buttermilk.  With the added dairy sugars the bread will often rise to be lofty and soft, as opposed to the more dense country loaf I make for every-day purposes.  Takes two days to make a great loaf of sourdough, but can be done in one.

Speaking about dairy. my dream is to eventually make my own hard cheese.  Wouldn't it be lovely to give the gift of Cheese?  Even a soft farmhouse style cheese mixed with dry herbs dressed in a beautiful jar or clay pot would be a good addition to a gift basket.  Soft cheese takes a couple of hours, a hard cheese on the other hand can take years.


Of course, you could always spice up your relationship with some hot sauce.  Fermented hot sauce takes about one week, or this one which is ready in two days.


Last but not least, my personal all time holiday favourite:


Cranberry Mead!

The biggest advantages of fermented vs the baked gift, are that fermented gifts last longer, are generally more affordable to make and are a refreshing change from over-indulgence.  They are also an excellent way to use up the last of the harvest.

Thursday, November 27, 2014

Going plastic free - or very nearly. A beginning

The goal: to reduce my use of plastic in my life, with a focus on the kitchen and food related plastic.

Why?  I've had a lot of failed attempts at writing why; it all tumbles into long rants about the world going to shit and how we each need to do our part.  My part begins here.

Inspiration:  Began with a book I accidently borrowed from the library called Plastic Free by Beth Terry (a book that the library had kindly coated in plastic to preserve it from the excessive use they anticipated it would get - libraries are funny like that, and apparently not the only ones to plasticize the plastic free book).


Generally, I'm interested in reducing any negative environmental impact I create and moving towards plastic free would be a huge step in this direction.

Another source of inspiration came from digging in the garden last spring.  I noticed when digging that there were hundreds of plastic fruit stickers in my soil.  These are the stickers that grocery stores put on their fruit to make life easier for the till workers.  Always before, these stickers use to disappear into the soil after a few months, but here I was digging in a section of the garden where no new compost had been added for at least 4 years, and there they were, an excess of plastic.  It was such a little, everyday thing this digging in the garden, but it struck home the realization that plastic is forever.


So what am I going to do about it?  

I am starting with simple observation.  I want to know just how much plastic is in my life right now; more specifically, how much plastic do I waste?  I am taking The Plastic Challenge.  For a week I am collecting up all the plastic that I would otherwise toss in the trash or recycling, taking a photo of it, and documenting how much plastic do I waste in a week?

The goal of this week is to develop a baseline for my personal plastic use.  I'm not trying to change anything at this stage, in fact, it may be an overrepresentation of my plastic use as we are going through a major cleaning phase in our life right now.


Here it is, one week worth of plastic:

Week 1 plastic pile
 My theory was correct, almost everything here is food related (or related to raising food), except for the shampoo and mail.  All in all, it weighs in at 3/4 pound.  According to the book Plastic Free by Terry, the average American uses 4 pounds of plastic a week.  


I sorted it into two piles:  Unavoidable and Might Be Able to Do Better.

Things like the envelope with the plastic window in it is necessary.  For starters, I am not convinced that e-communication actually is less eco-damaging than paper letters, but even if it is, I still prefer the paper trail when dealing with official documents.  Apparently this makes me evil - so be it.


This blue string, it's called binder twine.  It is used to bind the bales of hay together so that they are easy to use and transport.  We feed the hay to the animals, so it is a necessity in life.  Unfortunately it's made of a nasty-give-me-blisters plastic (a bit like coarse fentex).  Until relatively recently, binder twine was made of jute or sisal (plant based fibres) which are strong, biodegradable over time, and what's more, supported many third world economies.  Now, short of moving to a tropical climate and growing the jute myself, I don't know where to get natural binder twine.  That's a shame, because each day we cut at least 12 feet of plastic twine off the hay.  The twine goes into a bag where it sits until we can use it for things like tying together hurdles (temporary sheep fencing), which is what this pile of twine was reused as before meeting it's end.  Even though we re-use the twine before sending it to the landfill, we don't use it as fast as it comes in (anyone want an armful of bright blue plastic twine?).

So those are the kinds of plastic waste in my life that are currently unavoidable.  However, there are a few items here that I might be able to do better on.


For example, this tea bag wrapper.  The company brags that the teabag is compostable (which it is, I tried it) and the box is recyclable as well as made from recycled materials.  However, this individual sachet has a plasticized coating on the inside, which I assume is to help keep the tea fresh.  It might not even be a plastic, who knows?  But it feels like plastic and has yet to compost in my worm bin, so it goes in my plastic pile.  The solution, buy another brand of tea, or better still, drink more loose leaf tea.


Plastic bread bags also fall under the 'might do better' title; although, I'm currently stumped as to how.  I'm quite proud of my bread baking abilities, especially the ability to bake a loaf that will last at room temperature for two weeks (or more) before going moldy - using only flour, water, and salt!  One of the elements to this long lasting bread is the bag it's stored in.  Wrap it in a towel and it either goes hard or soggy, but either way only lasts a couple of days before we toss it to the chickens.

I wonder, how can I store bread without plastic bags?  Another question that taunts me is how to freeze bread without plastic?

Re-using plastic bags, even washed ones poses problems.  There are fancy things about chemicals leaching into the food, but more important to me is that the cleanliness of the bag is one of the factors that helps preserve the bread.  It's impossible to get a bag completely clean with home-washing.  Besides, the goal is to keep my bread fresh without plastic, not to re-use plastic.

One of my biggest sources of inspiration for finding solutions to this and similar problems, is to look at history.  What did they use to do before plastic was ubiquitous?  Could I use a bread box or wrap my bread in paper for example?  These are things I'm just going to have to try and discover for myself.  I'm looking forward to the experiment.


For more information on going plastic free, have a look at this blog: My Plastic Free Life, written by the same author that wrote the book I mentioned at the beginning.  I'll also be joining the discussion (I hope) at the Plastic Trash Challenge.

I've also discovered this very interesting Canadian based online store called Life Without Plastic which, as you guessed it, focuses on plastic-free alternatives for everyday items.  I have had a great deal of fun bumming around their site and feel very hopeful that there are possibilities available, if a bit beyond my price range.

  A final thought, this is a great challenge for Transitional groups like Transition Victoria, who dedicate themselves to gathering skills for living in a post-petroleum age.

Recyclable on the left, destined for the landfill on the right :(


The goal of going plastic free brings up a lot of questions, especially regarding food storage, preservation, buying, &c.  I feel that in most areas of my life, I use a darn sight less plastic than my peers, but I really want to cut down my kitchen waste.  That's why I'm writing about this on my food blog and not my (currently sleeping) yarn/life blog.  Let me know if you find this interesting or better yet, inspirational.


Tuesday, November 18, 2014

Talking about Craftsy Class, Favorite Asian Dumplings from Scratch with Andrea Nguyen

Today is the day we gave up Television in our house.  With The Ancient (a great fan of Jeopardy) in long term care at hospital, and not likely to return home soon, it didn't make sense to keep the idiot box hooked up.  So we took our cable gadgets down to the company and said - thank you, no thanks.

Aside from my daily dose of Columbo, I don't think I'll miss it.  There are so many other exciting things to do, like cleaning the house (okay, that one's not exciting), trying new recipes, sewing bags, playing with yarn, reading books... and so on.  How do people get bored?

And when it happens that I do miss TV, I can always borrow a film from my local library or better still, watch videos online of people telling us how to cook stuff (which doesn't happen on TV much these days anyway - reality cooking competitions are repetitive).

Not long ago, I signed up for one of Craftsy's promotional deals and decided to take a couple of their classes.  I started with knife skills, and it made a huge difference to my confidence in the kitchen.

The Craftsy classes include in depth videos, usually some sort of instructional document, and a question and answer section where you can discuss what you watch with the instructor and other students.  It's quite clever really, and long over due.  Finally, a place that gathers together some useful expertise and makes it available (for a price) to an Average Jane like me.


They are suppose to look like a nurse's cap


The Favorite Asian Dumpling class by Andrea Nguyen has inspired me greatly.  For some reason, I didn't even imagine that people could make dumplings in their own home.  Why this never occurred to me, I don't know, it's just one of those blind spots I guess.


This class has been so inspiring.  Nguyen has great enthusiasm for her cooking, and lots of little tips to share about how to improve your technique.  What I like best is how easy she makes it look, but what amazing results she creates.

What's even more amazing is that it really is that simple.


This is the shrimp wonton soup.  It took me about an hour the first time I made it, but most of that was getting over my trepidation at trying new techniques.  Second try was considerably faster.


To be honest, I found shrimp dumplings a bit bland on their own, so I decided to add some finely diced pickled ginger to the second batch - much better.

And look, I got a new steamer!  I have a big project coming up where I need to steam a few pounds of barley, so I took a trip to China town and brought home big and little steamer sets.  The little steamer is for practice, and the big one for ... well, big steaming.

Apparently dumplings overcook really quickly in a steamer and get chewy.  Now I know something new.

Is it affordable to make dumplings?  I think it depends on the filling.  4 servings of dumplings took 200g of prawns, which comes to about $10 here.  Plus another $1 for the rest of the ingredients (plus $5 for the soup).  But a different filling (like pork or kimchi - recipes and videos also included in the class) would be a lot more affordable.

On the whole I'm thrilled and am eager to try some of the other recipes included in the class.

Thursday, July 31, 2014

Saving Seeds

This year I had the great joy to participate in the Victoria Seed Library.  The beginning of the growing season I choose 6 different seed kinds from their lovely list of things to grow, and received tiny envelopes with a pinch of seed in each.  The goal is to plant the seeds in the garden, nurture them, then select and save seeds from the best plants.


I'll save a few seeds for myself and in the case of dried beans and peas, a handful for a meal, then give the remaining seeds back to the library so they can share the seeds with people next year.

It's not only a lot of fun, but it's also a good reminder about how precarious our food future is and the importance of maintaining genetic diversity in our gardens.

The Seed Library is free to participate in, free workshops and free seeds.  The only thing you are obligated to do is to give back some of this years seeds and a record of how the plants grew, conditions, &c.

We have sandy soil that we augment heavily with manure and compost, a long dry summer, and a weak well.   So when I selected the plants worth keeping seeds from, I choose those that were most drought tolerant and good producers.

Here are some observations on the seeds I choose and how they grew on our farm.


Tangerine Marigold (which I suspect are actually Tangerine Gem Marigolds)


Tiny little flowers that smell like apple candy.  Grow in a bush formation about 8 inches high, and make a nice border.  I thought maybe I would use these for dyeing yarn, but given how tiny they are, not much hope of collecting enough for that.  However, they may make a good companion plant, as the insects seem to avoid them.  More research is needed, but yes, I think I'll grow these again next year.

Drought tolerance?  About 1/4 died from drought, but what did survive thrived!

I started these inside then planted them out in the garden when danger of frost had past.

Green Lentils

Moderate drought tolerance, but the number of pods that filled out was lower than I would prefer.  For the pods that did fill out, there was only one lentil per pod instead of the two there should have been.  I hope it was simply the lack of water and not a flaw of the plant that prevented the beans from forming.

Also, as the lower pods dried out, they started to split open and spit out their seeds, so I ended up harvesting the plants much earlier than I would have hoped.


Hutterite Soup Beans

These make really nice snacking beans as well as dry soup beans.  They do have a climbing tendency despite what the internet says.  The beans aren't ready yet, but when they are, I think I'll separate the ones that like to climb from the ones that prefer to bush.

I had a lot of trouble starting these seeds, though I think the soil was warm enough.  In the end, about half survived to reproduce.


Wild Cherry Bush Tomato


This has been an outstanding success.  Every single one of these seeds I planted grew, and my garden is overwhelmed by tiny tomatoes growing on massive bushes.  The most sturdy of tomato cages cannot contain this plant.  I had so many germinate that I started giving the extras away.

Funny thing is, the ones with the richest soil aren't growing as well as the ones with sandy loam.


Darlaine Pea - yellow soup pea

More drought tolerant than regular garden peas, these little gems taste delicious at different stages.  The shoots are delicate and sweet.  The young pods can be consumed whole like you would snow peas, the mature pods make great boiled peas and finally the dried peas... well they are just like yummy dry peas.

Woad

Didn't grow :( despite planting the seeds in different environments and time of year.  No seeds left.  Maybe the Library will accept bread poppy seeds instead.


All in all, it's been an enjoyable experience.  It's nice to be reminded that gardening is not a solitary act.

Tuesday, July 29, 2014

Headcheese - it's the weirdest cheese of them all, and possibly the hardest to make

Headcheese tops my list of weirdest foodstuff ever.  It's basically a hog's head, boiled, the meat removed, then the broth boiled down to make a thick jelly.  That's it.  That's headcheese.  Weird!


If I'm so grossed out by headcheese, why did I decide to make it?  Not sure really, perhaps because I've never done it before.  Though the more I think about it, the more I realize I made headcheese because I couldn't stand the idea of waste.  More and more I feel it necessary to honour the animals we eat by using every part of them.  

A couple of weeks ago, my friends butchered their oinkers, and I went to help.  Lovingly raised, these little piggies had it good: A warm cooked breakfast every morning, massages, and I suspect even songs.  It's a real privilege to give thanks to such well cared for animals before they met their end.


Next comes the most disgusting thing I've ever done - so far.


I brought home the head.

For the next 6 hours, myself and The Captain experimented with different ways to remove the bristles from the skin.  We tried scalding, skinning, plucking, shaving, and in the end we settled for a small blow torch and scraping.  Wish we had started with that to begin with, as it would probably have taken only about an hour.

Next came the part where we saw the head in half so we can scoop out the brain.  We can probably leave the brain in there, though I suspect it would make the final cheese cloudy.  Also, I'm not brave enough to eat brain yet, so I felt we needed to get it out.  A hack saw with a blade designed to cut metal was the best tool we found.  But if you ever have a chance to buy your own hogshead, get the butcher to cut the skull in half for you -  parts of the skull were nearly 4 inches thick.

There are a lot of recipes out there for Head Cheese, some simple, some beyond complicated.  I opted for one in the middle.  The recipe is from In The Charcuterie bye Taylor Boetticher and Toponia Miller.  I'm not going to copy the recipe here as most libraries have this book.  Besides, if you are interested enough in working with meat to read this post, you really need your own copy.

One change I did make is to make the brine using only a small amount of boiling water, than top it up with cold water once the head was ready to go in the vat.  Then in the fridge it goes overnight.

After that, the head comes out of the brine and into the largest pot in the kitchen.  A word of advice for any other crazy people who want to try this - make certain you have a large enough pot before you start.

Boiled with some vegetables for a few hours, until the meat falls from the bones.  Meat is removed, broth is kept and simmered down to make a jelly.  Add some extra spice to the meat, and eventually meat and jelly are combined in a loaf tin to make... drum roll please... head cheese.

Best tool for removing the meat - fingers
just make certain it's cool enough first
Leave it in the fridge overnight to set.  Keeps most of a week in the fridge.


If, by some miracle I ever make this again, there will be changes.  First off, never again will I do this in the heat of the summer.  It takes up far too much space in the fridge, and waiting till almost midnight for the kitchen to be cool enough to work in, makes for a grumpy me.

The second change I would make is to change the ratio of meat to jelly.  I would use almost equal parts of both so that the head cheese holds together better.  For this attempt, I used about 80% meat and only 20% jelly.

The third change is to save the excess jelly in small frozen servings so I can add it to pasta water, soups, and just about anything that could do with a boost of flavour and nutrition.  There is a lot of books that claim meat jelly can do wonders for osteoarthritis, so I jump at any excuse to add bone broth or jelly to the diet.


Affordable?  The head was free, in fact, I only used about half the meat on it.  The jowls I froze for winter curing.  Spices, salts, &c. comes in at roughly $3.  The electrical bill on the other hand was up about $20, and we have cheap rates here.  This could easily have made double or triple the amount of headcheese if I had been brave enough to add more jelly.  Since this is so flavourful and a tiny bit of head cheese goes such a long way, I'm going to say yes, it's worth it.  If you have a woodstove, or some other way of cooking then yes, it can be quite affordable.

Healthy?  There is a lot of salt in this, but it is balanced out by not eating much at one time.  On the other hand, there are often great poetical treatise on how good bone jelly is for a person, so I'm going to say, yes, it's healthy in moderation.

I'm also going to add this under the label Transitional.  As in it is a good food skill to cultivate for that time in the future when oil is sparse and we are forced to rely on local resources.  It's a way of using every last part of the animal and what's more, it makes a little bit go a long way.


Wednesday, July 2, 2014

Medieval Goose - two ways over an open fire

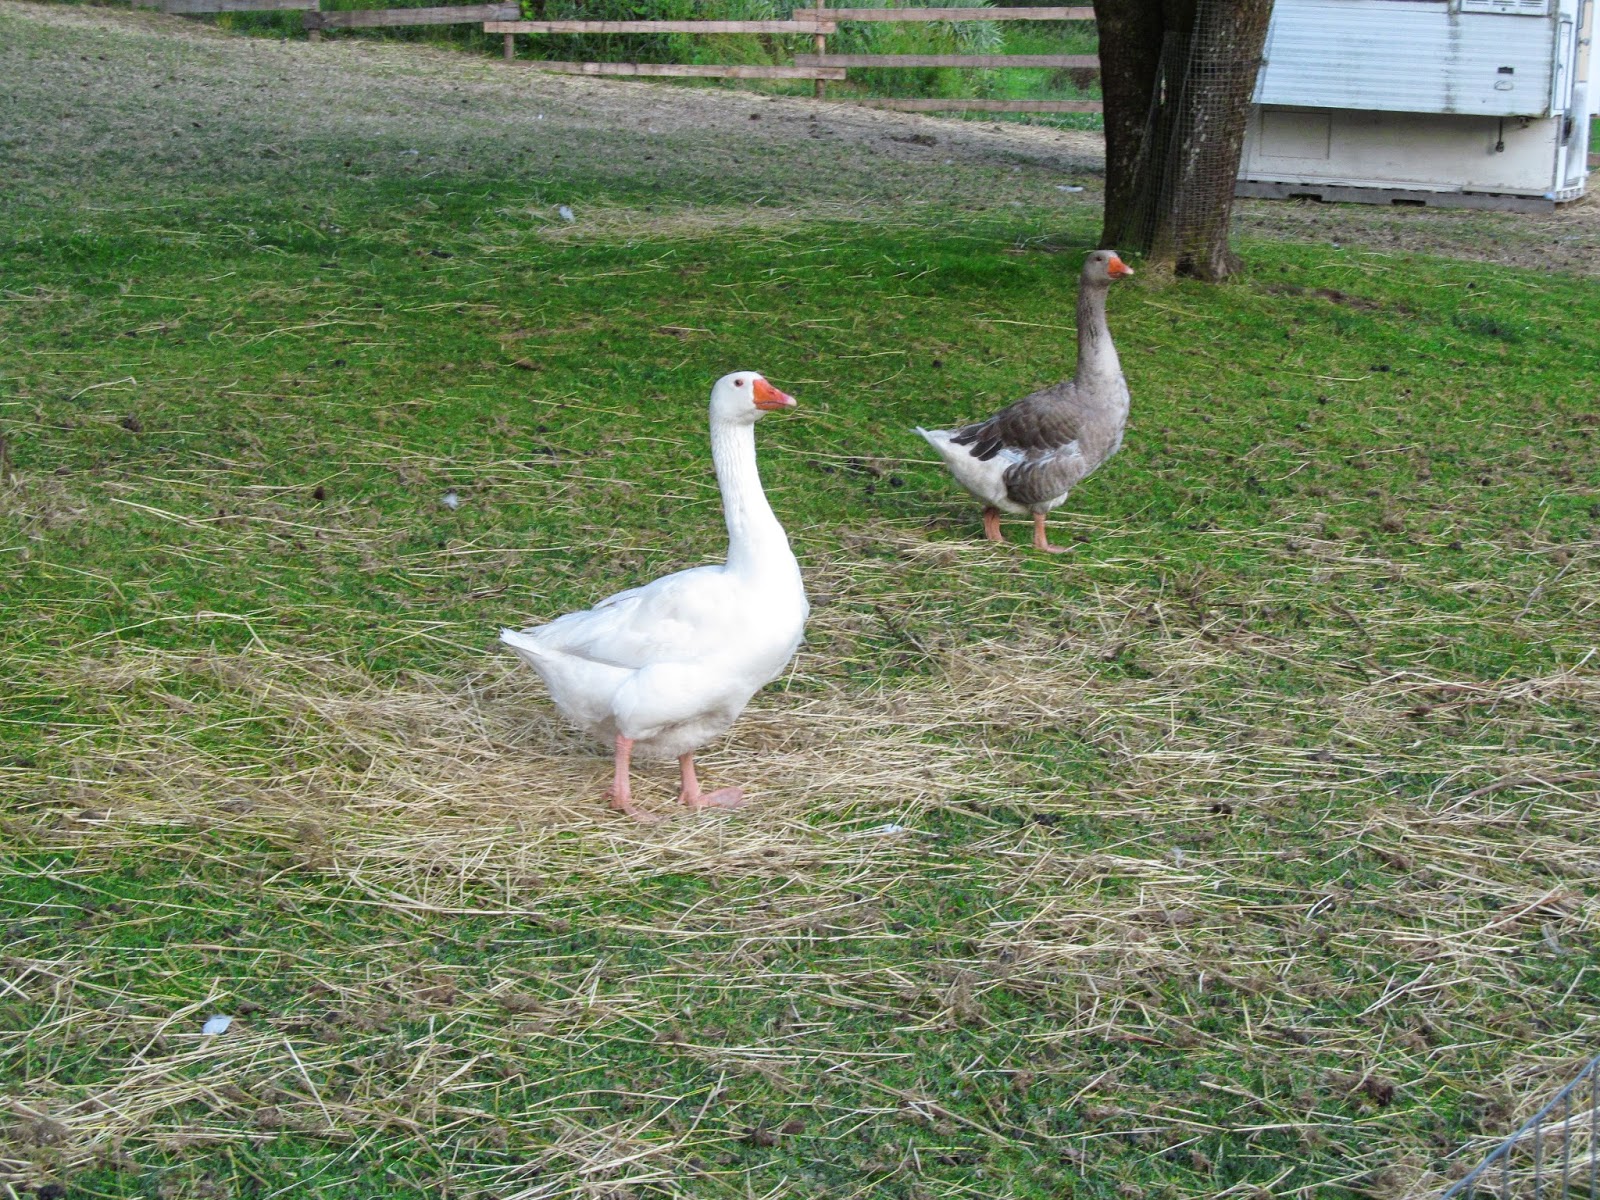
You remember Henry and William?  Two lovely geese I raised by hand from (not so) tiny eggs.

Maybe squeamish people should click away now, as this post involves processing and consuming my lovely boys.  But in a good way.  A very good and fulfilling way, with friends and free flowing mead.  It's been difficult gathering my feelings and thoughts to write about it, but I want to share the experience with you, if you'll let me.

Once a year I travel to the 14th Century for, what passes as a vacation.  A wonderful week or two among friends, dressed in funny clothes, eating medieval food, doing medieval things.  Living life just as they would in the year 1371, only we do it with potable water.

Things are never quite that simple, because while we are living a medieval life, we are also an interactive display for the public.  Visitors wander in and out of our camp while we cook, eat, spin yarn, weave, cast metals, practice combat... and all the regular day to day tasks correct for our period.  It's great fun interacting with them and showing off what we are doing.

A setting with good friends and a chance to educate random people about food and food choices - what  Pastafarian could pass up an opportunity like that?  So I brought my geese to the park, early one morning.  While The Captain and I hugged our feathered friends, they met their end.  I cried.  A lot.  But their end was just the beginning.

Plucking pheasants geese


As the day progressed a whole host of helpers plucked the larger of the two birds as we prepared him for roasting on the spit.  The smaller fella we skinned.  That took most of the morning, and some fun rhymes about pheasant pluckers and their sons.


With the smaller goose, we made a soup.  I carved off the meat and put to one side.  A broth was made from the bones, onions, carrot leaves and a few other tidbits that were kicking about.  After a few hours, we strained the broth, added it to some lightly fried veg, spices and the rest of the goose meat.  Delicious.


Goosefat


Not the most appetizing of photos, but very interesting for someone like me who hasn't worked with goose before.  First thing I noticed is how colourful the bird is under it's skin.  The yellow chunky bits are fat.

Fats of all kinds were highly prized in the middle ages, especially in Northern climes where there were very few sources of vegetable oils.  Fat was used to make soap, lotions, lighting, cooking, lubrication for wagon wheels, and many other things.  As we know now, fat is essential not just to make you feel full when eating, but also for brain development, skin, Vit D processing, and so many other things.  I had often read that goose fat was the most valued fat of all, but I never realized why before.

Unlike lard or tallow, when rendered, goose fat is liquid at room temperature.  It was quick and easy to render, especially because it's easy to see and trim the fat thanks to the natural colour coding inside the goose.  There is a lot of fat inside a goose!  It's also quite a mild taste, a lot like olive oil with a slight meaty undertone.  Very neutral flavour.


The roasted goose was much easier to process.  Just clean out the innards, trim some of the fat from the cavity, stick a stick in it and put it in front of the fire, turning from time to time.


"Is that a real goose?"


While we are working with the geese, the public flows in and out of the kitchen area and I talked with them about what we were cooking.  This probably the best part of the week for me.  I love hearing people's questions and listening to their stories.  Although, while working with the goose... things were a bit different.

The most common question of the day was, "Is that a real bird?"

The first few times I heard someone ask that, I wondered why we would be plucking an unreal bird?  What would an unreal bird look like?  How would it taste?

After a while, I decided (or at the very least hoped) they meant was, is it something that comes wrapped in plastic from a store or a bird we were in the process of transforming from live to dinner.  

Not surprisingly, many of the people were taken aback when they discovered what we were doing.  They had never seen anything like it before.  Even avid meat eaters didn't know what to make of it.

So I told them the story of the geese and how they came to be there.  I described how I hatched the eggs, raised the geese by hand, loved them and gave them a fulfilling life.  I shared how honoured I was that these geese would provide sustenance for us, and how we would honour them by making certain not a scrap would be wasted.  And most importantly, I talked about the difference between modern day methods of raising meat and the way it was done in the Middle Ages.  In the past meat was an infrequent luxury - and still is for most people who live on this planet today - so no part would go unused.  If we are going to eat meat, in our society today, we have the luxury of choice - we can choose to eat an animal who lived a miserable confined forcefed existence, or we can choose to eat fewer animals; ones who lived in a manner most true to their nature.  Why is it so many people proclaim they care about animals, but still buy miserable-meat?

I like to believe I got people thinking about what they eat when they eat meat.


Chowing Down (as in goose down... well, I tried)


Goose soup, goose livers and hearts fried in goose fat, and roast goose.  Add rice and a few veg to the mix and ring the dinner bell.


Everything was delicious.  We toasted the geese with homemade mead.

I don't know how to say this but while I ate, I was both incredibly sad and unbelievably joyful.  I was sad (and still am a little inside) because I'm always sad when one of my animals comes to an end - be it for food reasons or others.  These animals become my friends, even though I know that they will be food some day - I'm determined to give them the best life I know how.

But like I said, I was also joyful.  Amazingly so.  Enjoying the meal with my medieval friends was uplifting. I felt they honoured the lives of my animals - that it wasn't just meat to them.  It was sustenance, both of body and soul.

I'm losing the thread of what I was saying, but I doubt many people read to the end of a post this long.  Basically, what I am looking to say is: despite my conflicting emotional state, I am glad this happened.  I would do it all again  if it meant sharing a meal with these lovely people.  In fact, I already have a flock of replacement geese.  Between educating the public, learning new skills, and enjoying time with my friends, it was a very successful day.

Friday, June 13, 2014

Sourdough Nettle Rye Bread recipe - or let's get Medieval on Your Nettles

Yesterday I made an adaptation of an adaptation of a medieval recipe for Nettle Bread.  It's exceedingly delicious, with a sweet and moist rye bread crumb.  I like it sliced thin, lightly toasted and smothered in butter (homemade is best) and a few drops of honey on top.

Rustic nettle bread


We have the perfect growing place for stinging nettles, it's moist year round, it's acidic, it's downhill from the neighbour's manure pile so the soil is overloaded with nutrients.  There is not much else that will grow there, but the nettles thrive.  So I harvested a large basket full of just the leaves.  My nettles are getting a bit old and scraggly, but if you have young nettles, you can use the stem as well.

Although I made a huge batch of nettle bread this time, I'm going to scale down the recipe for you.  Those of you without constant access to nettles might have to wait till they are available in the shops in the spring... Far too expensive for something available free in the wild, but when that's all you have... well, you make do.  The bunches sold in the store are about a cup worth - but you can use more or less depending on what you have on hand.

blanching nettles
(in the water I used for brewing small ale later that day.
This should be interesting)


The recipe I used for inspiration comes from the beautiful book The Medieval Kitchen, a social history with recipes by Hannele Klemettila (the final 'a' in the name has those two little dots on top).  The author uses modern yeast and caraway seeds.  I hate caraway seeds, possibly more than I hate mushrooms.  They disgust me.

Last year I used Klemettila's recipe and it's quite nice (without the caraway seeds).  It's written in a way that assumes you are very comfortable baking bread and the recipe uses modern ingredients and methods that were not available in the middle ages.  Like most of the book, it is more an attempt to introduce the modern pallet to some of the medieval flavour combinations.  Combine that with the layout and gorgeous pictures, I think it's a good introduction to medieval food.

For me, it's not enough.  In the middle ages a person couldn't just drive down to the supermarket and pick up a packet of yeast.  They had to capture their own yeast, very much like we do with sourdough today.  In fact, in some parts of Europe, it was exactly like we do with sourdough today.  To keep the bread as medieval as possible, I used sourdough instead of modern yeast.

Because the nettles have so many natural sugars, I figured a heavy rye bread would do the trick.  And I was right.

This bread uses a sponge so start it the evening before you plan to bake.  It is also a bit different than many bread recipes in that I only rise it once.  It's a trick you can use for sourdough when you can't guarantee you'll be available to shape the loaves for the second rise.  This creates a more rustic texture, sometimes creating those big air pockets in the loaf.  I kind of like it.

Stinging Nettle Sourdough Rye Bread

About 1 cup of fresh nettles - or a lot more if you have it
1 tsp salt
Sourdough starter
Rye flour
Wheat flour
1/2 tsp Whole fennel seeds
1 tsp honey (optional - makes it no longer vegan)
water

The night before baking day, we make a sponge:

  • Put 2 Tbs sourdough starter (from the fridge or already active is fine), 1/2 cup water, and enough rye flour to make a thin batter.  Cover with a cotton or linen towel and leave on the counter overnight.  This is called the sponge.
  • Feed your starter as per normal - I'm assuming you are already slightly familiar with sourdough.
Now it's baking day, let's get's medieval on your nettles
  • Toast the fennel seeds in a dry fry pan until they smell amazing then put to one side to cool.  While it's toasting, you will want to shake or stir the seeds quite frequently to ensure nothing burns.  When cool enough to handle, coarsely grind it with a mortar and pestle or a spice mill.  
  • Bring a fairly large pot of water to the boil and dunk the nettles in the boiling water for about 3 minutes.  Take the nettles out and put them in a bowl, add about a cup of cold water to the nettles.  When the nettles are cool enough to touch comfortably, take them out of the cold water and strain them - keep the cold water, we're about to use it.  Let's call it nettle rinse water.
  • Combine the nettle rinse water, sponge, 1 tsp salt, toasted fennel seeds, a handful of flour, and a handful of rye flour.  If you are using honey, add it now too.  Mix it up well and put it to one side.  
  • Take the nettles that have drained, chop them up as finely or as coarsely as you like.  The cooking should have neutralized the sting.  Add this to the flour/sponge/fennel/water mix above.  Stir vigorously, almost whisking it in as this will help to activate the gluten in the flour and ensure the nettles are well incorporated into the dough.
  • Add another three or four handfuls of rye flour, or about 1/2 a cup, and mix well.
  • Add regular flour by the handfuls, mixing between each addition, until you have a shaggy mess.
  • Put the shaggy mess onto a well floured board or counter, kneed it until no longer shaggy, but instead a lovely smooth.  
  • Shape into one or two loaves, then put on a baking sheet.  Cover with a towel and leave it alone until double in size.  This may take an hour or it might take 8, depends on your yeast and many other factors... most of which are beyond your control.  A lot of people like to leave it somewhere warm, which is okay, but for me doesn't make as nice a texture or as long keeping loaf.  Just put it somewhere where it isn't in a draft.  
  • When it's double in size, preheat the oven to 400 F.
  • While the oven is heating up, use a very sharp knife to carefully cut some lines in the top of the bread.
  • Bake at 400 for 35 min for the small loaves, or 40 min for one large loaf.  Bread is done when it sounds hollow when you tap it on the bottom.
  • Take out of the oven, wrap the loaves in a cotton or linen towel and leave at least 12 hours to cool before storing in plastic.  Or if you are hungry now, wait at least 10 min before cutting into it.
So beautiful, ready to rise


Affordable: Yes, if you're harvesting your own nettles and not paying grocery store prices.  The nettles add a lot of nutrition and a little bit of bulk to the bread which is pretty awesome.  Nettles are very healthy - just google stinging nettles to find out all the good things they do.

If you omit the honey, this is a vegan friendly bread.

Tradition and transition?  It seems to have been quite common in medieval times, but the tradition has died out.  As a Transition bread, however, this is going to be a good recipe to keep around.  A dense nettle bread is very common during starvation times, like during World War 2 for example.  Usually wheat flour is one of the first things to be rationed, so breads were made with whatever grains were on hand, and often augmented with nettles and other nutritional weeds that are usually ignored in times of plenty.

We would be foolish to think that we won't ever have a starvation time again in The West, but for now, it's actually quite a yummy bread, the nettles adding  a little bit of tang, sweetness, and even help prevent the bread from going moldy.


nettle toast and honey, delicious.